Over the years of Intune deployments, I have searched for a way to let my end users know that an application is being installed or uninstalled from their computer. I have used things ranging from notification bubbles to blanking a screen. All of these methodologies are poor at best. I found a few paid items that companies just didn’t want to pay for due to the insanity of the pricing. For example, one company wanted us to pay 150 USD per deployment. Times that by 1500 devices, that adds up quickly. It wasn’t until I found the PowerShell App Deployment Toolkit that I found what I was finally looking for.
What is the PowerShell App Deployment Toolkit?
This toolkit is an immensely powerful and amazingly simple setup. You can download the tool kit here. It provides a framework to install and uninstall applications using PowerShell through a signed application. This allows us to deploy complex and confusing deployments as a single package. A good example would be AutoCAD. Recently, I was tasked with standardizing AutoCAD in a single department. Some members used AutoCAD 2016, some used 2024. This was a problem as the 2024 files did not work with the 2016 AutoCAD. Thus, I needed to uninstall the previous versions of AutoCAD before I installed the current version. As all files are backed up, I didn’t have to worry about them losing any files. The toolkit was perfect for this.
Key items I like of the toolkit
Simple packaging
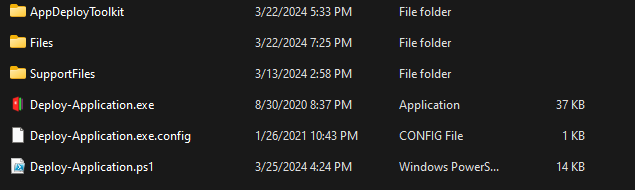
Many application toolkits come with complex packaging. It’s normally an application that wraps itself around another application that keeps doing this until it’s all transparent. With the PowerShell App Deployment Toolkit, all you need to interact with is the deploy-application.ps1 file. That’s assuming you are doing more than an a MSI file. If you are only using an MSI file, all you need to do is drop the file in.
As you can see in the screen shot, this is the package. When you download the zip file, you will be greeted with this amazing structure. The Deploy-Application.ps1 is where our code will go. The Files folder is where the installer files would go. Following our auto cad example, the installer and updates would all be placed inside the Files folder.
Deploy-Application.ps1
This file has an amazing setup. It first has a wall of documentation inside the file itself. The file explains each step along the way. It is broken up into installation, uninstallation, and repair. Each section has a Pre, during and post process in each section. This is great if you need to kill some services, send a message or more. It’s also helpful because it gives you a structure to work within.
The Commands
Inside this packaging there are many useful commands. As I stated in the intro, it’s full of ways to communicate what you are doing with the end user. During an application install, you can show which applications needs to be turned off for the install to work by using the show-installationwelcome command.
This example shows us it wants to close the applications and gives the user a 60 second window to do so. This isn’t the only thing this command can do.
Other commands like execute-process, will launch processes that you need from the file directory and more. All while logging what’s going on. You can find a full help system for all the unique commands inside the tool kit. Navigate to the tool kit > AppDeployToolkit > AppDeployToolkithelp.ps1 will bring up a gui that allows you to read all about the commands.
Using the Toolkit with Intune
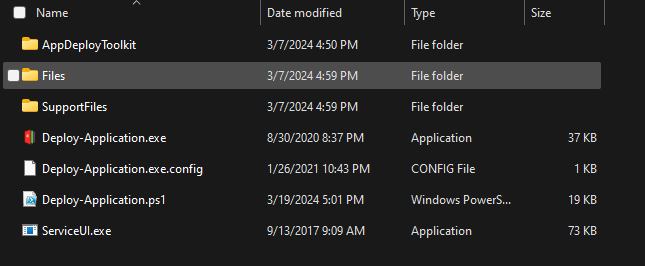
If you want the tool kit to work with the end user profile, then you will need to grab a unique little tool from MDT. We will need the ServiceUI.exe from the MDT software. You can download MDT here. Once you have the MDT installed. we need to pull the ServiceUI.exe out of the MDT install. Navigate to, C:\Program Files\Microsoft Deployment Toolkit\Templates\Distribution\Tools\x64 and copy the ServiceUI.exe file. Place this file in the home of your PowerShell App Deployment Toolkit file structure.
As you can see, the ServiceUI.exe is in the root folder. Now we need to create the package. We can create a win32 app package. I covered this here. This is the same concept.
The folder would be the folder with your toolkit
The setup file would be the Deploy-Application.exe
The output file would be wherever you want the Intune app to be dumped.
and we don’t need to catalog the folder.
Once you have your application built, it’s time to see how it works inside Intune. We start by building your application package. As stated in the previous blog, we start the application by uploading. The big difference here is our install and uninstall commands.
Understanding the commands
Our install command will be the using the ServiceUI.exe and the deploy-application.exe
By default, the Deploy-application.exe will be interactive. There are two flags for the Deploy-Application and here are what they are.
DeploymentType: (Super Straight forward)
Install: Installs the application
Uninstall: Uninstalls the application
Repair: repairs the application.
DeployMode:
Interactive: Shows all of the prompts needed.
NonInteractive: Only shows the required prompts.
Silent: Shows no prompts.
We can translate the command above by using these flags. By default the Deploy-application.exe is install and interactive. So, we know that the application would be prompted and the end user will see the command. The uninstall command will uninstall and it will be interactive. The ServiceUI.exe allows you to run applications as the user in and the system at the same time. The biggest issue with the ServiceUI.exe is the application will not install until someone logs in. No flags are needed here.
Over all, PSappdeploytoolkit changes the ball game with deployments. I encourage anyone and everyone to dig deeper into it.
What can we learn as a person today?
I live in the south of United states. From time to time I will hear people battling over belief systems. In my life time I have come to an understanding of how these systems work. I liken “objective truth” as fish in a sea. Our belief systems is the net we use to capture those fish. Some nets are better than others. The water of the sea is useless, distracting, or misinformation. It only makes it harder to bring those pieces of the objective truth into ourselves. A good net can capture a lot of fish, and let the water out at the same time. A bad net, like a tarp, captures some but becomes unmanageable due to the water. This is the same way with our beliefs. We are only strong enough to lift so much at different points in our lives.
Premade Nets
I see organized religions as premade nets. Think of it like a tool kit. It’s a format that is easy to use and allows you to do stuff with it. Does the toolkit work for everyone, no. Just like this PowerShell toolkit, it would be useless in a world without powershell. So chromeOS, this toolkit isn’t useful. This is the same with some beliefs. They are useful where they are, but not useful in other places. Sometimes these toolkits/nets, are useful for some but not others. If you don’t know PowerShell, this toolkit wouldn’t be useful to you. If you are shame sensitive, some religions are not for you.
Everyone has their own tool set or net. No single tool set is inherently bad. It’s how we use them and where we use them. If you take a net to a small pond, get ready to waste your time and damage your net. If you throw your net aggressively into a aggressive sea, get ready to lose that net.
Homemade Nets
Once someone understands how the nets are made and how to repair them, It’s always best for them to start building their own nets using the techniques they have used on their previous nets. By having a net/toolset of your own, this allows you to have full knowledge and be able to repair quickly. This belief system would be uniquely yours and different from others. So, when it breaks, you can grow it, replace parts, and more without having any problems. It’s yours and no one elses.
It’s time to Install Sentinel One. In this blog, we are going to go through the process of installing Sentinel One through Intune. We are going to be using the IntuneWinAppUtil program, and the MSI download of Sentinel one that you can obtain from your Sentinel one login portal. I will not go over how to download the msi installer.
File/Folder Structure
The next item you will need is the Microsoft Win32 Content Prep Tool [Link]. Once you have downloaded this file, I suggest creating a file structure as follows
Intune
Files
IntuneWin
After that, Extract the intunewinapputil.exe file to the top level of your file structure, intune. Place the MSI inside the Files location. Then we should be ready to run intunewinapputil.exe. Before you do, I always suggest reading the help by using the /? command line prompt. Here is the command we are going to use to convert our file.
Intune Win App Util
.\IntuneWinAppUtil.exe -c c:\Intune\Files -s SentinelOneInstaller.msi - o c:\Intune\IntuneWin
Afterward, we use the command above to convert our file into a intune installer file. This will give us a large amount of control. Things like detection rules, custom msi inputs and more. Which we will be using.
Intune – Setting up the installer
Next, It’s time to crack open the intune process. Log in to https://endpoint.microsoft.com/ with an account with intune rights.
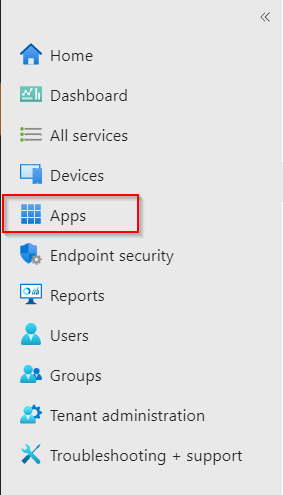
Once you have logged into the endpoint management system. Click the Apps on the left-hand side of the screen.
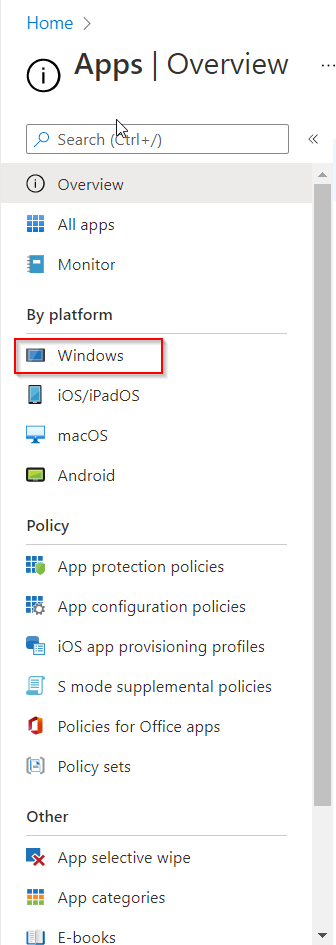
Since we are deploying sentinel one to windows machines, under by platform, click the windows icon.
Uploading the Installer
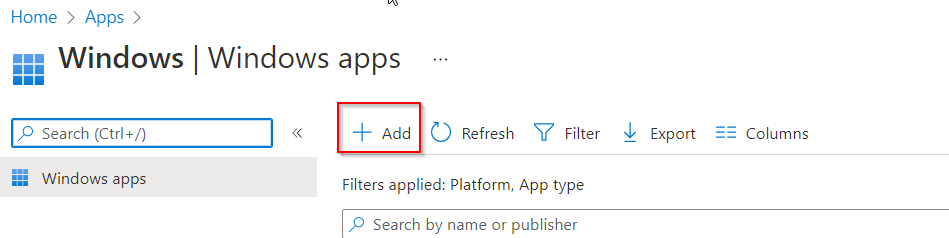
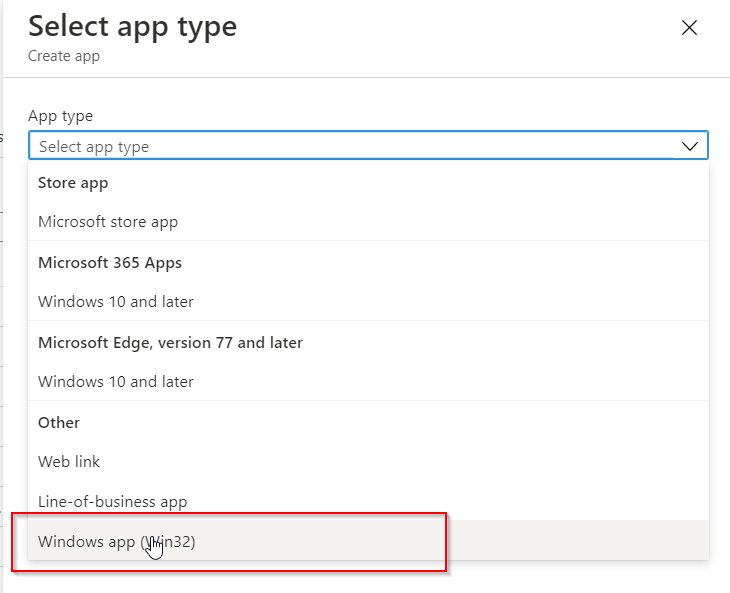
Now we are going to click the add button on the right-hand side of the screen. This will bring up the add dialog box. We are deploying out the final option. Click the Windows App (Win32) option.
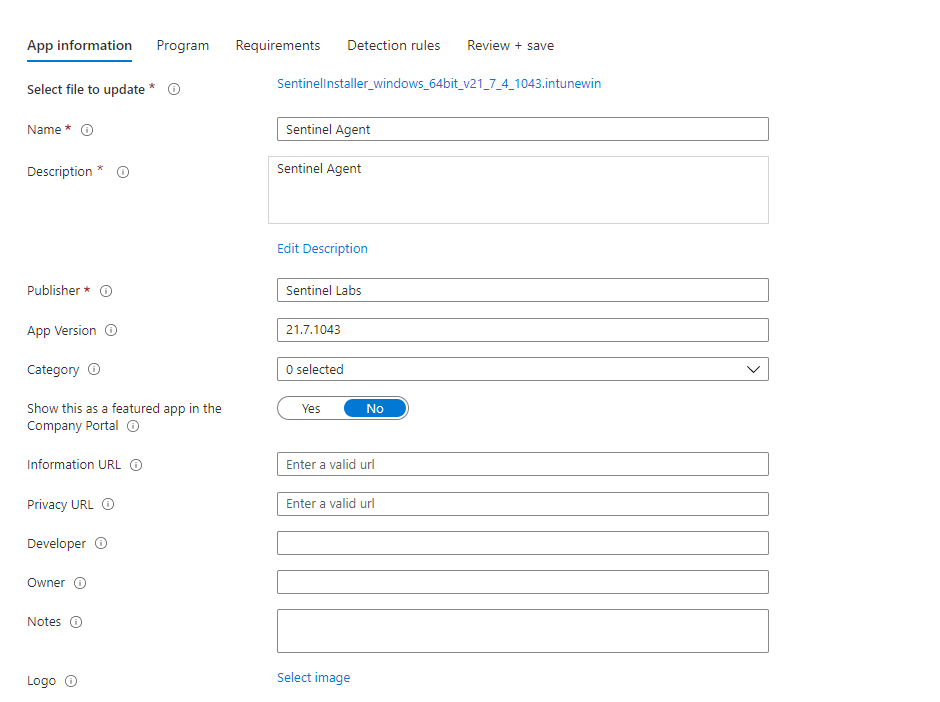
You will be brought to an upload page. Here you select the app package file and click the blue button on the right-hand side of the screen. This is where we go to the file we created in the previous steps. We upload the file here. Once it uploads it will populate the information like name and other items. Click ok to move to the app information page.
Setting the rules
Here we can change the name. Add a unique, html, description. Update the publisher, the application version and more. The category we are going to select is computer management. They show this as a featured app in the company portal. You want to check that one. This allows people to download this version of perch. If you want to feel in any of the other information you are welcome to. Once you have the required information, click next to go to the Program page. Where we determine how to install this application.
Adding the Key
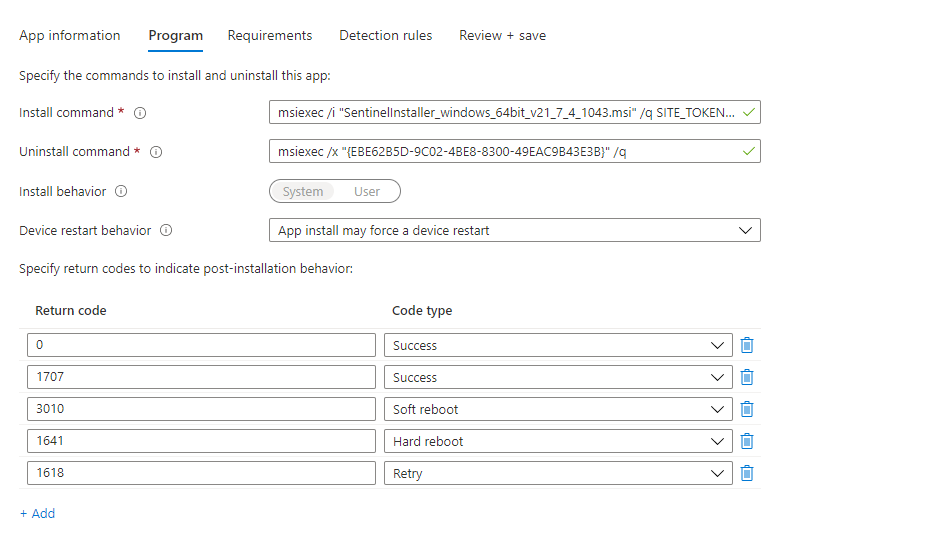
On this page, we want to show the install and uninstall commands. This is where research comes into play. If you don’t know the silent install command of your program then that’s a problem. If you don’t know how your program responds to installs and the error codes or success codes it produces. that’s also a problem. You will need to know these things for other applications. Sentinel One is unique as it’s commands is a little different. Here is the install command:
Keep the uninstall command the same. As the MSI installer of Sentinel One is the app code. The biggest problem with the uninstall command with S1 is that it doesn’t work without prior approval. You have to log into the S1 Portal and approve its uninstall. Keep the default and continue.
Another thing to point out, this kicked my tail, the SITE_TOKEN does not have a /, I repeat NO /.
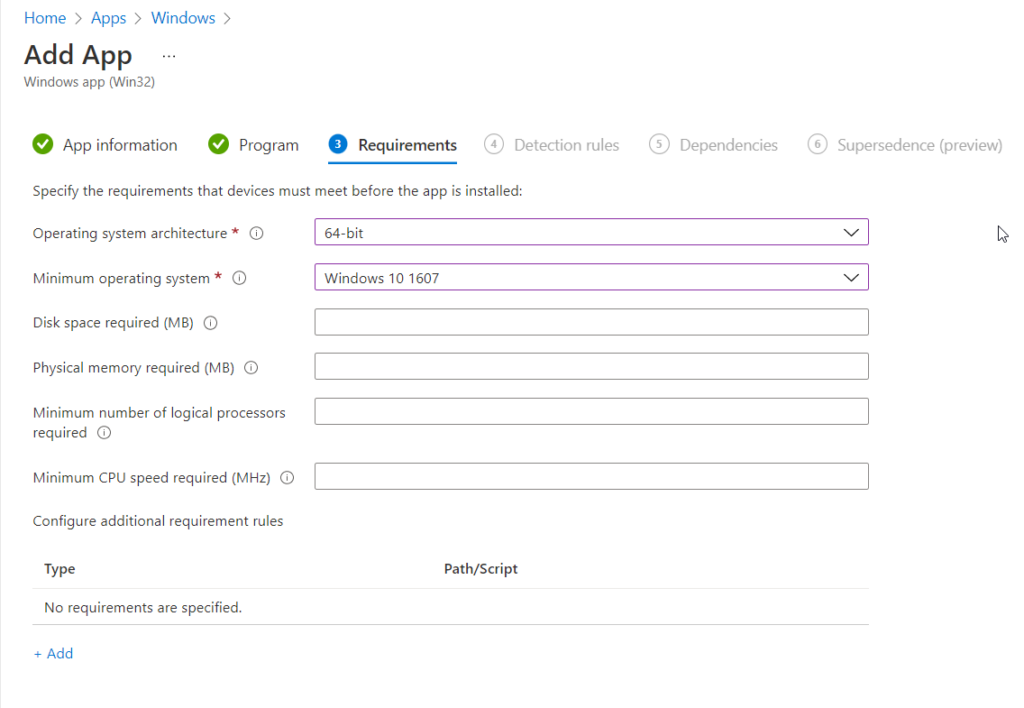
On this page, we can scan the system to make sure we meet the requirements. So if you know this is a heavy application, you can say to have at least 8GB of ram. You can even have PowerShell scripts that can trigger. A good example would be a user. If user Bob is on this PC don’t install it. The required items are the OS Arch and the minimum os. Which is going to be windows 10 1607 as that is intune’s min. Don’t get this confused with the next item. These are the requirements. Not meeting the requirements will prevent the app from installing. Once you have added what you want, click next.
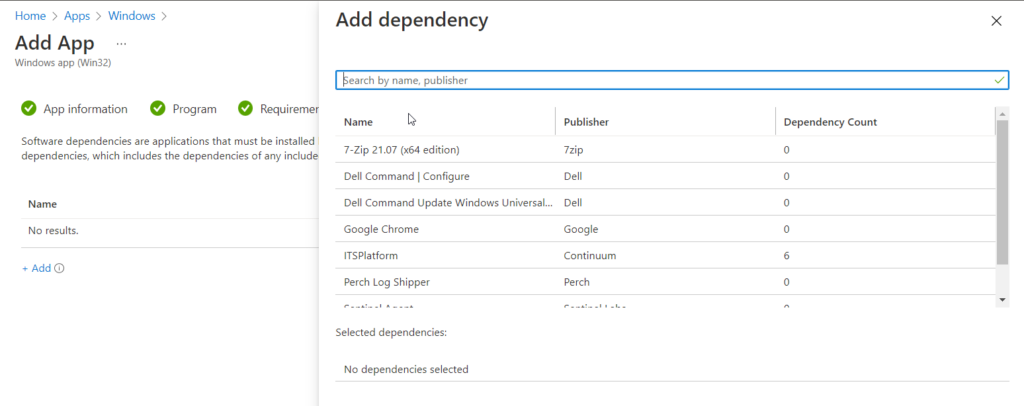
On this page, we are going to select any dependencies that the application may need. Something unique about Sentinel One is, it will capture all of your custom PowerShell deployments. It’s best to set those as dependencies on this installer. This way they will deploy before S1 does. S1, doesn’t need any additional dependencies from my current knowledge and testing.
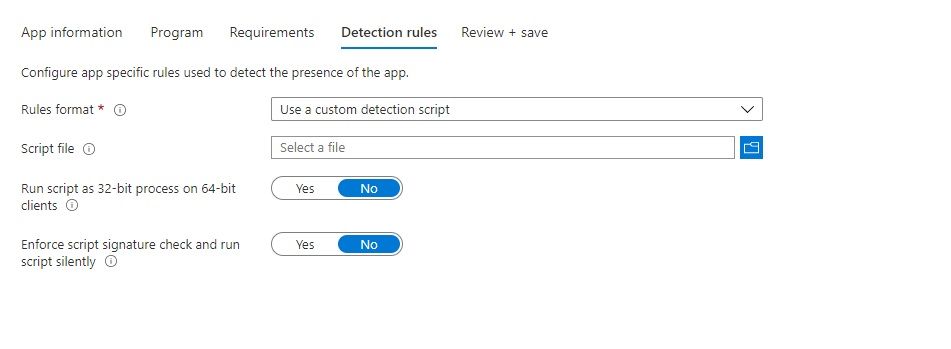
Detection Rules
We are going to use a Powershell Script to validate the install. Click on the Rule Format and select Use Custom Detection script. Upload your script file using the blue folder icon.
This script checks for the Sentinel Agent every 30 seconds after installation. Then it increases my timer, by 30. It finally stops at 300 seconds. If services are null, it just exits, and thus a failure is seen in intune. If it is installed, it exits with a string. This tells the system that the installation was successful. What I like about this part is, that if the edit needs to be done, it can be done at this point using PowerShell.
The next screen supersedence is where you can choose what will replace the application. This is a preview feature at the moment and the idea is for upgrades. The final section is the Assignment, this is where you will select a group of devices for S1 to deploy out to.
I hope this is helpful for everyone viewing this page.
Perch is an event log tracker that can catch a lot of useful information. I like perch because it captures failed login information. It’s easy to sort and exportable. This is why many companies use the software. There are some gatchya’s with perch installs though. If you are installing it on a server, some services don’t auto start. Installing it from PowerShell also has a gatchya. This post is about how to install perch via PowerShell scripts. This method uses your token for the client’s site. Let’s Install Perch with PowerShell.
Let’s break down the script. The first thing we do is create the download repo. I personally like to use the C:\Temp. Not all machines have a c:\. This is why I use the variable $Env:SystemDrive. If the OS drive is d, the code will add a D:\Temp. and so on and so forth.
The next line is the URL for the latest and greatest Perch installer. This keeps your download up to date. With that stated, this also means if they change something you will need to be able to catch that change. So you will need to stay up to date with their deployment. A good way to do that is by registering with their updates emails. I like to have a ticket every 3 to 6 months, randomly placed, to review deployments like this one. This is just a good habit.
Now we have the url, we want to create a path. Using the Env:SystemDrive we place the perch-log-shipper-latest.exe into the temp folder, our local repo. This will make the next command easier.
Now we invoke-webrequest this bad boy. Just like curl and wget, we are able to download the file. Using the PerchURL in the URI position and then the outfile will be the perchfullfilename. Of course, we use the basic parsing just in case it’s an older version of PowerShell. At the time of this writing, the default PowerShell is 5.1 on windows 10.
Now we start the installation. We start-process. Using the PerchFullFileName as the target. See, using parameters helps. Our argument list is /qn for quiet. The output is going to be the token. Finally our token value, value is our token from perch’s site.
Getting the token
To get the token, you will need to log into your perch system. At the top, select the company you wish to get the token from.
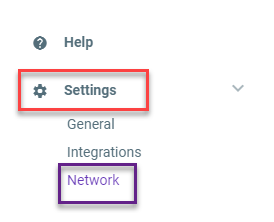
Next, you will need to click on the settings icon on the bottom left-hand corner. Then click the Network icon.
Normally we want to add a -wait flag to the end of the installer. Things like google chrome do great with the -wait flag. However, in this case, we don’t want to do that. The reason we create advanced checks is due to the multiple sub-processes inside of the perch install process. The wait flag only captures the first process.
Confirming Install Perch with Powershell
With all that, it’s time to confirm the installation. The most simple way to do this is by watching the services. Perch installs 2 services. It installs perch-auditbeat and perch-winlogbeat. During the confirmation process, we wait. If a timeout occurs, we get the error. If the application installs, we get the results. At this point, we want to start our time-out timer. That’s why we have a $timeout = 0. We then start a do until. Each time the system loops, we wait for 5 seconds. Then we add 5 to the timer. This effectively creates a timer for us. This process is repeated until the conditions are met. The services with the name perch* are greater than or equal to 2, or the time-out reaches 500.
If the services are installed or if the timeout is reached, we moved to the next step. By default, the auditbeat is set to manual. So we check to see if we have the two services. If we do, we then set the perch-auditbeat to automatic and start the service. If not, we throw an error saying the services did not install. This will alert the deployment engineer to dig deeper into this machine. From my experience, it’s because another application is installed.
My last weekly challenge to myself was to deploy google chrome with Powershell. This one was the hardest because it was hard to find the latest and greatest MSI 64 bit of google chrome. The coding wasn’t too hard after that. How google chrome works, follows suit the same way as firefox did.
We first start off getting the latest enterprise edition of google chrome. This is the 64-bit version thus the most stable version on them all. This is the version I would install everywhere in a company if I had a choice.
That’s it. Very simple very straightforward. If you need to uninstall before installing (My testing was a success with overlapping the installers) then you can do the following before Installing google chrome:
Need to deploy the latest version of firefox to 1000 machines, Here is a little powerhouse script that can do just that. It’s similar to my last script (Gimp) as it downloads directly from the web. This time we don’t have to parse out a website since Modzilla has it laid out before us.
The source is awesome. We are downloading directly from the site with their latest 64-bit product. This time we are going with the temporary file and then downloading the file with invoke-webrequest. Then we start the process of installing it with the /s flag which means silent. Since we are coming from the temp folder I threw in the runas flag to run it as the system. This way it installs for all users. Next, we set the wait flag to install the system. From everything I have read, we don’t need to uninstall the previous version to install the newest version. We do however have to stop the process that’s why we have a get process and stop process above. Finally, we remove the installer. That’s it. A lot simpler than Gimp.
We use cookies to ensure that we give you the best experience on our website. If you continue to use this site we will assume that you are happy with it.