The first thing we do is set up the path we want to make. Then we test to see if the path exists. If they don’t, we make them. I’m using temp in this cause because I will be deploying this to 2000+ machines. We will remove the installer afterward. I want the Temp folder to existing afterward for future deployments.
Next, we grab the URL we want to work with This is the gimp’s official download portal. This portal is by default Oldest to newest when you pull from it using Powershell.
Then we use the Invoke-webrequest to grab the website as we did in a previous post. From there we grab all of the links. In this case, since it’s a repo, they are all download links except for 2. We only want the exes of the list, so we use a where-object to find those. Then we select the last 1 as it is the newest version.
Now we need to build our URL and our Path. This is some string controls. Notice the $($Something.Something) in this code. When you deal with an array in a string and want to grab a sub item, you need to call it out with the $().
Now we want to uninstall the pervious version of Gimp. Since gimp doesn’t show up in the win32_products, we go to it manually in the file system. Newer gimps host themselves inside the program files > gimp 2. So we search to see if that folder exists with a test-path. If it does, we then check to see if gimp is running. Then kill it with fire… ok, not fire, but force. Gimp is awesome about putting an uninstaller inside the file system. So we will use that. It’s located in the Gimp 2 > Uninst > Unins000.exe. Which can be triggered with a /verysilent parameter to keep it quiet. We do this with a start process and we use a flag -wait to wait on it to uninstall.
Then we start the install of the new gimp with the start-process again. We use the Download Name we made eailer with an argument list of /verysilent /norestart /allusers and a -wait.
In this article, I will guide you through the process of deploying webroot via Group Policy. This is a fairly straightforward process with only a little editing of the MSI. I am assuming you know how to download the MSI from the webroot portal. The portal changes often, so, I will leave this part out. If you are ready, throw on your group policy pins, and let’s get started.
Super Orca
The first thing you will need is the Super Orca. You can download it here, link. Once you get super orca installed, we will be able to download and set up the webroot MSI.
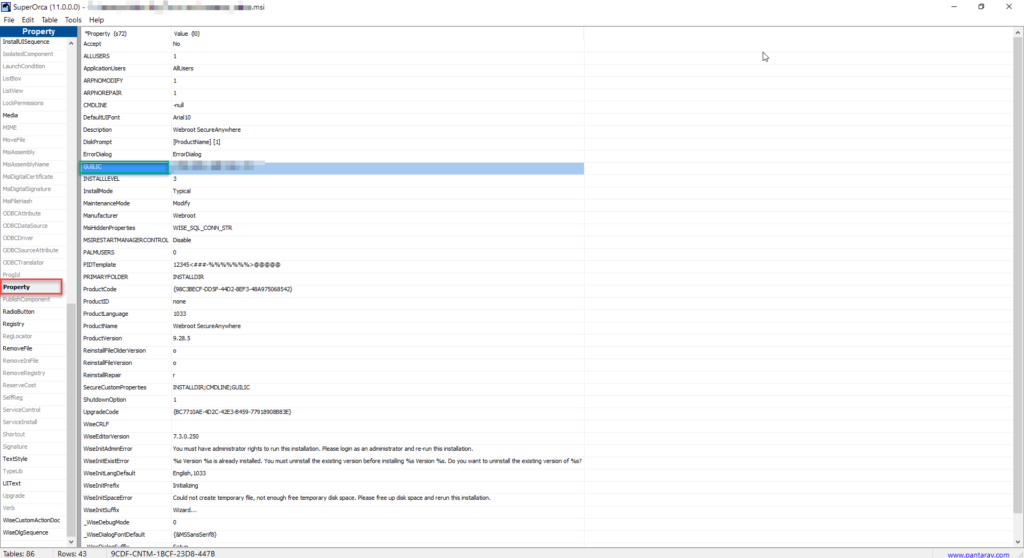
Open Super Orca
Open the Webroot MSI.
Click the Property On the left (Red Block).
Click GUILIC (Green Block)
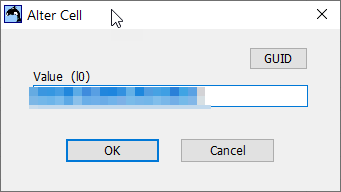
Enter the Key Number
Click File
Click Save As
Save as a different name. ALWAYS KEEP THE ORIGINAL!
Shared Folder
Now you have the MSI ready. You need to place it into a shared folder location. This location has to be accessible to every computer in the company as a minimum of read-only. Make sure the share is shared! I can’t tell you how many times I made this mistake. If it’s shared, good, make sure some of the clients can reach it.
Group Policy
Now we have the MSI ready to go. It’s time for the group policy. It’s a very simple computer policy. In my experience, a lot of IT managers don’t want AVs on servers. So, this tutorial will include a wmi filter. Let’s get to it.
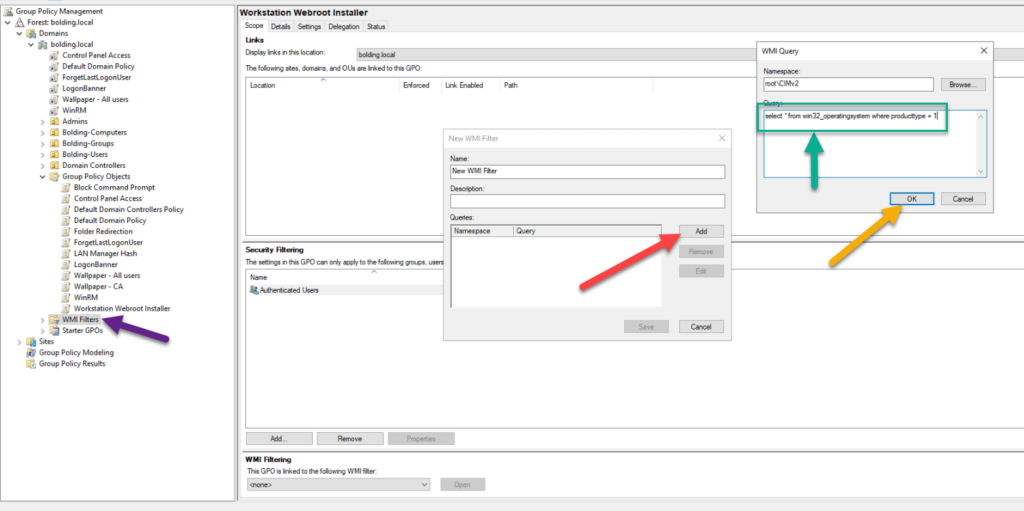
Open Group Policy.
Create a new policy and name it Workstation Webroot Deployment
Enter: select * from win32_operatingsystem where producttype = 1
The numbers mean:
Workstation
Domain Controller
Server
Click Ok
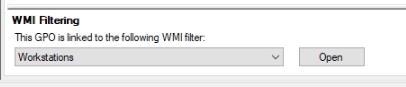
Under the WMI Filter Select the WMI Object.
All that is left is linking the GPO. Now you can link it wherever you want. Most orgs have an OU just for workstations and one for servers just for this case. It doesn’t matter where you link it the WMI filter will ignore servers and only hit the workstations.
As always, if you have questions, feel free to ask. If you ever see anything that is wrong, feel free to reach out and correct me. Thank you for reading.
We use PDQ where I work, and I am lazy. So, I have made a way to set up devices into Different OUs. This way when I am gone, it’s as easy as putting a computer into an OU and walks away. When I image, The image will load the OS and put the computer into the OU for me, which makes it even sweeter. Then PDQ will hit that OU, check the file, and bam, off to the races with the most up to date software. Makes a great hybrid solution.
Here are a few things you will need before we get started.
A Licensed version of PDQ.
A laptop Deployment Package
A general knowledge of how the conditions work in package deployments.
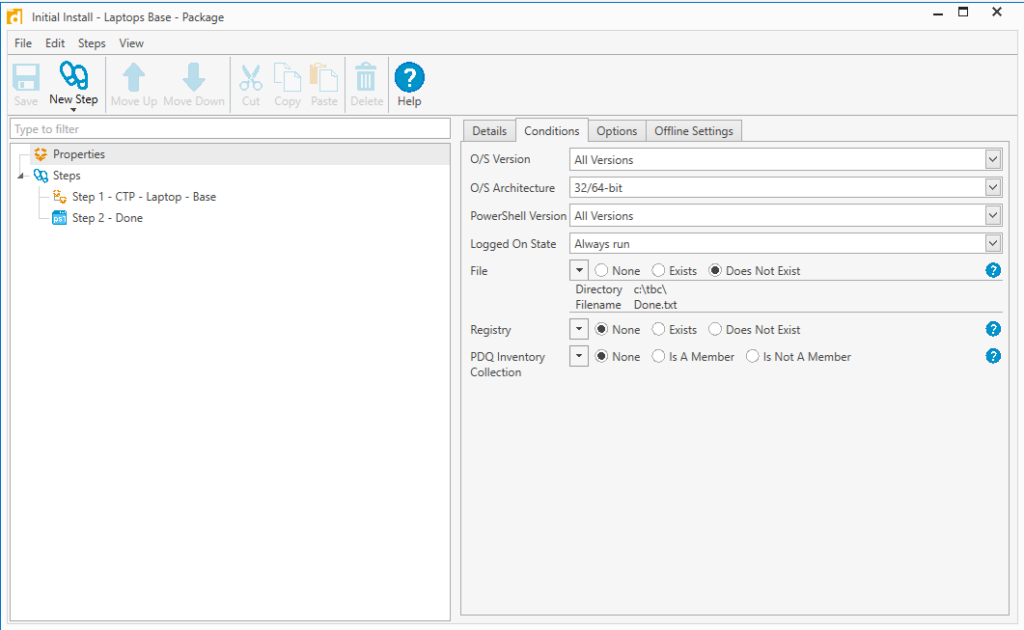
We first make a new package deployment. This package deployment will have the Laptop package deployment nested inside of it. We will place a special condition on this deployment package. On your new package deployment, select properties and then conditions. Under File we will select “Does Not Exist” and put a directory of your choice and a filename of your choice.
Initial Install – Laptop Base
Your first step is the laptop base install. I name my deployments with a CTP if it is complete. The second step is the “Done” step which creates the condition file. This way it will not redeploy, but you can force it by deleting the file.
Now you have the initial install package built, it’s time to build the scheduling.
Right click on the deployment package
Select New Schedule
Under Targets tab, click choose targets
Select Active Directory
Select Containers
Select the OU you want.
Under Triggers select the Interval button
Here you change the Time ranges. we do an hour as it takes 30 minutes for the laptop deployment to go through.
Select the Package tab
Confirm your package is located there.
Under Options
Here you can tell it to stop redeploying if the deployment was successful. We don’t want to do that because we have a condition and we don’t want it to stay in that OU. This is a good way to create a reminder for yourself by having the Notification send you emails.
You’re done.
A quick way to add a computer to the OU while setting it up is the Add-Computer Command.
Add-Computer -DomainName <Your Domain> -OUPath <OU Path for the Initial Install> -NewName <New Computer Name> -Credential (Get-Credential) -restart
This command will add the computer to the OU that you want and restart it. Make sure you have a group policy set to the OU to turn off or Open the ports on the firewall.
We use cookies to ensure that we give you the best experience on our website. If you continue to use this site we will assume that you are happy with it.