A client called in and told me a line of information that made me concerned about security. I ran a webroot scan and wanted to give another level of the scan. I am partial to the Microsoft Safety Scanner. It runs well connectwise backstage. You can read more about the safety scanner here. So, lets look at this oneliner.
The first part of this little script is to test and create the folder that will hold our file. We are doing this by using test-path. Then if the file doesn’t exist, aka !. Then we create it with the new-item.
The next part is we are going to download the Microsoft security scanner from Microsoft directly. The link is the direct download. We use invoke-webrequest to download the file. The -outfile flag is where we will download the file at and its name. In this case, we are going to name it something simple. Mss.exe inside our temp folder. We use the -usebasicparsing because most machines only have PowerShell 5.
Then we run the command needed. We start the command with the path. C:\temp\mss.exe. We want it to be quiet and we want to force it. So we use the /Q to quiet, and /F:Y to force.
c:\temp\mss.exe /Q /F:Y
The system will not prompt for any kind of approval. It will run and delete what it needs to delete. This is a simple, deploy and walk away one-liner. So, add it to your deployment scripts and enjoy scanning with a Microsoft safety scanner.
It’s time to Install Sentinel One. In this blog, we are going to go through the process of installing Sentinel One through Intune. We are going to be using the IntuneWinAppUtil program, and the MSI download of Sentinel one that you can obtain from your Sentinel one login portal. I will not go over how to download the msi installer.
File/Folder Structure
The next item you will need is the Microsoft Win32 Content Prep Tool [Link]. Once you have downloaded this file, I suggest creating a file structure as follows
Intune
Files
IntuneWin
After that, Extract the intunewinapputil.exe file to the top level of your file structure, intune. Place the MSI inside the Files location. Then we should be ready to run intunewinapputil.exe. Before you do, I always suggest reading the help by using the /? command line prompt. Here is the command we are going to use to convert our file.
Intune Win App Util
.\IntuneWinAppUtil.exe -c c:\Intune\Files -s SentinelOneInstaller.msi - o c:\Intune\IntuneWin
Afterward, we use the command above to convert our file into a intune installer file. This will give us a large amount of control. Things like detection rules, custom msi inputs and more. Which we will be using.
Intune – Setting up the installer
Next, It’s time to crack open the intune process. Log in to https://endpoint.microsoft.com/ with an account with intune rights.
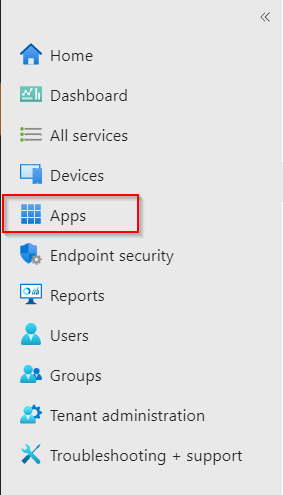
Once you have logged into the endpoint management system. Click the Apps on the left-hand side of the screen.
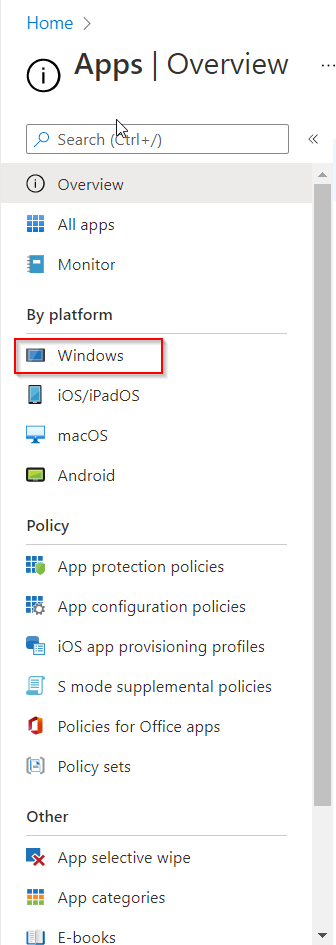
Since we are deploying sentinel one to windows machines, under by platform, click the windows icon.
Uploading the Installer
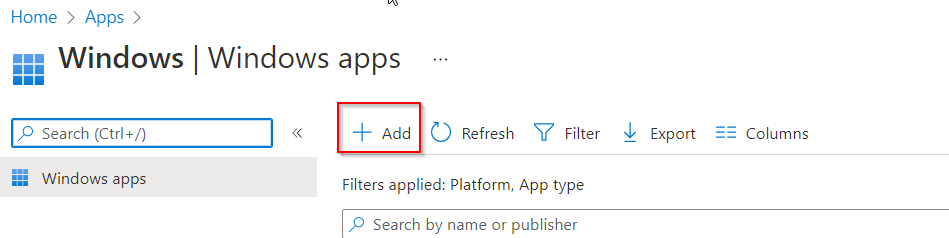
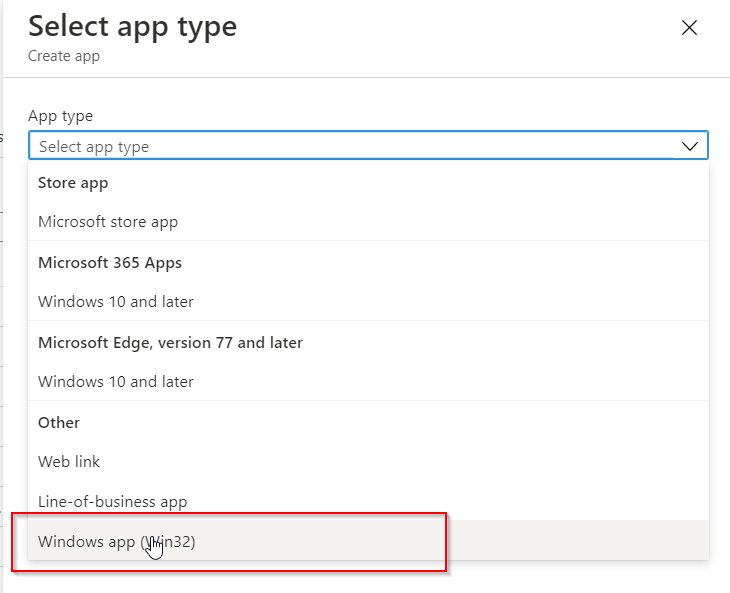
Now we are going to click the add button on the right-hand side of the screen. This will bring up the add dialog box. We are deploying out the final option. Click the Windows App (Win32) option.
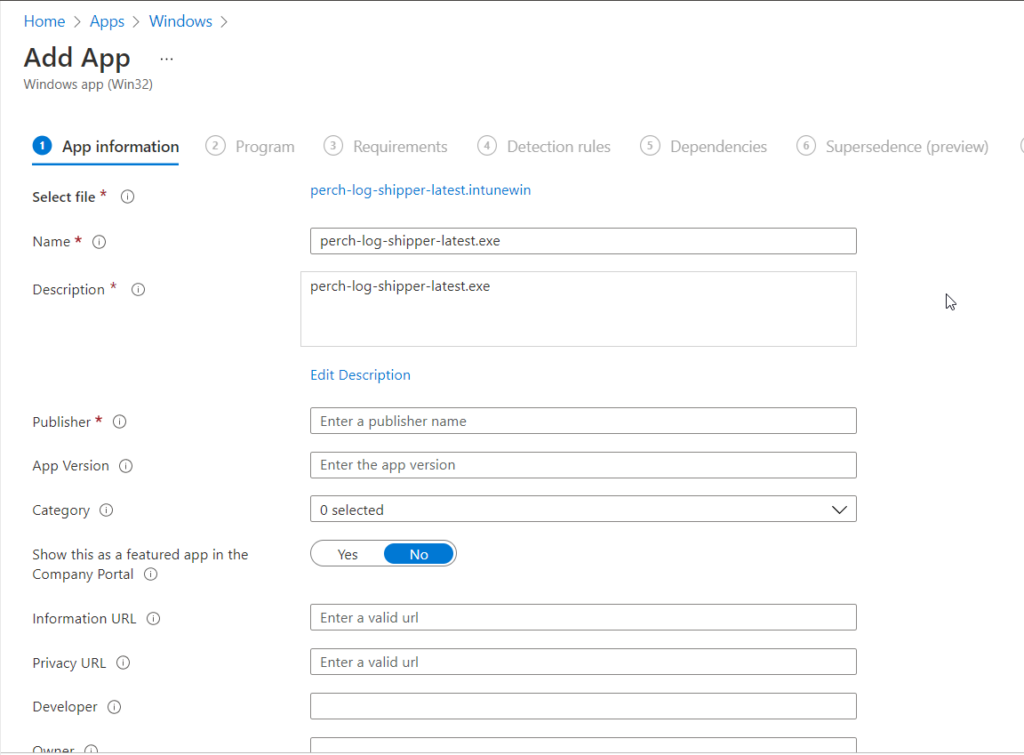
You will be brought to an upload page. Here you select the app package file and click the blue button on the right-hand side of the screen. This is where we go to the file we created in the previous steps. We upload the file here. Once it uploads it will populate the information like name and other items. Click ok to move to the app information page.
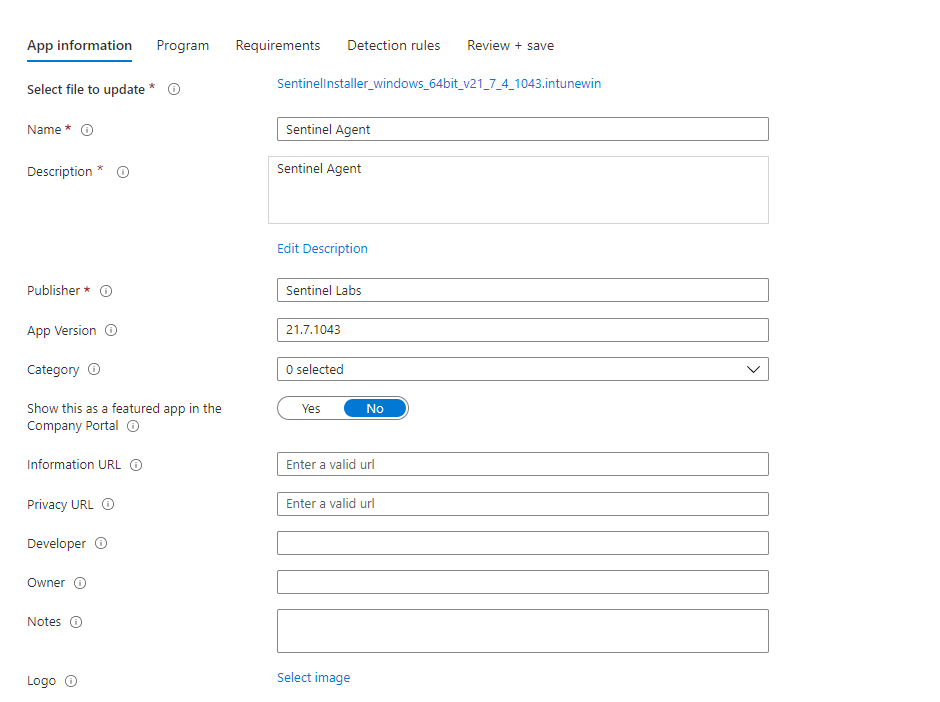
Setting the rules
Here we can change the name. Add a unique, html, description. Update the publisher, the application version and more. The category we are going to select is computer management. They show this as a featured app in the company portal. You want to check that one. This allows people to download this version of perch. If you want to feel in any of the other information you are welcome to. Once you have the required information, click next to go to the Program page. Where we determine how to install this application.
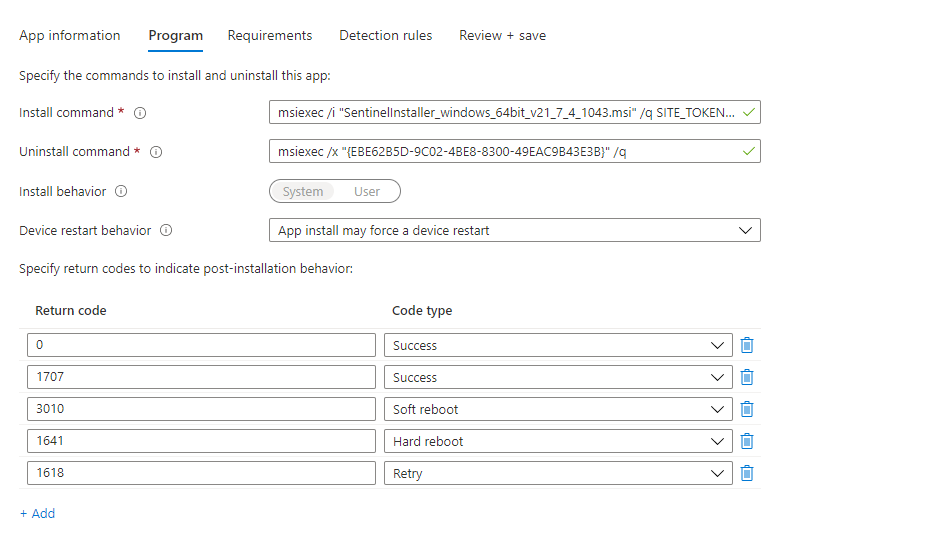
Adding the Key
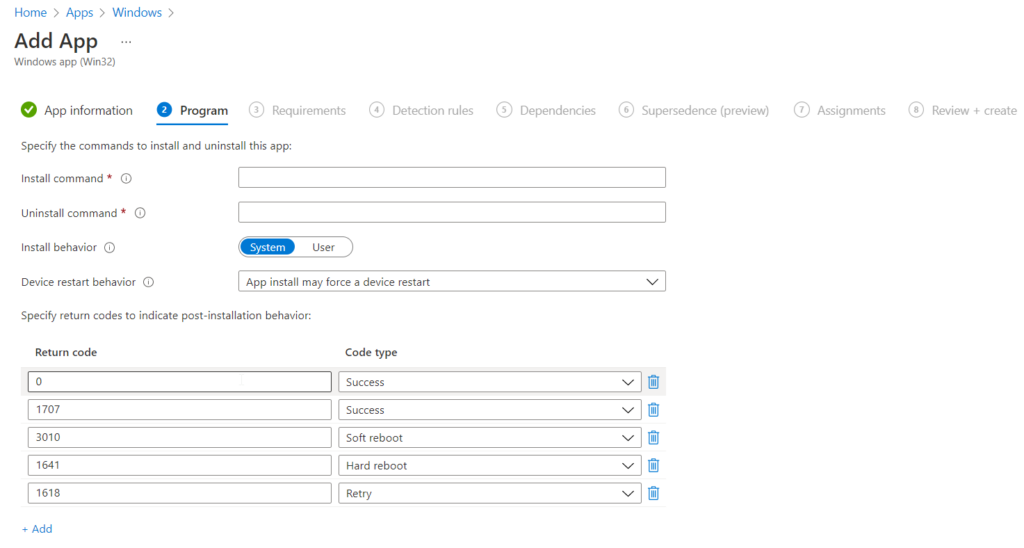
On this page, we want to show the install and uninstall commands. This is where research comes into play. If you don’t know the silent install command of your program then that’s a problem. If you don’t know how your program responds to installs and the error codes or success codes it produces. that’s also a problem. You will need to know these things for other applications. Sentinel One is unique as it’s commands is a little different. Here is the install command:
Keep the uninstall command the same. As the MSI installer of Sentinel One is the app code. The biggest problem with the uninstall command with S1 is that it doesn’t work without prior approval. You have to log into the S1 Portal and approve its uninstall. Keep the default and continue.
Another thing to point out, this kicked my tail, the SITE_TOKEN does not have a /, I repeat NO /.
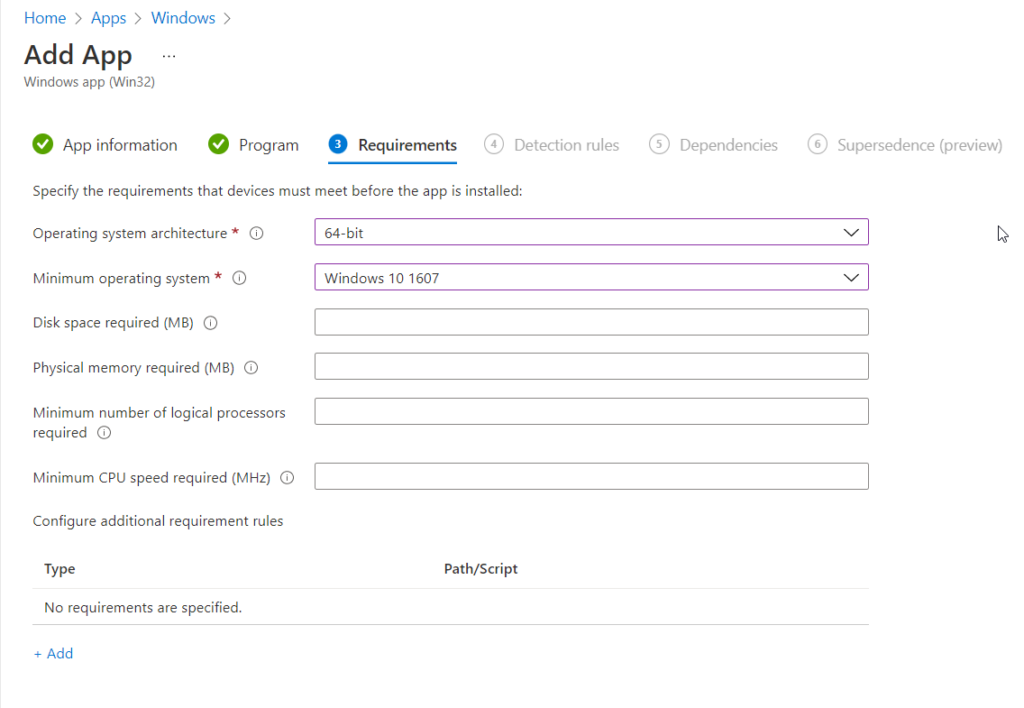
On this page, we can scan the system to make sure we meet the requirements. So if you know this is a heavy application, you can say to have at least 8GB of ram. You can even have PowerShell scripts that can trigger. A good example would be a user. If user Bob is on this PC don’t install it. The required items are the OS Arch and the minimum os. Which is going to be windows 10 1607 as that is intune’s min. Don’t get this confused with the next item. These are the requirements. Not meeting the requirements will prevent the app from installing. Once you have added what you want, click next.
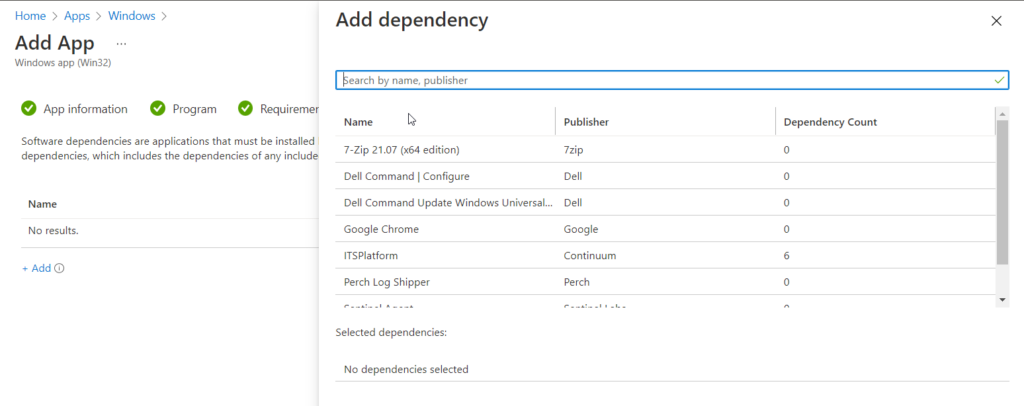
On this page, we are going to select any dependencies that the application may need. Something unique about Sentinel One is, it will capture all of your custom PowerShell deployments. It’s best to set those as dependencies on this installer. This way they will deploy before S1 does. S1, doesn’t need any additional dependencies from my current knowledge and testing.
Detection Rules
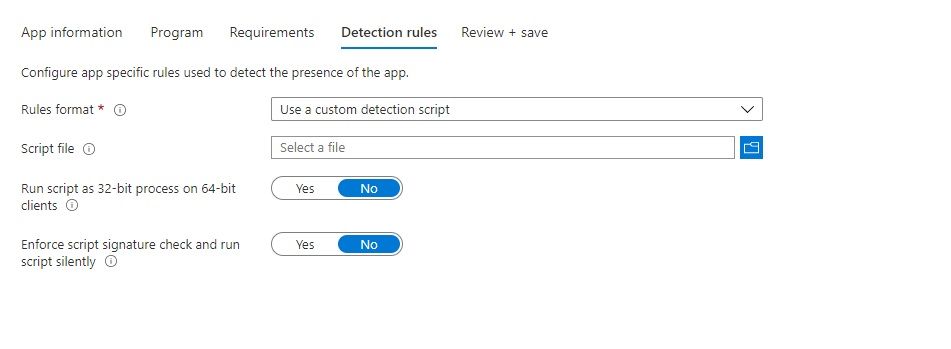
We are going to use a Powershell Script to validate the install. Click on the Rule Format and select Use Custom Detection script. Upload your script file using the blue folder icon.
This script checks for the Sentinel Agent every 30 seconds after installation. Then it increases my timer, by 30. It finally stops at 300 seconds. If services are null, it just exits, and thus a failure is seen in intune. If it is installed, it exits with a string. This tells the system that the installation was successful. What I like about this part is, that if the edit needs to be done, it can be done at this point using PowerShell.
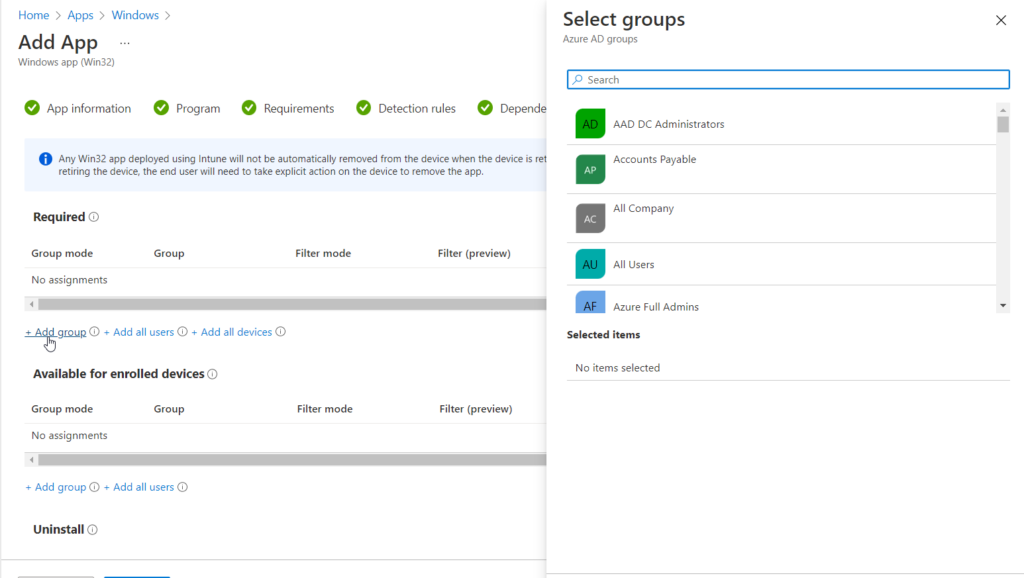
The next screen supersedence is where you can choose what will replace the application. This is a preview feature at the moment and the idea is for upgrades. The final section is the Assignment, this is where you will select a group of devices for S1 to deploy out to.
I hope this is helpful for everyone viewing this page.
Recently I covered how to install perch using PowerShell. Today we are going to Install Perch Log Shipper with Intune. This is very useful for tools like continuum where there is very few software deployment tools built-in. Intune is a powerful tool that you can use to deploy software for a client. Today we are going to be looking at how to deploy Perch through intune.
The first thing we need is a fresh perch installer. You can acquire one here. [link]. Once you have the installer, you will need to download the Microsoft Win32 Content Prep Tool [Link]. Let’s setup our directory like so. Top Folder = Intune. Two subfolders, one called Files and the other called intunewin. Extract the exe from the Microsoft win32 content prep tool to the intune folder. Copy the perch installer to the files folder. Now we have a setup that is easy to remember.
By default, you can not deploy EXE programs via intune. You must convert them to the win32 application or a .intunewin file. The tool you just downloaded can do just that. The Tools name is IntuneWinAppUtil.exe.
IntuneWinAppUtil.exe
Start a command prompt and navigate to your intune folder using the CD command. Run the intunewinapputil.exe /? command to view the help selection. Notice we are going to be using the -c -s and -o commands. Here is the following command you will use to convert the perch installer into a intunewin application.
Now we have a perch installer for Intune. Lets move to intune and take a look.
Intune Apps
It’s time to crack open the Intune process. Log in to https://endpoint.microsoft.com/ with an account with intune rights.
Once you have logged into the endpoint management system. Click the Apps on the left-hand side of the screen.
Since we are deploying perch to windows machines, under by platform, click the windows icon.
Now we are going to click the add button on the right-hand side of the screen. This will bring up the add dialog box. We are deploying out the final option. Click the Windows App (Win32) option.
Upload the Package
Afterward, we are brought to the app page. Here you select the app package file and click the blue button on the right-hand side of the screen. This is where we go to the file we created in the previous steps. We upload the file here. Once it uploads it will populate the information like name and other items. Click ok to move to the app information page.
App Information
Here we can change the name. Add a unique, html, description. Update the publisher, the application version and more. The category we are going to select is computer management. The show this as a featured app in the company portal. You want to check that one. This allows people to download this version of perch. If you want to feel in any of the other information you are welcome to. Once you have the required information, click next to go to the Program page. Where we determine how to install this application.
Program Information
On this page we want to show the install and uninstall command. This is where research comes into play. If you don’t know the silent install command of your program then that’s a problem. If you don’t know how your program responds to installs and the error codes or success codes it produces. that’s also a problem. You will need to know these things for other applications. Thankfully perch follows the basic ones. Here is the installer command:
Once you have the installer and uninstaller in place, click the next button to go to the requirement page.
Requirements
On this page, we can scan the system to make sure we meet the requirements. So if you know this is a heavy application, you can say to have at least 8GB of ram. You can even have PowerShell scripts that can trigger. A good example would be a user. If user Bob is on this PC don’t install. The required items are the OS Arch and the minimum os. Which is going to be windows 10 1607 as that is intunes min. Don’t get this confused with the next item. These are the requirements. Once you have added what you want, click next.
Dependencies
On this page, we are going to select any dependencies that the application may need. For example, let’s say your application needs 7-zip. Set up an install for 7 zip and make it a dependency and have it install the dependency. One hack I found is if you know the app is going to break other apps while installing as the ITS Platform does, then you can set the other applications as dependants and install them. Thankfully perch does not have any additional dependants. So, when it does it’s taxes, life is easier. (American joke).
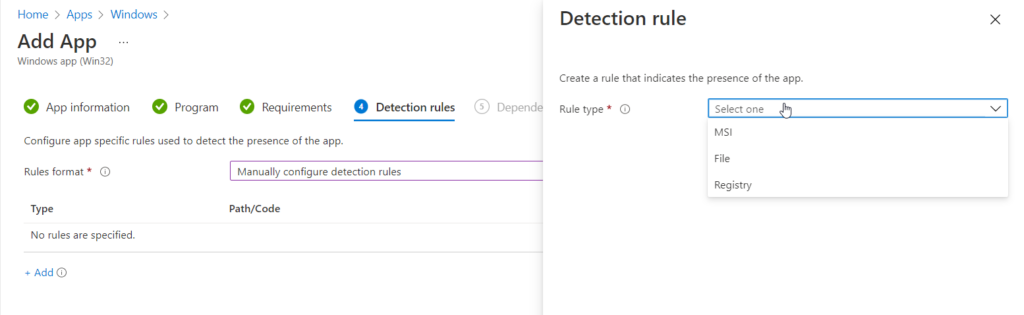
Detection Rules
Detection is very important. if the rule doesn’t exist, then intune has no idea if it was installed. If the detection policy is incorrect, the same issue. It’s very wise to know what you are looking for. In this case perch always installs on c:\program files\perch. So we will select the manual to configure detection rule. Then select add. We will select a file from the drop-down list and enter the folder path of c:\program files and the folder name perch. Then click folder or existing file. That’s your detection policy.
Group Assignments
In like fashion, The next window of importance is the Assign. If you want the app to deploy with autopilot, you must select the app as required, or be tied into another application install dependency. Here we are adding a group of computers. This is very common. The other options are available for enrolled devices. If the computer has the company portal, they can download it without needing admin rights. The final option is to uninstall which would uninstall from the select computers.
Finally, the last page is to review all the settings. Once you click save the file will upload and it might take some time. The bigger the file the longer it will take. This is how you Install Perch Log Shipper with Intune.
Conclusion
Hopefully this guide helped you through the process of setting up an Install Perch Log Shipper with Intune
Perch is an event log tracker that can catch a lot of useful information. I like perch because it captures failed login information. It’s easy to sort and exportable. This is why many companies use the software. There are some gatchya’s with perch installs though. If you are installing it on a server, some services don’t auto start. Installing it from PowerShell also has a gatchya. This post is about how to install perch via PowerShell scripts. This method uses your token for the client’s site. Let’s Install Perch with PowerShell.
Let’s break down the script. The first thing we do is create the download repo. I personally like to use the C:\Temp. Not all machines have a c:\. This is why I use the variable $Env:SystemDrive. If the OS drive is d, the code will add a D:\Temp. and so on and so forth.
The next line is the URL for the latest and greatest Perch installer. This keeps your download up to date. With that stated, this also means if they change something you will need to be able to catch that change. So you will need to stay up to date with their deployment. A good way to do that is by registering with their updates emails. I like to have a ticket every 3 to 6 months, randomly placed, to review deployments like this one. This is just a good habit.
Now we have the url, we want to create a path. Using the Env:SystemDrive we place the perch-log-shipper-latest.exe into the temp folder, our local repo. This will make the next command easier.
Now we invoke-webrequest this bad boy. Just like curl and wget, we are able to download the file. Using the PerchURL in the URI position and then the outfile will be the perchfullfilename. Of course, we use the basic parsing just in case it’s an older version of PowerShell. At the time of this writing, the default PowerShell is 5.1 on windows 10.
Now we start the installation. We start-process. Using the PerchFullFileName as the target. See, using parameters helps. Our argument list is /qn for quiet. The output is going to be the token. Finally our token value, value is our token from perch’s site.
Getting the token
To get the token, you will need to log into your perch system. At the top, select the company you wish to get the token from.
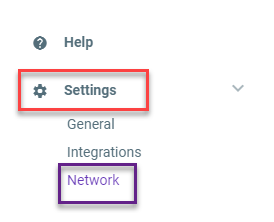
Next, you will need to click on the settings icon on the bottom left-hand corner. Then click the Network icon.
Normally we want to add a -wait flag to the end of the installer. Things like google chrome do great with the -wait flag. However, in this case, we don’t want to do that. The reason we create advanced checks is due to the multiple sub-processes inside of the perch install process. The wait flag only captures the first process.
Confirming Install Perch with Powershell
With all that, it’s time to confirm the installation. The most simple way to do this is by watching the services. Perch installs 2 services. It installs perch-auditbeat and perch-winlogbeat. During the confirmation process, we wait. If a timeout occurs, we get the error. If the application installs, we get the results. At this point, we want to start our time-out timer. That’s why we have a $timeout = 0. We then start a do until. Each time the system loops, we wait for 5 seconds. Then we add 5 to the timer. This effectively creates a timer for us. This process is repeated until the conditions are met. The services with the name perch* are greater than or equal to 2, or the time-out reaches 500.
If the services are installed or if the timeout is reached, we moved to the next step. By default, the auditbeat is set to manual. So we check to see if we have the two services. If we do, we then set the perch-auditbeat to automatic and start the service. If not, we throw an error saying the services did not install. This will alert the deployment engineer to dig deeper into this machine. From my experience, it’s because another application is installed.
Do you have a zip file or an msi file that you need to embed into a powershell script for deployment. This is a quick and simple way to do this. The method is pretty sound and works most of the time. The larger the file, the more troubles the system has converting and converting back, so small files works wonders for this method.
The first thing we are going to do is convert a file into a base 64 string. This is done through the command Get-Content and the system convert method. Powershell 7 recently changed the command for this method and we will cover that first.
Powershell 7 Command
The get content changed the encoding flag to asbytestream flag.
This command will read the data as raw byte data which is needed for the System convert method. The Powershell 5 method users Encoding and then you select your type which is byte.
Powershell 5
$Content = Get-Content -Path $Path -Encoding Byte
These commands reads the data as raw information that will be used for the system.convert to base 64 string method.
Now we have an object of random-looking data like before. We need to write those bytes to a file we do that with the System.IO.File write all bytes method. We will need the outfile location. and the object we created earlier to complete this task.
[system.io.file]::WriteAllBytes($OutFile,$object)
This will create the file you embedded into your powershell script.
Use Case
Encrypted Passwords
Let’s secure a password file and key file inside our embedded script. First, we are going to create the key for out password file.
Now we build the script with these two pieces of information. We recreate the files from the script and then pull them in like before. Here is the key code:
Now we have both files needed to receive our password, let’s convert that password using the key from before. We get the content of the .key file with get-content. Then we use it when we convert to secure string the password file. Pushing all that information into a new credential object for later use in something like a nextcloud download. Then we remove the files as we don’t want that password getting out there.
Let’s say we need to embed an MSI file. For example, we have a custom Open DNS MSI that will auto setup the Umbrella client on an end user’s computer. The first thing we want to do is convert that msi file to the base 64 string like above.
Here we are using the powershell 5 code to convert the msi into a string and pushing it out to our clipboard. Now we need to place that information into the script. This is what the script would look like:
As you can see by the size of the base64 string, that seems like a large file. Surprisingly that’s only 11kb in size. The larger the file the more code will be present and the chances of buffer overload increases.
Scripts
What kind of person would I be without giving you a function or two to make life easier on you. Here are two functions. The first converts the item to base64 string and copies it to your clipboard. The second converts a base64 string to an object.
My last weekly challenge to myself was to deploy google chrome with Powershell. This one was the hardest because it was hard to find the latest and greatest MSI 64 bit of google chrome. The coding wasn’t too hard after that. How google chrome works, follows suit the same way as firefox did.
We first start off getting the latest enterprise edition of google chrome. This is the 64-bit version thus the most stable version on them all. This is the version I would install everywhere in a company if I had a choice.
That’s it. Very simple very straightforward. If you need to uninstall before installing (My testing was a success with overlapping the installers) then you can do the following before Installing google chrome:
We use cookies to ensure that we give you the best experience on our website. If you continue to use this site we will assume that you are happy with it.