

Dynamic Groups in Azure AD is something that will change how you work. Inside my azure AD, I want a group for my windows 10 devices and a group for my windows 11 devices. Dynamic Groups allow you to set parameters for the members of that group. For example, if you want only Windows 10 devices, you select the build number. Want only Azure AD joined, add the parameter. So on and so forth.
Getting Started with Dynamic Groups in Azure AD
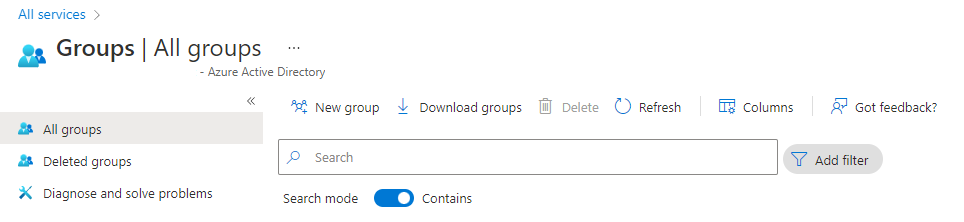
The first thing we need to do is log into azure. Click Groups on the left-hand side. Then Click all groups. Search for the group you want to make, just in case it’s already been built. Once you confirmed that it’s not the case, click “New Group”.
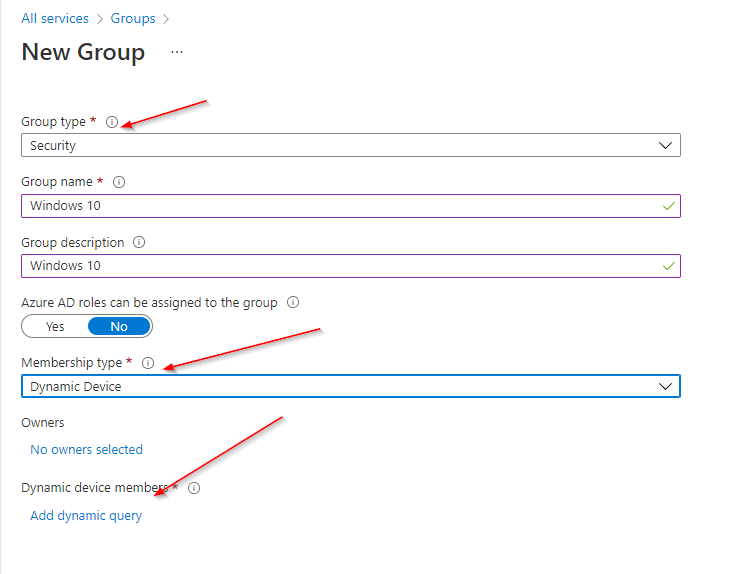
Here are the settings you will need to use:
- Group Type: Security
- Group Name: Windows 10
- Group Description: All windows 10 machines
- Membership Type: Dyanmic Device
Now you will need to click the Add Dynamic Query to add a custom query.
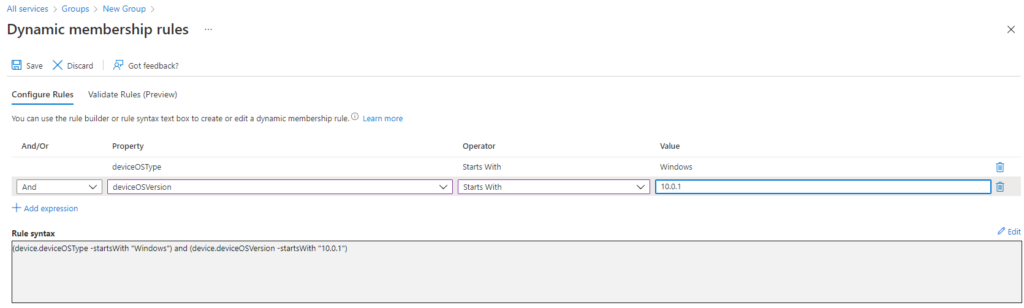
From here, we will click the Property and select DeviceOSType The operator is Starts With and Finally, the value will be Windows. We select these options for the first check because we only want windows devices. Macs start with “Mac”, Linux starts with the Version Number or the name of the OS type. While Windows always, and I mean always, Starts with Windows. Windows Server, Windows 10, Windows Vista, Windows 3.0.
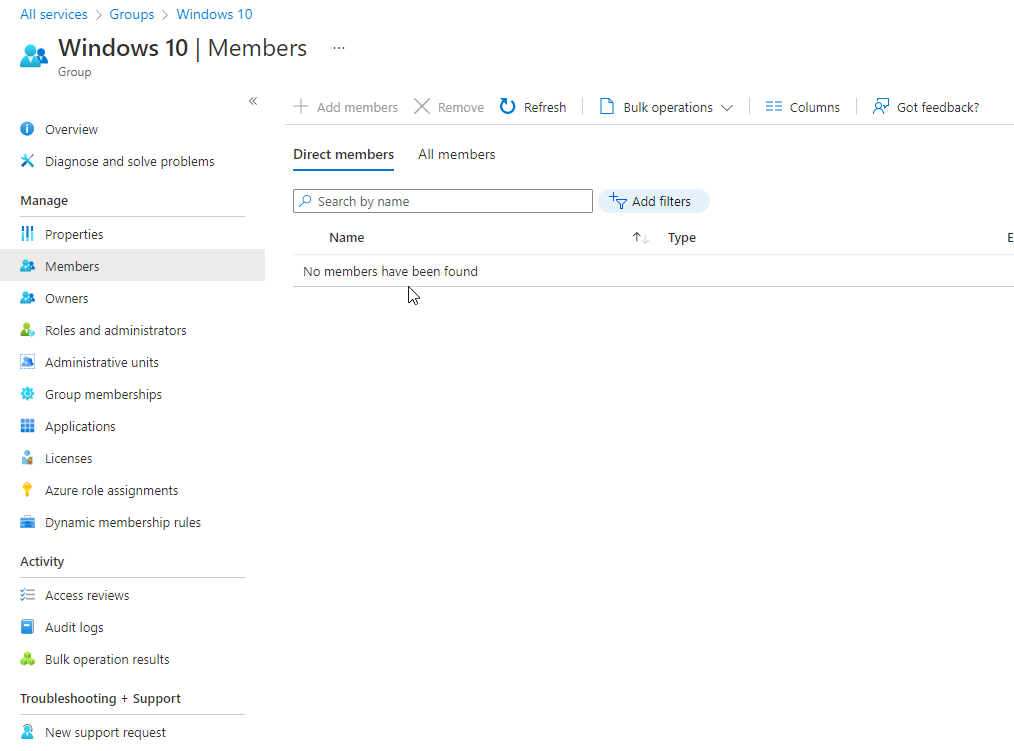
Next, we need to click Add Expression. The And/Or needs to be set to And. So we are checking both queries. The property is going to be DeviceOSVersion, and the operator is going to be Start With. The value is important. As we have entered the world of Windows 11. Why is the value so important? It’s because Windows 11 is nothing more than a skin for windows 10 when it comes to the version number. Windows 11’s version number is 10.0.22000. While Windows 10 is 10.0.19… It’s super important for windows 10 groups to use a value of 10.0.1 with Start with. If you want only windows 11, use 10.0.2. I am expecting Windows 12 (currently in development) to be 10.0.3. Once you click the ok, You can check the members by clicking the Members tab on the left side of the Windows 10 group.
Windows 10 – 10.0.1
Windows 11 – 10.0.2
This group’s concept can be taken a few steps further. You can call out the windows version, and make groups accordingly. This will give some clearer auditing. This also will tell you what you need to update. I hope this helps out.
For more information about Dynamic Groups in Azure AD go here.