There are 171,476 or so words in the English language. This doesn’t include names or other items. Datamuse is a very powerful database of English words. It contains rhyming, like, anonymous, Synonyms and much more. What I like about this site is it has a simple API that can be stacked. You can find the API here.
What do I mean by stacked. Some APIs use the URL and gathers all the information from that. While others uses the custom header and body of requests. Datamuse uses the URL. It returns a nice json to work with as well inside its content area. Basically, it’s my kind of API. The below API is an example of a url API. After words? each XX= has the word to query with. Each item means something different. The ML means, means like and the sp is spelled like. So we are looking for words that means like black and starts with the letter b.
https://api.datamuse.com/words?ml=Black&sp=b*
URL API’s are super easy to work within PowerShell. The key is to make a string of what you are looking for. If you have a flag of $meansLike = Black. Then it will add the &ml=black to the string. Same as $Spelling=”B*”. It will add the &ml=Black&sp=B*. Then we just remove the first character of the string and we have our string. We do that with substring. Let’s take a look at the full script.
The Script
function Get-SHDWords {
    [cmdletbinding()]
    param (
        [string]$MeansLike,
        [string]$SoundsLike,
        [string]$SpelledLike,
        [string]$LeftContext,
        [string]$RightContext,
        [string]$Topic,
        [string]$NounModifiedByAdjective,
        [string]$AdjectiveModifiedbyNoun,
        [string]$Synonym,
        [string]$Trigger,
        [string]$Antonym,
        [string]$KindOf,
        [string]$MoreGeneralThan,
        [string]$Comprises,
        [string]$Meronym,
        [string]$FrequentFollowers,
        [string]$FrequentPredecessors,
        [string]$Rhymes,
        [string]$NearRhymes,
        [string]$Homophones,
        [string]$Consonant,
        [switch]$Random
    )
    $actionstring = ""
    if ($PSBoundParameters.ContainsKey('MeansLike')) { $actionstring = "$($actionstring)&ml=$MeansLike" }
    if ($PSBoundParameters.ContainsKey('SoundsLike')) { $actionstring = "$($actionstring)&sl=$SoundsLike" }
    if ($PSBoundParameters.ContainsKey('SpelledLike')) { $actionstring = "$($actionstring)&sp=$SpelledLike" }
    if ($PSBoundParameters.ContainsKey('LeftContext')) { $actionstring = "$($actionstring)&lc=$LeftContext" }
    if ($PSBoundParameters.ContainsKey('RightContext')) { $actionstring = "$($actionstring)&rc=$RightContext" }
    if ($PSBoundParameters.ContainsKey('Topic')) { $actionstring = "$($actionstring)&topics=$Topic" }
    if ($PSBoundParameters.ContainsKey('NounModifiedByAdjective')) { $actionstring = "$($actionstring)&rel_jja=$NounModifiedByAdjective" }
    if ($PSBoundParameters.ContainsKey('AdjectiveModifiedbyNoun')) { $actionstring = "$($actionstring)&rel_jjb=$AdjectiveModifiedbyNoun" }
    if ($PSBoundParameters.ContainsKey('Synonym')) { $actionstring = "$($actionstring)&rel_syn=$Synonym" }
    if ($PSBoundParameters.ContainsKey('Trigger')) { $actionstring = "$($actionstring)&rel_trg=$Trigger" }
    if ($PSBoundParameters.ContainsKey('Antonym')) { $actionstring = "$($actionstring)&rel_ant=$Antonym" }
    if ($PSBoundParameters.ContainsKey('KindOf')) { $actionstring = "$($actionstring)&rel_spc=$KindOf" }
    if ($PSBoundParameters.ContainsKey('MoreGeneralThan')) { $actionstring = "$($actionstring)&rel_gen=$MoreGeneralThan" }
    if ($PSBoundParameters.ContainsKey('Comprises')) { $actionstring = "$($actionstring)&rel_com=$Comprises" }
    if ($PSBoundParameters.ContainsKey('Meronym')) { $actionstring = "$($actionstring)&rel_par=$Meronym" }
    if ($PSBoundParameters.ContainsKey('FrequentFollowers')) { $actionstring = "$($actionstring)&rel_bag=$FrequentFollowers" }
    if ($PSBoundParameters.ContainsKey('FrequentPredecessors')) { $actionstring = "$($actionstring)&rel_bgb=$FrequentPredecessors" }
    if ($PSBoundParameters.ContainsKey('Rhymes')) { $actionstring = "$($actionstring)&rel_rhy=$Rhymes" }
    if ($PSBoundParameters.ContainsKey('NearRhymes')) { $actionstring = "$($actionstring)&rel_nry=$NearRhymes" }
    if ($PSBoundParameters.ContainsKey('Homophones')) { $actionstring = "$($actionstring)&rel_hom=$Homophones" }
    if ($PSBoundParameters.ContainsKey('Consonant')) { $actionstring = "$($actionstring)&rel_cns=$Consonant" }
    if ($Random) {
        $Character = [char](Get-Random -Minimum 65 -Maximum 90)
        $actionstring = "$($actionstring)&sp=$Character*"
    }
    $actionstring = $actionstring.Substring(1)
        (Invoke-WebRequest -Uri "https://api.datamuse.com/words?$actionstring").content | convertfrom-json
}
The Breakdown
Ok, first notice that we have each of the items from the datamuse site as string values that can take input. None of them are mandatory. The first thing after the parameters is our blank action string.
Next, we start questioning the input like a youtube conspiracy theorist. We do that by asking if the bound parameters contains a key. If it does we add to the action string.
if ($PSBoundParameters.ContainsKey('MeansLike')) { $actionstring = "$($actionstring)&ml=$MeansLike" }
Here we are recreating the string by taking the value of the string and adding the &ml=$MeansLike. We do this for each parameter we use except for random. Random we just grab a random english word character and ask for a word that starts with that word. After we have created our action string we use our substring command to remove the first & from the string.
$actionstring = $actionstring.Substring(1)
Once we have the action string formatted right, we are ready to go. We use the invoke-webrequest command and we will grab the data. We will select only the content, which is in a nice json format. Then we will pipe that information into convertfrom-json to create a Powershell object.
Here we are looking for all the words that start with the letter L and that Rhyme with Pink.
Example 2 – Lash
Get-SHDWords -MeansLike anger -SoundsLike love | Where-Object {$_.tags -contains "v"}
Here are the results:
word score tags
---- ----- ----
lash 14742 {v}
In this example, we are looking for words that mean anger but sound like love. Some of the results will have tags. Items like means like and sounds like have tags that you can filter through. With this example, we are looking for verbs. So we look with the where-object command.
In this example, we get a random list of words that start with a random letter. Then we select from that list a random item. We do that with the get-random with a minimum of 0 and the maximum of the test count. Then we select the word. All that produced the word ominous.
Taking a step farther – Passwords
Let’s take this one step further and make a two-word password. The first thing we want is a word. So we use the command Get-SHDwords again. We are going to use the word trust.
Here we generate 3 random characters. We then select our word, trust by putting it into the $One. We can replace our word by replacing the $One input. Then we get the second word with two. Get-SHDWords -Rhymes $One Then we grab just one of those words like before. This time we replace all the vowels with the character we generated at the beginning. Then we combine it all together. The first word, $One, the middle character, $characterMiddle, the second word $two, and finally the ending Character $CharacterEnd. Now we have an easy-to-remember password.
Datamuse offers even more options than what this script offers. Check them out and see what amazing things you can create.
I’m going to leave off here with a challenge this week. Can you write a poem using datamuse based off the word:
Do you have a zip file or an msi file that you need to embed into a powershell script for deployment. This is a quick and simple way to do this. The method is pretty sound and works most of the time. The larger the file, the more troubles the system has converting and converting back, so small files works wonders for this method.
The first thing we are going to do is convert a file into a base 64 string. This is done through the command Get-Content and the system convert method. Powershell 7 recently changed the command for this method and we will cover that first.
Powershell 7 Command
The get content changed the encoding flag to asbytestream flag.
This command will read the data as raw byte data which is needed for the System convert method. The Powershell 5 method users Encoding and then you select your type which is byte.
Powershell 5
$Content = Get-Content -Path $Path -Encoding Byte
These commands reads the data as raw information that will be used for the system.convert to base 64 string method.
Now we have an object of random-looking data like before. We need to write those bytes to a file we do that with the System.IO.File write all bytes method. We will need the outfile location. and the object we created earlier to complete this task.
[system.io.file]::WriteAllBytes($OutFile,$object)
This will create the file you embedded into your powershell script.
Use Case
Encrypted Passwords
Let’s secure a password file and key file inside our embedded script. First, we are going to create the key for out password file.
Now we build the script with these two pieces of information. We recreate the files from the script and then pull them in like before. Here is the key code:
Now we have both files needed to receive our password, let’s convert that password using the key from before. We get the content of the .key file with get-content. Then we use it when we convert to secure string the password file. Pushing all that information into a new credential object for later use in something like a nextcloud download. Then we remove the files as we don’t want that password getting out there.
Let’s say we need to embed an MSI file. For example, we have a custom Open DNS MSI that will auto setup the Umbrella client on an end user’s computer. The first thing we want to do is convert that msi file to the base 64 string like above.
Here we are using the powershell 5 code to convert the msi into a string and pushing it out to our clipboard. Now we need to place that information into the script. This is what the script would look like:
As you can see by the size of the base64 string, that seems like a large file. Surprisingly that’s only 11kb in size. The larger the file the more code will be present and the chances of buffer overload increases.
Scripts
What kind of person would I be without giving you a function or two to make life easier on you. Here are two functions. The first converts the item to base64 string and copies it to your clipboard. The second converts a base64 string to an object.
This little script logs public IP address changes. The original design was to email out. I’ll make sure to point out when and where to put that code. So the idea is simple. It checks to see if it’s public IP address has changed using an invoke-webrequest. If it has changed, it checks to see if a log has been made. If it has been made, it updates the log, if it hasn’t been made, it creates the log. Then when the IP address changes back, it backs up the logs and stops. Lets take a look at the script.
The Script
Param (
    [string]$IPAddress = "Your IP Address"
)
$IP = (invoke-webrequest -Uri "http://ifconfig.me/ip" -UseBasicParsing).content
If (!(Test-Path C:\temp)) { New-Item -Path "c:\temp" -ItemType Directory }
if (!($IP -like "$IPAddress")) {
    if (!(Test-Path c:\temp\IPTrigger.log )) {

#Email Code Goes Here

        $Datetime = (Get-Date).ToString("yyyy-MM-dd_HH-mm")
        "Datetime,IP" > c:\temp\IPTrigger.log
        "$datetime,$IP" >> c:\temp\IPTrigger.log
    }
    else {
        $Datetime = (Get-Date).ToString("yyyy-MM-dd_HH-mm")
        "$datetime,$IP" >> c:\temp\IPTrigger.log
    }
}
else {
    if (Test-Path c:\temp\IPTrigger.log) {
        $Datetime = (Get-Date).ToString("yyyy-MM-dd_HH-mm")
        Copy-Item -Path c:\temp\IPTrigger.log -Destination "c:\temp\IPTrigger_$($datetime).log.bak"
        Remove-Item -Path  c:\temp\IPTrigger.log

#Email Code goes here with attachment of the log bak.

    }
}
The Breakdown
We grab the IP address from the Paramters. This way you can have the script called Public-IPChecker -IPAddress Something from your task scheduler. After we get what the IP Address should be we get what It is with the Invoke-webrequest command.
There are a hand full of sites that grabs the IP address for you. I personally like Ifconfig.me because it places the IP address as the content. Thus no sorting through the HTML to get the IP address.
Next we ask if it’s the IP address. Then we ask if the log has been made.
if (!($IP -like "$IPAddress")) {
    if (!(Test-Path c:\temp\IPTrigger.log )) {}
}
If it doesn’t exist, we create it by getting the DateTime into a file friendly format. and Piping that information into the log file along with the current IP address.
If the IP addresses do match then we test to see if the log file is there. If it is there we create a bak of the log file and remove the old one. This is when you can send an email saying it’s back up. If it doesn’t exist, we do nothing.
In the last blog, I talked about how to upload to your next cloud’s file drop, aka upload only, password-protected folder. This time we will go over how to download from a password-protected folder. Let’s go over how to share out a file with a secure password.
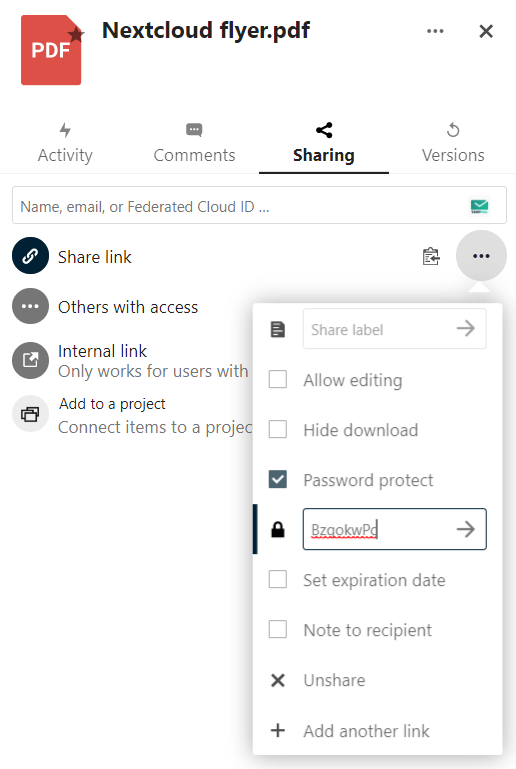
Password-Locked Single File
Navigate to the file you wish to share out.
Click on the file in question.
Click the share link + symbol.
Checkbox the “Password Protect”
Enter a new secure password.
Document the password!
Click the Arrow to set the password
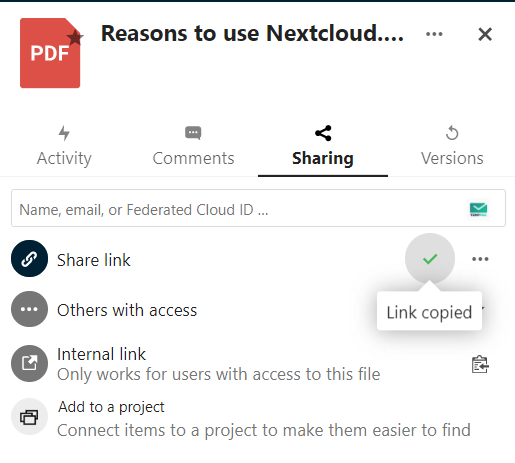
click the Clipboard to copy the link.
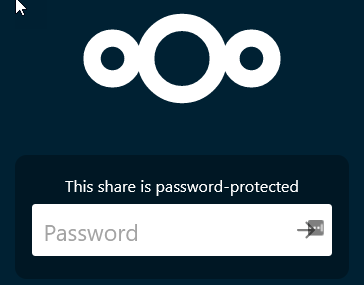
In another browser, navigate to the link to make sure it works.
Password Protected
After password
Now we have the File shared, it’s time to download it.
The share ID
The Share Password
The URL of the nextcloud site.
The file name/location of where you will save the file.
Now you have those pieces of information, you can start the process of creating the header. Let’s look at the Variables first.
The Authorization type is going to be basic. We are going to convert the shareid and the sharepassword into the UTF8 so our nextcloud can understand it. We want all that as a base 64. So we create the string with “$($ShareID):$($SharePassword)” and push that into our System.Text.Encoding UTF8. Using the method GetByes. All that is then put into the System.Convert base of 64 string, aka password.
Next, we tell the site what we are requesting, we are requesting the XML HTTP request. Next, we will create the URL that will be used by the rest method.
$URL = "$($NextCloudURL)public.php/webdav"
Now we create the invoke-restmethod to download the file in question.
Now that we covered password locked, it’s time to look at the non-password locked. This is a single line item. Like above, just don’t create a password. Copy the URL.
Navigate to the file that you wish to share
clickt he share icon
Click the share link +
Copy the Link
This is a single-line command. The copied item will be the URL/shareID. If you place a /download at the end, it will download accordingly. Nice right. Its even nicer with PowerShell.
That’s it! A simple invoke-webrequest. Now, let’s take it to a different level.
Download a single file from a shared Folder
If you share out a single folder, you can download the files directly from that folder if you know those file names, even if the file isn’t shared itself. Standard information is required. First, let’s make the shared folder.
Navigate to the folder you wish to share out.
Click the share icon.
Click the Share Link +
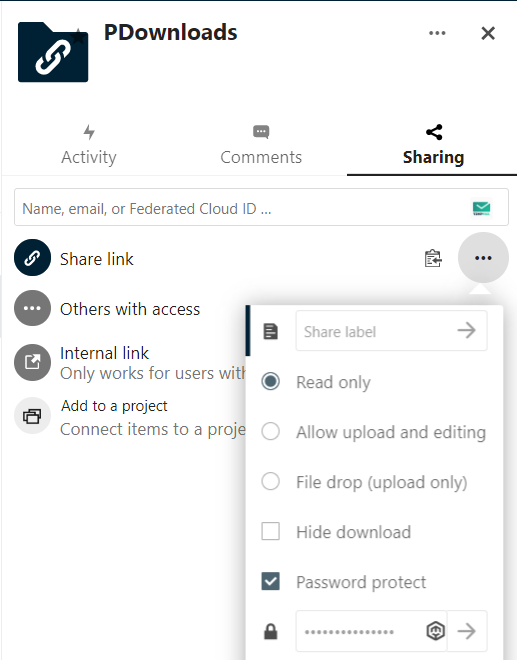
Click the 3 Dots.
Click the Password Protect
Enter a new password
Document the new password
Click the Arrow beside the password
Click the clip board to copy the link
Here are the items you are going to need to setup this command.
The URL of the next cloud
The Share ID
The Share Password
The File name you are going to download.
The filename/location where you will be downloading too.
The share this time is the folder. So we are authing to that folder. This is great because if you forget the password later, it’s in the script. Next, we grab the file using the invoke-restmethod.
Invoke-RestMethod -Method GET -Header $Header -uri "$($NextCloudURL)public.php/webdav/$($Filename)" -OutFile $Outfilepath
Notice at the end of the URL, the $($filename). This is the filename inside the share. So we are looking for that file to download. That’s all, take a look at the script.
I love my nextcloud. It is hosted at my house, and I can upload files from anywhere in the world. It’s very clean, and one of the most awesome features is the file drop. I use scripts to upload the results all the time to the file drop location on my next cloud. A file drop is an upload-only file location. This means the outside world can not see the files inside of it. Only I can do that. I can also password lock this file drop location so only those with the password can get into it. It’s pretty cool.
How to setup a File Drop
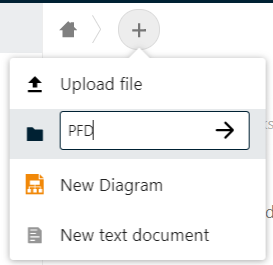
I am going to assume you have a nextcloud. Once you log in, click the + icon to create a folder. We will call it PFD for password file drop and click the arrow to create.
Create file drop
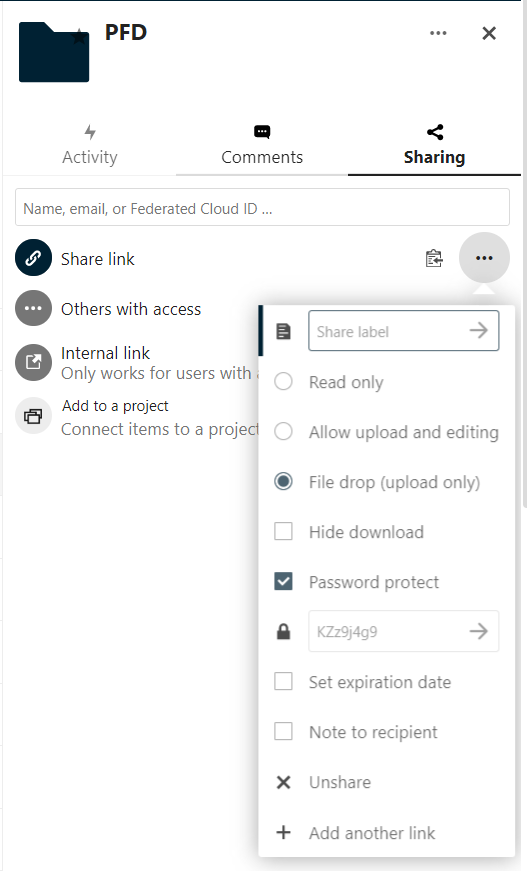
Now we will set up the sharing side with the password lock.
Click the PFD folder to open the menu on the right hand side.
Click the sharing icon
Click the share link +.
Click the three dots
Radio check the File Drop (Upload Only)
Check the Password Protect
It will auto generate a password, It’s best to make your own.
Document your password!
Click the arrow to save the password
Click the clip board to copy the link for your new share
In a different browser test your link.
Before Password
After Password
Now you have a safe place for the files to go. It’s time to upload files via PowerShell. You will need a few items. First the URL of your site. example https:\\cloud.bolding.us. Next, you will need the shareID of the folder in question. That can be found in your URL at the end. Example
The URL. For this example we will be using https://cloud.bolding.us
The shareID of the directory in question. It is the last part of the main url that we copied by clicking the clip board. I have bolded it for you in this example: https://cloud.bolding.us/index.php/s/oWHeW4dfWnxwXXX
Next you will need the password.
Those are the three things you will need to create your invoke-restmethod. Lets build the script. Lets declare our variables.
Now the hard part. We need to create the header. This is where we will be placing the passwords and the type of information we are going to be accessing.
The Authorization type is going to be basic. We are going to convert the shareid and the sharepassword into the UTF8 so our nextcloud can understand it. We want all that as a base 64. So we create the string with “$($ShareID):$($SharePassword)” and push that into our System.Text.Encoding UTF8. Using the method GetByes. All that is then put into the System.Convert base of 64 string, aka password.
Next, we tell the site what we are requesting, we are requesting the XML HTTP request. Next, we will create the URL that will be used by the rest method.
Now we have the Header that will be needed for our rest method. We have the URL. now we need the method and the file. We do the file by using the -InFile and select the full name of the file $Item.Fullname. The method will be PUT as we are putting something somewhere.
Invoke-RestMethod -Uri $URLBuild -InFile $Item.Fullname -Headers $Headers -Method Put
Now it’s time to put it all together into a workable function.
We use cookies to ensure that we give you the best experience on our website. If you continue to use this site we will assume that you are happy with it.