Perch Log Shipper with Intune
Reading Time: 5 minutesRecently I covered how to install perch using PowerShell. Today we are going to Install Perch Log Shipper with Intune. This is very useful for tools like continuum where there is very few software deployment tools built-in. Intune is a powerful tool that you can use to deploy software for a client. Today we are going to be looking at how to deploy Perch through intune.
The first thing we need is a fresh perch installer. You can acquire one here. [link]. Once you have the installer, you will need to download the Microsoft Win32 Content Prep Tool [Link]. Let's setup our directory like so. Top Folder = Intune. Two subfolders, one called Files and the other called intunewin. Extract the exe from the Microsoft win32 content prep tool to the intune folder. Copy the perch installer to the files folder. Now we have a setup that is easy to remember.
By default, you can not deploy EXE programs via intune. You must convert them to the win32 application or a .intunewin file. The tool you just downloaded can do just that. The Tools name is IntuneWinAppUtil.exe.
IntuneWinAppUtil.exe
Start a command prompt and navigate to your intune folder using the CD command. Run the intunewinapputil.exe /? command to view the help selection. Notice we are going to be using the -c -s and -o commands. Here is the following command you will use to convert the perch installer into a intunewin application.
IntuneWinAppUtil.exe -c c:\Intune\Files -s perch-log-shipper-latest.exe -o c:\Intune\intunewin
Now we have a perch installer for Intune. Lets move to intune and take a look.
Intune Apps
It's time to crack open the Intune process. Log in to https://endpoint.microsoft.com/ with an account with intune rights.
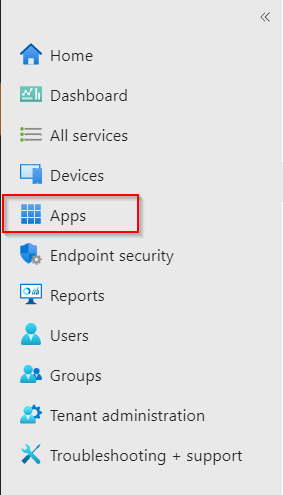
Once you have logged into the endpoint management system. Click the Apps on the left-hand side of the screen.
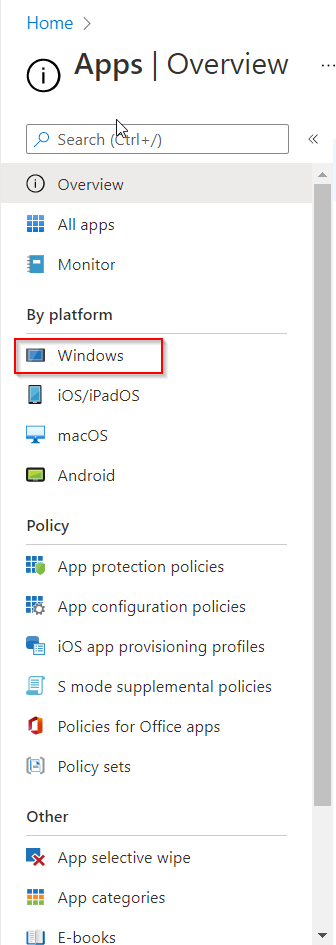
Since we are deploying perch to windows machines, under by platform, click the windows icon.
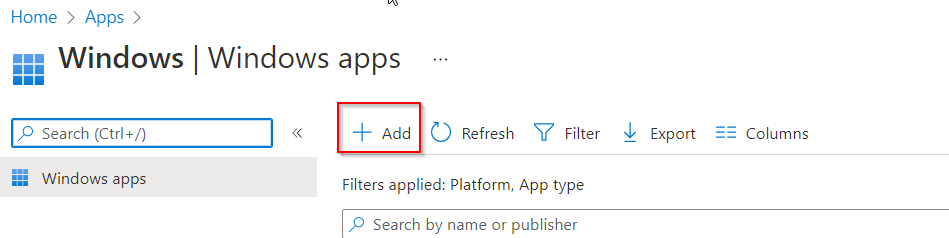
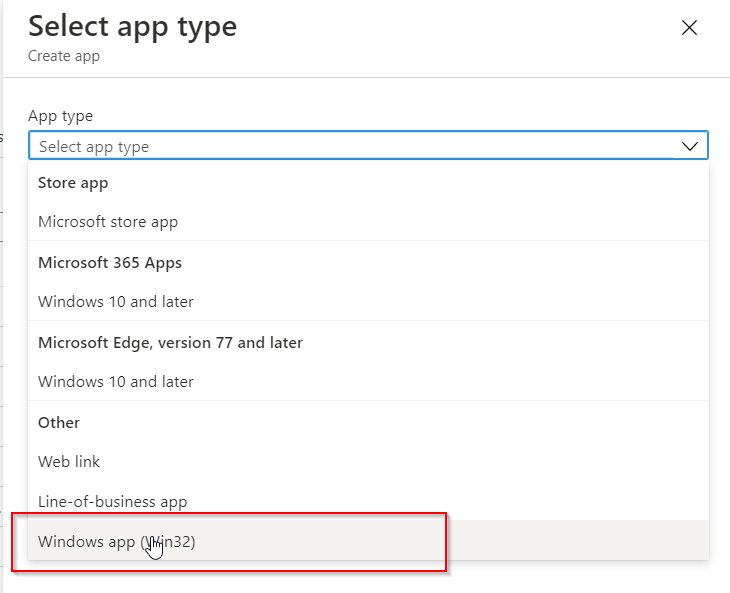
Now we are going to click the add button on the right-hand side of the screen. This will bring up the add dialog box. We are deploying out the final option. Click the Windows App (Win32) option.
Upload the Package

Afterward, we are brought to the app page. Here you select the app package file and click the blue button on the right-hand side of the screen. This is where we go to the file we created in the previous steps. We upload the file here. Once it uploads it will populate the information like name and other items. Click ok to move to the app information page.
App Information
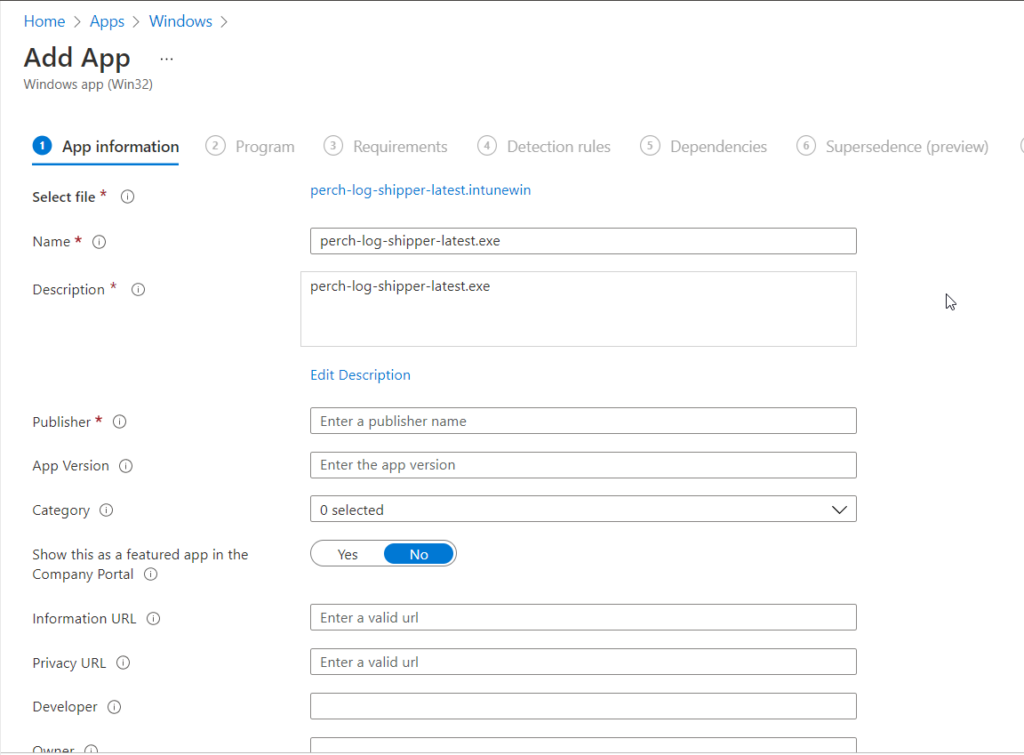
Here we can change the name. Add a unique, html, description. Update the publisher, the application version and more. The category we are going to select is computer management. The show this as a featured app in the company portal. You want to check that one. This allows people to download this version of perch. If you want to feel in any of the other information you are welcome to. Once you have the required information, click next to go to the Program page. Where we determine how to install this application.
Program Information
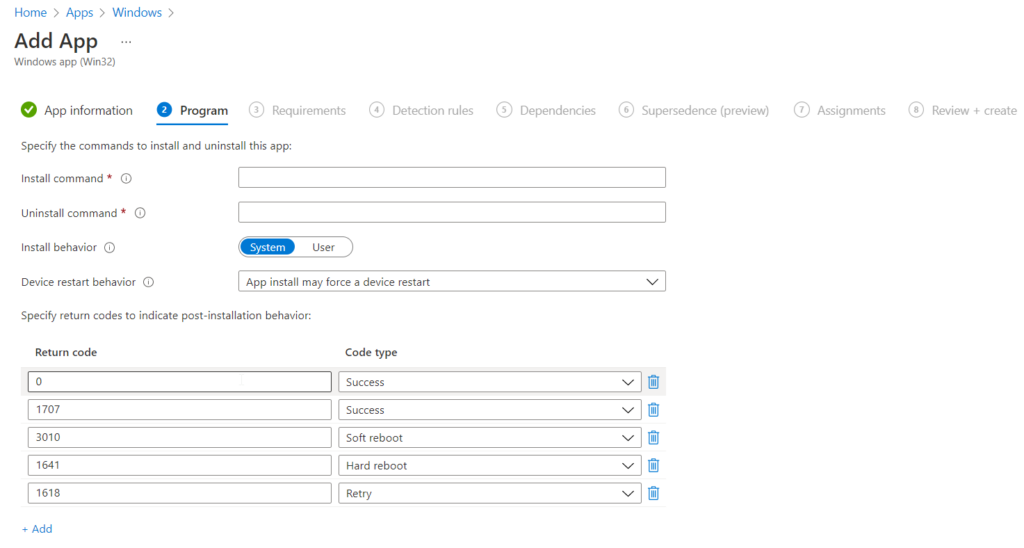
On this page we want to show the install and uninstall command. This is where research comes into play. If you don't know the silent install command of your program then that's a problem. If you don't know how your program responds to installs and the error codes or success codes it produces. that's also a problem. You will need to know these things for other applications. Thankfully perch follows the basic ones. Here is the installer command:
perch-log-shipper-latest.exe /q OUTPUT="TOKEN" Value="YourSiteToken"
The uninstall command is as follows:
perch-log-shipper-latest.exe /uninstall
Once you have the installer and uninstaller in place, click the next button to go to the requirement page.
Requirements
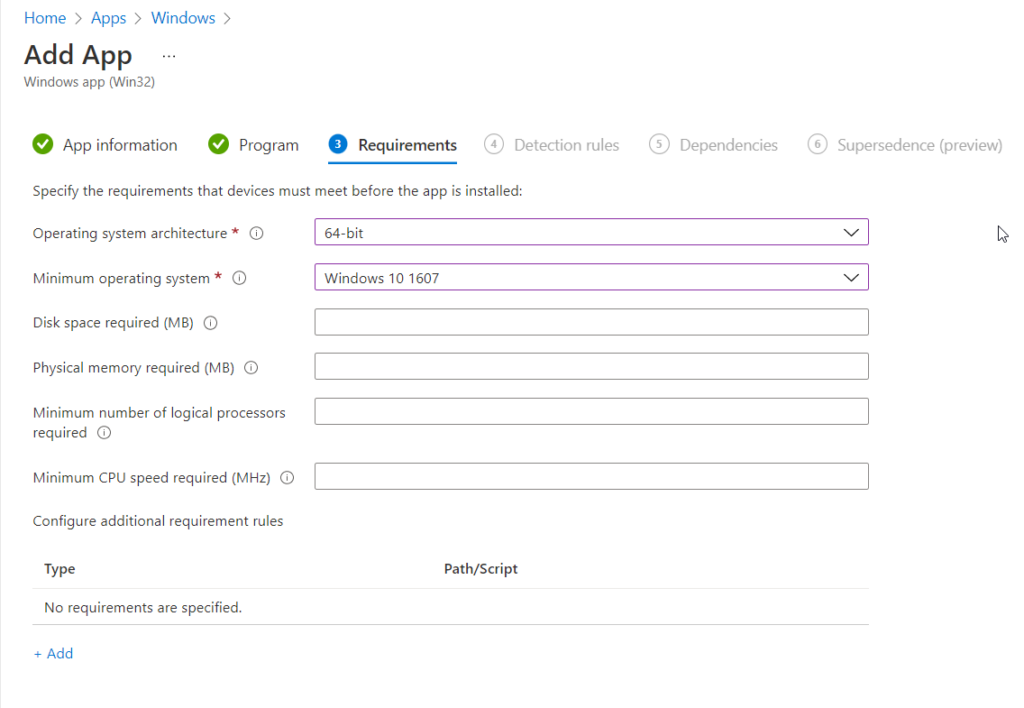
On this page, we can scan the system to make sure we meet the requirements. So if you know this is a heavy application, you can say to have at least 8GB of ram. You can even have PowerShell scripts that can trigger. A good example would be a user. If user Bob is on this PC don't install. The required items are the OS Arch and the minimum os. Which is going to be windows 10 1607 as that is intunes min. Don't get this confused with the next item. These are the requirements. Once you have added what you want, click next.
Dependencies
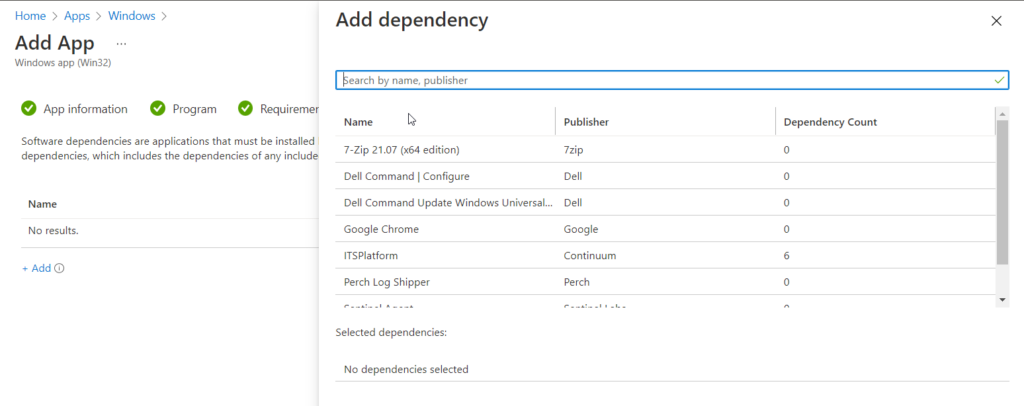
On this page, we are going to select any dependencies that the application may need. For example, let's say your application needs 7-zip. Set up an install for 7 zip and make it a dependency and have it install the dependency. One hack I found is if you know the app is going to break other apps while installing as the ITS Platform does, then you can set the other applications as dependants and install them. Thankfully perch does not have any additional dependants. So, when it does it's taxes, life is easier. (American joke).
Detection Rules
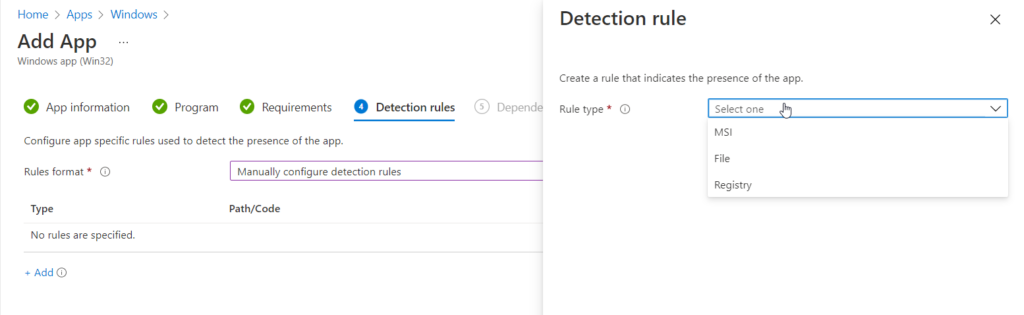
Detection is very important. if the rule doesn't exist, then intune has no idea if it was installed. If the detection policy is incorrect, the same issue. It's very wise to know what you are looking for. In this case perch always installs on c:\program files\perch. So we will select the manual to configure detection rule. Then select add. We will select a file from the drop-down list and enter the folder path of c:\program files and the folder name perch. Then click folder or existing file. That's your detection policy.
Group Assignments
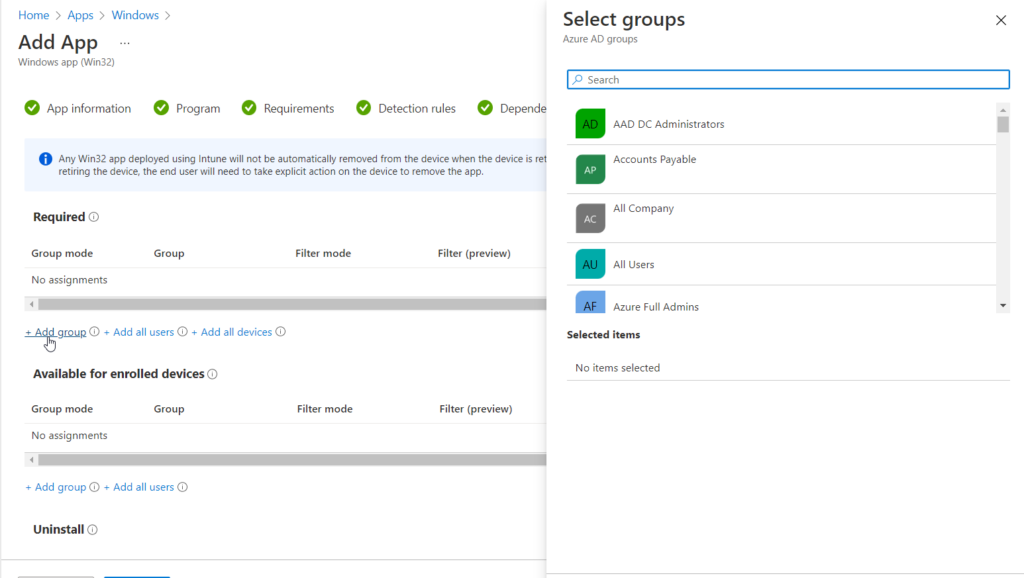
In like fashion, The next window of importance is the Assign. If you want the app to deploy with autopilot, you must select the app as required, or be tied into another application install dependency. Here we are adding a group of computers. This is very common. The other options are available for enrolled devices. If the computer has the company portal, they can download it without needing admin rights. The final option is to uninstall which would uninstall from the select computers.
Finally, the last page is to review all the settings. Once you click save the file will upload and it might take some time. The bigger the file the longer it will take. This is how you Install Perch Log Shipper with Intune.
Conclusion
Hopefully this guide helped you through the process of setting up an Install Perch Log Shipper with Intune