Have you ever started in a company and there was no documentation? The disabled OU isn’t named “Disabled Users” and things are just what the heck? This powershell script will help find that disabled user OU. Believe it or not, it’s a one liner.
Lets tare this bad boy apart. First we have a Get-Aduser -filter { Enabled -eq $False}. So we want all the users in the company who are disabled. From there we are selecting only the DistinguishedName. We want to remove the first part of the DistinguishedName with a replace command. The Regex is ^CN=.*?,’,” Lets break this down.
.Distinguishedname -replace '^CN=.*?,', ''
^CN= tells us we are looking for the first “CN=” inside this string. Then we ask for the wild cards up to the first , with .*?. We tell it to replace it with nothing, aka double single quotes, ”.
| Group-Object
Now this gives us all the OUs that everyone who is disabled lives in. Next we group them together with Group-Object. Group-object is going to give us a clean count of each OU and how many unique items there are for each OU.
| Sort-Object -Property Count -Descending
Next we want to organize everything with a Sort-Object. We select the count property and put it in descending order. This way we can select the first one in the final piece of the puzzle.
| Select-Object -First 1).name
Now we use the Select-object-First 1 command to get the first object from the descending list. This will give you the highest disabled users counted OU.
We use PDQ where I work, and I am lazy. So, I have made a way to set up devices into Different OUs. This way when I am gone, it’s as easy as putting a computer into an OU and walks away. When I image, The image will load the OS and put the computer into the OU for me, which makes it even sweeter. Then PDQ will hit that OU, check the file, and bam, off to the races with the most up to date software. Makes a great hybrid solution.
Here are a few things you will need before we get started.
A Licensed version of PDQ.
A laptop Deployment Package
A general knowledge of how the conditions work in package deployments.
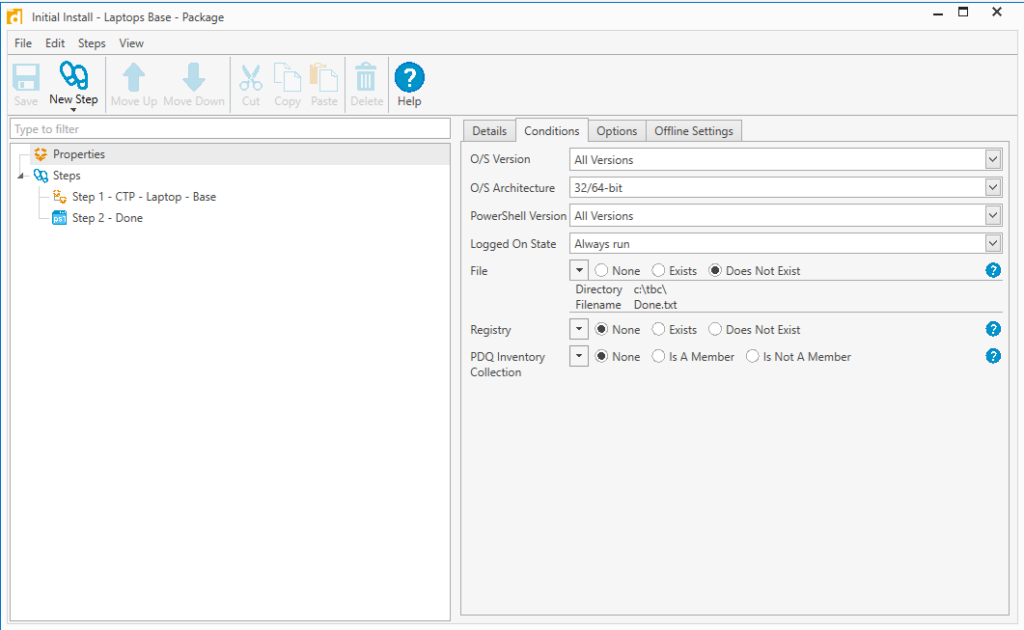
We first make a new package deployment. This package deployment will have the Laptop package deployment nested inside of it. We will place a special condition on this deployment package. On your new package deployment, select properties and then conditions. Under File we will select “Does Not Exist” and put a directory of your choice and a filename of your choice.
Initial Install – Laptop Base
Your first step is the laptop base install. I name my deployments with a CTP if it is complete. The second step is the “Done” step which creates the condition file. This way it will not redeploy, but you can force it by deleting the file.
Now you have the initial install package built, it’s time to build the scheduling.
Right click on the deployment package
Select New Schedule
Under Targets tab, click choose targets
Select Active Directory
Select Containers
Select the OU you want.
Under Triggers select the Interval button
Here you change the Time ranges. we do an hour as it takes 30 minutes for the laptop deployment to go through.
Select the Package tab
Confirm your package is located there.
Under Options
Here you can tell it to stop redeploying if the deployment was successful. We don’t want to do that because we have a condition and we don’t want it to stay in that OU. This is a good way to create a reminder for yourself by having the Notification send you emails.
You’re done.
A quick way to add a computer to the OU while setting it up is the Add-Computer Command.
Add-Computer -DomainName <Your Domain> -OUPath <OU Path for the Initial Install> -NewName <New Computer Name> -Credential (Get-Credential) -restart
This command will add the computer to the OU that you want and restart it. Make sure you have a group policy set to the OU to turn off or Open the ports on the firewall.
We use cookies to ensure that we give you the best experience on our website. If you continue to use this site we will assume that you are happy with it.