The other day I was searching for a piece of code for work. One of the links I clicked was geo locked to the EU only. Which threw me off. I didn't have a VPN on the computer. So what do you do? We use a web proxy. Last week we talked about a reverse proxy. A web proxy is a website that you can use to look like you are from that site's hosts. Most of the bigger sites will block you from using a web proxy, but simple sites have no idea. Everywall built a simple web proxy that we can use in docker. This is where we get to use Ladder with Docker.
What is Ladder
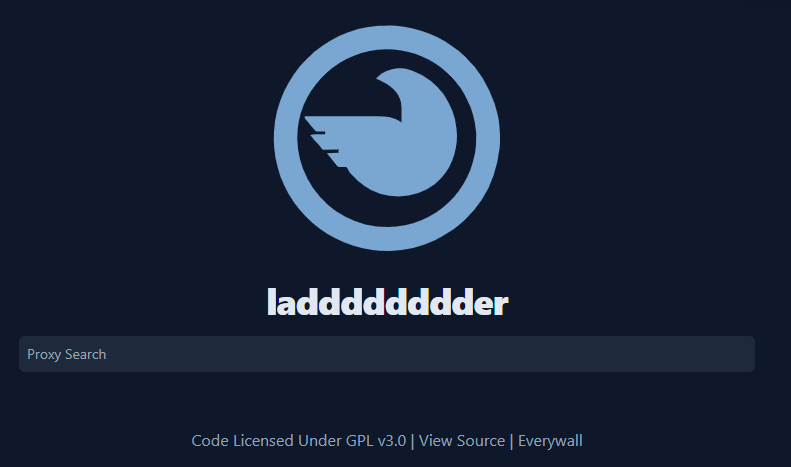
Ladder is a web proxy. So, when you install this inside your homelab, or wherever you can with docker, you can enter a url into the link and it will take you there from that machine. The example above, my ladder install had to be on a machine in the EU for me to access the site. Fun part is, I had a box in the EU to work with. A web proxy works by being in the middle. When you enter your url you wish to go to, the web proxy acts like the browser and sends the request from itself. Then it brings that information back to you and displays it. Ladder appends the link to the back of it's url. This way you can edit the url if need be. So, if you go to "Therandomadmin.com" while using your ladder, it will think you are coming from the ladder instead of your browser. You could be at work, using your ladder to view the rest of the world. Thus, you can see things from your home. Yes, this can get around filters.
How Do you install Ladder
I have Ladder with Docker. First thing first, always check out the official documentation, you can do that here. We will be using our reverse proxy from our previous blog post, here. Docker is going to be our go to here. First, we need to log into our server using ssh. Once you get into your server, navigate to where you are holding all your docker folders. Next, you will need to use the mkdir command and make a folder called ladder. Then CD into it.
mkdir ladder
cd ladder
Now, inside the "ladder" folder, we want to create a compose file. Now we are in the folder. It's time to build the compose file by using the nano command. We want to build a "docker-compose.yml" file.
nano docker-compose.yml
You will be brought into the editor where you can write the docker file. You can simply copy the information below and past it into the text file.
To save, all you have to do is press ctrl and x and follow the prompts.
Breakdown of the Yml
Like before, we are starting off with version 3 of docker. Our service is called ladder, and the image is from ghcr.io. Everywall is the company and ladder is the image name. We are grabbing the latest. The container's name will be ladder. We will set the restart to always restart unless we stop it. This will allow it to survive a reboot. Next, we will be using the environmental flags. We want to use our port 8080 and have our ruleset accordingly. Later we can build a unique rule set. Then we want to select our ports. The system port will be 8080, we can change this to whatever we want. The image port is 8080. Finally, we build our volume. We need a /app/ruleset.yaml and a /app/form.html. Ladder has additional options, and you can find that information from the official documentation. Of course, you will need to start the Image. Do so by using the docker compose commands with the d flag.
docker-compose up -d

# If using docker-compose-plugin
docker compose up -d
Now navigate to your http:<ip address>:8080 and confirm the site is up and running.
Pointing your Reverse Proxy to your Ladder with Docker
Now, we want to point our reverse proxy we made in the last post to our ladder. Lets follow these steps:
Navigate to your reverse proxy and log in
Click On the dashboard button if you not already brought to it.
Click "Proxy Hosts"
Click "Add Proxy Host"
Enter your name for the ladder. Remember to have the DNS already setup for this.
Enter the IP address you wish to forward to.
Enter your port, in this case it will be 8080
Select "Websocket support"
If you want to have a custom SSL for this site, Complete by doing the next.
Click SSL
Under SSL Certificate, select request a new SSL Certificate.
Enter your email address and check the agree to the let's encrypt terms and service.
Click Save
If your DNS is pointing, and your Ladder is working, your system will be assigned a SSL. Now, your ladder is ready to go. I hope you enjoy.
What can we learn as a person today?
As you see in this post, it builds on the last post. Most of our lives have been built on something from our past. I know powershell really well. Now imagine, if I suddenly couldn't read. All those skills would be gone. Our minds are built on stages of knowledge and skill sets. Inside the brain, there is a network that is more complex then the world's road systems. If you are studying something that that really has no usefulness right this minute, it may a few years down the road because Knowledge builds upon itself. I didn't know why I was studying virtual hosts for redhat servers back in the day. Now you are reading my blog. Sometimes the knowledge is wasted space or damaging. Those are still there, but they are like the awkward emails, they go to trash at some point. As a person, you can choose to build on your skills and grow any way you choose.
Over the past year, I have started rebuliding my home lab. One thing about a home lab is you want very little entries into your network. I split off my home lab from my main network using a pfsense firewall. The home network only has 2 ports open on it. That's 80 and 443. Everything runs through those ports. The whole lab is based on docker. This way I can run mulitple objects on different ports. For example, I have 3 wordpress living on one server. These are for development tests and so on and so forth. The question that needs to be answered is how do I get to those services outside the network? This is where a Reverse Proxy on Docker comes into play.
What is a Reverse Proxy?
Imagine walking into a massive building with hundreds of offices. There are no maps on the wall. The doors have no names and there is no glass to look through each door. All that lives on each door is a number. So, how would you find anything in that building? Well, there is a receiptionist at the front with a security guard. If you ask the receiptionist to see Dr Ross Geller, they will look at their charts. If Dr Ross Geller doesn't work there. They will look up at you and say nothing. You get no feed back and you can go past that point without the security gaurd's keys. Even if you got the keys, the lights are off and you need the recipionists keys for the lights.
Now, if Dr Ross Geller is there, She will grab the security guard and whisper the room number into their ear. Then, the guard will hand cuff you to himself and walk you to the office in the dark. Once at the door, he will pat you down for common weapons then open the door for you and you can walk into the meeting with Dr Ross Geller. Remember to PIVOT!
This is how a reverse proxy works. They are the gate keepers of the network. When something comes in on port 80 or 443, the reverse proxy will that the DNS name and check it's register. If it has the DNS name, it then forwards you to the local port. It doesn't tell the user about any other active ports. Many proxies will block common exploits and even work with your SSLs.
Ngnix Reverse Proxy Manager
We are going to be working with Ngnix Reverse Proxy Manager. Ngnix Reverse Proxy Manager is a docker friendly reverse proxy that gives you a beautiful ui to work with. Along with connecting to Let's Encrypt to give you free ssls, it also allows multiple users, redirects, custom 404 pages, streaming services, and more. The Graphical interface helps keep management sustainable.
Install on Docker
We are going to assume you have docker installed on your system. If you do not, you can read on how to do it here and you can learn how to install docker compose here. Nginx proxy Manager has their quick guide that you can read here. This next steps below will match up to this documentation with a few small changes.
The First step is to setup your docker folders. I am in the camp of using a folder for each service. After logging in with SSH we want to make a directory using the mkdir command.
mkdir ReverseProxyManager
cd ReverseProxyManager
Now inside the "ReverseProxyManager" folder we want to create a compose file. On Ubuntu, my server of choice for this, we will use the built in editor, nano. I am a nano fan, some like vi, some like vim. That is a debate for other people. I suggest using what you have access to. So run the nano command and build a "docker-compose.yml" file.
nano docker-compose.yml
This will drop you into a text file. Copy the blow information and past it into the text file.
To save, all you have to do is press ctrl and x and follow the prompts.
Breakdown of the Yml
Here we ahve the service manager making a service called proxy-manager. We are using the offical Reverse proxy for Docker through jc21. We tell it to continue running until someone stops it. Then we tell it the ports we want. Here we want 80, 81, and 443. 81 will be your management port and should only be accessiable internally. The other two will be for the data coming in. Next we have the volumes. We need a data folder. Using ./ to indicate the folder this yml file lives in. We also want a place for the lets encrypt. Finally we are using enviromental tags. Having a sqlite server allows you to do more than without it. Finally, I disable IPv6 because I don't use IPv6, yet. I will one day.
Starting The Docker
The next step is to start the docker. There is a way to test by using docker-compose up, but it freezes your terminal. adding the -d will make what the docker-compose up perment and give you back your terminal.
docker-compose up -d

# If using docker-compose-plugin
docker compose up -d
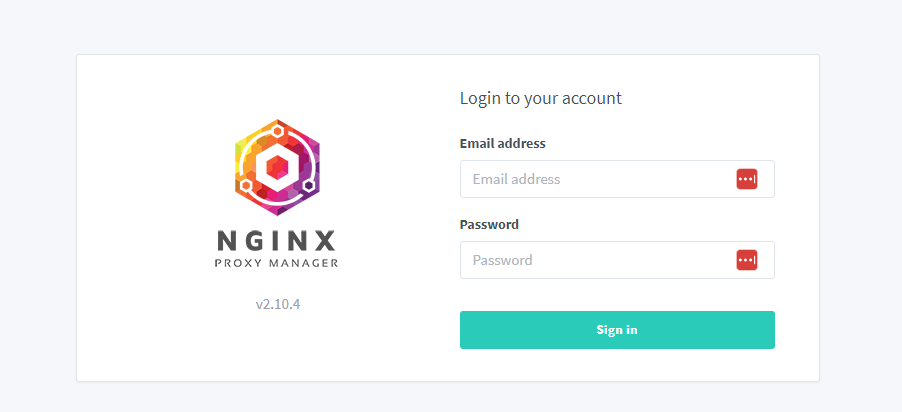
now the stack is up and running. The next step is to navigate to the ip address of the server. you can use the ip a to grab the ip address from the server. When you access the Url, you will see the below. Enter the below information.
URL: http://<serverIPAdddress>:81
Email: admin@example.com
Password: changeme
It will prompt you to change your password. Make sure you do that.
What can we learn as a person from Reverse Proxies?
In our lives, we have many different parts of ourselves. What's interesting about these parts is we don't know all of them. Imagine the reciptionist from our example above being your sub countinous mind. It knows all the parts of you and can direct you to those parts. But to get to the sub countinous mind, you have to go through the body. Imagine trying to walk into a building and the door handle says push, but every time you push it, it doesn't open. Many people get mad and give up. The truth behind the door is a pull. Our brains don't like being pushed, instead they like us to sit and pull them to us. Calm brings the sub countinous to the surface as it changes the state of our minds to allow the sub countinous to communicate back. Once that is achived, you will have access to some of the darkest parts of your mind.
Almost every religion has some reference to being still. In our busy world, being still is like dealing with an alien language. Being still allows you to communicate with your body. It allows you to know who you are and be able to sit with that knowledge. Without that stillness, we end up burning ourselves on our internal fire. This is why vacation times are so important in companies. Companies who give poor vaction time sees a higher turn over because their people don't have a chance to commucate with themselves and enjoy thierselves.
Over the next week, take moments where you can be still with your thoughts and become aware of yourself. You may see that your internal proxy is hiding some dark secreats that are leaking out in verious of way.
Did you know you can wipe a computer using code? I didn't realize this was an option until I needed to do it the other day. Well, I quickly found code to wipe a computer using PowerShell. It was pretty simple as a full Microsoft documentation page is dedicated to the wipe types. You can read about it here. The only problem I ran into was this code needs to be launched as a "System User" instead of a domain admin. This presented a problem if I wanted to use PowerShell for this task. However, psexec could launch scripts as a system user. That was my solution for running a Remote Wipe on a Computer with PowerShell.
The Script
Today we start out with a rough script. This script is designed to give you a rough idea of what I am thinking about and how I was able to do it. You can do additional items to this script like split the here-string and add options. However, most of my items have been from a clean local wipe idea.
Let's break down this script. The first item is always the parameters. In this case, we are making a list of strings with computer names. We will use these later. This script is broken up into a begin and process. Remember, begin, process, end, and final are all simple organization tools. This makes life easier because we are going to need to download the psexec command from sysinternals life site. We also need to build out the main script and have a folder to add it all in.
Begin
The first thing we need to do is test if the c:\temp exists as we are going to download everything into it. This one liner makes life much easier. We test if the path doesn't exist, then we make it if that is true. The ! mark indicates do the opposite of what is inside the (). Inside the () we are testing for c:\temp or local system drive temp in this case. If that doesn't exist, we create a new item with a path of the system drive. We create a new item with new item and call it temp making sure it's a directory flag in the item type.
Next, we test if the psexec exists and download it accordingly. Once again, we are using the ! test. If the file doesn't exist, we us invoke-webrequest to reach out to the live sysinternals site and download it to our c:\temp.
Now we have downloaded and made all the required folders, it's time to write the script. In this case, we are building the script with a here-string. This way, the data is the same no matter what we do. It's a clone each time and we know what we are getting. Let's break down the wipe script.
The Wipe Script
As stated before, we are building out the script inside our here-string. This way, it is always the same. I prefer to know what is happening with any script I launch. So, it's time to break it down.
We start off with a new cim session. This is a blank session, with nothing special about it.
$session = New-CimSession
Next, we need to make some new objects. We need a cim method parameters container. So we do this with a new-object command. Then we add the parameters we need inside this new parameter container. Both of these commands use the Management > infrastructure objects as parents. Finally, we add the parameters to the parameters. yeah that sounds weird, but luckily we just change a s and it makes it much easier to understand.
Now we have our parameter set for our invoke method, it's time to create the splat. We need a remote wipe command. Viewing this documentation. We see our remote wipe is located inside the ./Device/Vendor/MSFT/RemoteWipe/. This is part of the MDM cim version 2 instance. So, our namespace will need to reflect that. We have a namespace of root\cimv2\mdm\dmmap. Our class name needs to be the MDM_Remotewipe. Finally, our filter needs to be show the vendor msft and the instanceId, the item we are after, is remoteWipe.
Now we start our try catch. Inside our try, we are call the get-ciminstance with the splat from before. This creates an instances on the computer that is talking directly to the wipe system. Now, we need to use the session we made at the beginning of this here-string. We invoke the method using invoke method. From there, we use the $cimsplat namespace, the instance of the cimsplat, the wipe method, in this case, a local wipe, and the parameters we made at the beginning. The system will trigger a wipe at this point. The catch just exits and sends the error it gets.
Now the here-string is built, we push that string into a PowerShell script on our freshly created temp folder. We use the single > to overwrite anything that is already there. This limits mistakes.
Process
Now it's time for the process. Here we are going to copy the files and execute it with psexec. We are also going to loop through each computer during this process. The first step is to start a loop with a foreach loop.
foreach ($Computer in $ComputerName) {
#            Do something
}
Up to this point, we have done everything on our computer. We have downloaded the psexec. We have created the required script. The next step starts to affect the end user's computer. This is where the Remote comes into Remote Wipe a Computer. We are going to use the command test-connection and ping the computer twice.
if (Test-Connection -ComputerName $Computer -Count 2 -Quiet) {
    #It was tested
}
If the computer is present, we attempt to copy the script over. We force the copy to overwrite anything with the same name. Finally, we use the local psexec to trigger powershell as the system. We use the -s for psexec to trigger the file that is on the remote computer that we copied. I want the output on my local screen of the psexec command. This is what we trigger it with the & instead of a start-process. Now, could you use the start process, yes, in fact, it would be quicker since you can set it as a job and put the PC name as the job, but you do lose the output information from psexec. So, if there is a problem, you wouldn't know.
At this point, the computer will take a few seconds, and the reset process would start. After that, everything you will need to do will require a hand on the machine. So have fun and use wisely. Also, the script inside the script can be ran by other products like Continuum, ninja, pdq and more.
There has been a few times where I have needed to enable Remote Desktop Protocal on Remote computers. So, I built out a simple but powerful tool to help me with just this. It uses the Invoke-Command command to enable the RDP. So, lets dig in.
The Script - Enable RDP on a Remote Computer
function Enable-SHDComputerRDP {
    <#
    .SYNOPSIS
        Enables target computer's RDP
    .DESCRIPTION
        Enables taget Computer's RDP
    .PARAMETER Computername
        [String[]] - Target Computers you wish to enable RDP on.
    .PARAMETER Credential
        Optional credentials switch that allows you to use another credential.
    .EXAMPLE
        Enable-SHDComputerRDP -computername <computer1>,<computer2> -Credential (Get-credential)

        Enables RDP on computer1 and on computer 2 using the supplied credentials.
    .EXAMPLE
        Enable-SHDComputerRDP -computername <computer1>,<computer2>

        Enables RDP on computer1 and on computer 2 using the current credentials.
    .OUTPUTS
        [None]
    .NOTES
        Author: David Bolding
    .LINK
        https://therandomadmin.com
    #>
    [cmdletbinding()]
    param (
        [Parameter(
            ValueFromPipeline = $True,
            ValueFromPipelineByPropertyName = $True,
            HelpMessage = "Provide the target hostname",
            Mandatory = $true)][Alias('Hostname', 'cn')][String[]]$Computername,
        [Parameter(HelpMessage = "Allows for custom Credential.")][System.Management.Automation.PSCredential]$Credential
    )
    $parameters = @{
        ComputerName = $ComputerName
        ScriptBlock  = {
            Enable-NetFirewallRule -DisplayGroup 'Remote Desktop'
            Set-ItemProperty ‘HKLM:\SYSTEM\CurrentControlSet\Control\Terminal Server\‘ -Name “fDenyTSConnections” -Value 0
            Set-ItemProperty ‘HKLM:\SYSTEM\CurrentControlSet\Control\Terminal Server\WinStations\RDP-Tcp\‘ -Name “UserAuthentication” -Value 1
        }
    }
    if ($PSBoundParameters.ContainsKey('Credential')) { $parameters += @{Credential = $Credential } }
    Invoke-Command @parameters
}
The breakdown
Comments/Documentation
The first part of this tool is the in-house Documentation. Here is where you can give an overview, description, parameters, examples, and more. Using the command Get-help will produce the needed information above. On a personal level, I like adding the type inside the parameters. I also like putting the author and date inside the Notes field.
Parameters
We are using two parameters. A computer name parameter and a credential parameter. The ComputerName parameter contains a few parameter flags. The first is the Value from Pipeline flags. This allows us to pipe data to the function. The next is the Value From Pipeline by Property name. This allows us to pass the "ComputerName" Value. Thus we can pull from an excel spreadsheet or a list of computer names. Next, we have the Help Message which is just like it sounds. It's a small help message that can be useful to the end user. Finally, we have the Mandatory flag. As this command is dependent on that input, we need to make this mandatory. The next item in computername is the Alias. This allows us to use other names. In this example, we are using the hostname or the CN. This is just a little something that helps the end user. Finally, we have the type. This is a list of strings which means we can target more than one computer at a time.
The next parameter is the Credential Parameter. This one is unique. The only flag we have here is the Hel message. The type is a little different. The type is a System Management Automation PSCredential. And yes, it's complex. A simple run down is, use Get-Credentials here. This function is designed to be automated with this feature. If you are using a domain admin account, you may not need to use this. However, if you are working on computers in a different domain, and don't have rights, you can trigger this parameter.
Now we need to create the script block that will be used inside the invoke-command. We are going to build out a splat. We build splats with @{}. The Information will be inside here. When we push a splat into a command we need to add each flag from that command that is required. Here we are going to be adding the computer name and script block. The computer name flag is a list of strings for our invoke-command. Thus, we can drop the Computername into the ComputerName. Yeah, that's not confusing. The script block is where the action is.
Let's open up some knowledge. The first thing we need to do is enable the remote desktop firewall rules. This will allow the remote desktop through the firewall.
Now we have created the Parameter, it's time to add credentials when needed. We do this by asking if the parameter credentials was added. This is done through the PSBoundParameters variable. We search the Contains Key method and to see if Credential is set. If it is, Then we add the credentials.
if ($PSBoundParameters.ContainsKey('Credential')) { $parameters += @{Credential = $Credential } }
Finally, we invoke the command. We are using the splat which is the @parameters variable instead of the $parameter.
Invoke-Command @parameters
And that's how you can quickly Enable RDP on a Remote Computer using PowerShell within your domain.
When building out scripts, we must consider different ways they will fail. One of the ways I have seen them fail is through the UAC of a computer. The script needs to be run by an administrator. The question is, How do you check if you are running as an Administrator? Here are the two ways I like doing this check.
The Comment Requires it
Powershell has a handy little feature called #Requires. The idea is simple, you place a #Requires at the top of your script. I suggest looking at the official documentation because there is a lot you can do. As of PowerShell 4, #Requires -RunAsAdministrator is a thing. Having this requirement at the start will tell the shell to fail out.
Powershell Checks
The next method is using PowerShell to check if the current shell is administrator through the security protocols of windows. This method only uses two lines of code to produce a true or false statement. Thus, it's best to keep it inside a function for later use.
function Test-Administrator {
    $user = [Security.Principal.WindowsIdentity]::GetCurrent();
    (New-Object Security.Principal.WindowsPrincipal $user).IsInRole([Security.Principal.WindowsBuiltinRole]::Administrator)
}
The first part is grabbing the current user of the terminal. We store that information and then create a new object. We create a security principal windows Principal object. Here we can check what the user's role was and if it was the built-in administrator role.
There we have it, how to test if a script is running as admin.
Taking it an additional step forward
Let's take this script to the next level by adding a restart in admin mode. The following code can be used to restart any terminal session into admin mode. However, it breaks in vs code.
The first part of this script catches the current process information. Then we pass that information into a new system diagnostic object to find the process start information. Next, we change the arguments to start a file and the current script's name. We also set the verb to runas to trigger a run as administrator call. Then we start the process that we created and close to this current process. Afterward, the script will run as admin.
Now to make this more practical. Add the above code to the Citrix Workspace Installer. Then wrap the script up into an EXE with the PS1toExe program. Finally, add the little script program to your toolbox for future use.
At a previous company, we had to maintain windows updates without WSUS. This caused some unique complexities. Back then, all machines in question were Microsoft Surface Tablets. This means that driver updates were important. Thus, I created a one-liner to update windows. In today's post, we will go over Windows Updates with PowerShell. Using PowerShell allows you to use tools like backstage or scripts to install updates on remote machines quickly. The first part of this post will be how to do it manually and then the final part is oneliners. PSWindowsupdate is the module we will be using.
Warnings
Today's code has the ability to install all windows updates. This includes updates blocked by different software. Thus, reviewing the updates and being confident in what you are updating are essential to success.
The Manual Breakdown
Once you are connected to a machine that you want to do windows updates with PowerShell, start a PowerShell session. Each step from here own will help make a clear and clean method.
Execution Policy
Set-ExecutionPolicy - ExecutionPolicy Bypass
This command allows you to install modules and any other items in PowerShell. The PSWindowsUpdate will require the execution policy to be at least set to bypass. You can learn more about execution policies here. Note, you must be running PowerShell in an evaluated prompt for this code to work.
Nuget
Install-PackageProvider Nuget -Force
After setting the execution policy, we might need to update the package provider. Making a single-line script becomes a challenge because of this. With this knowledge, we want to force an installation of the newest package provider.
The next piece is to install the pswindowsupdate module. This module is the module that does our heavy lifting. Here is where we will need to use the force and confirm flags.
Import PSWindowsUpdate
Import-Module PSWindowsUpdate
Now we have the module. It is time to import the module. Importing a module does not need additional input.
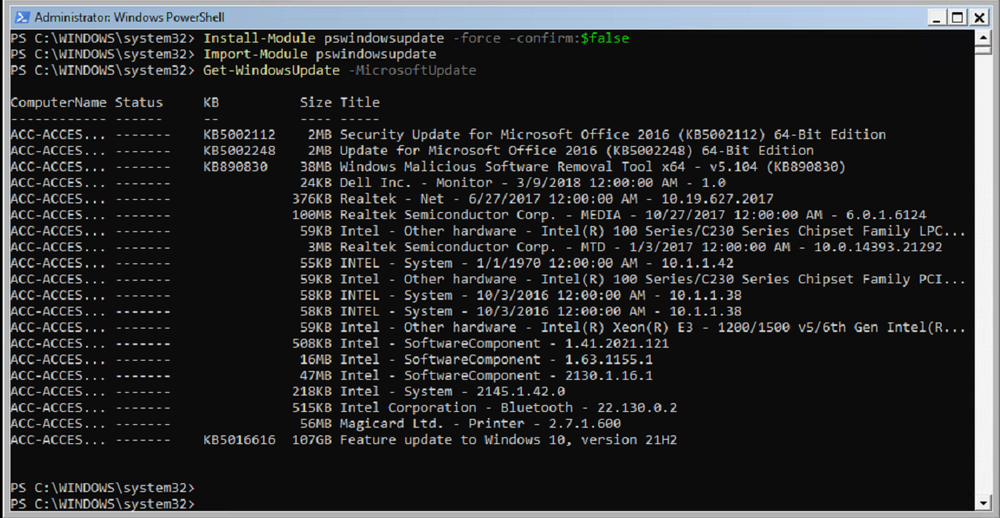
Getting the Windows Update
Get-WindowsUpdate -MicrosoftUpdate
It's time to get the updates.Here is where we grab the KB information. This is where Windows Updates with Powershell Happens. This is where you can find updates to research. It's important to know what you are updating.
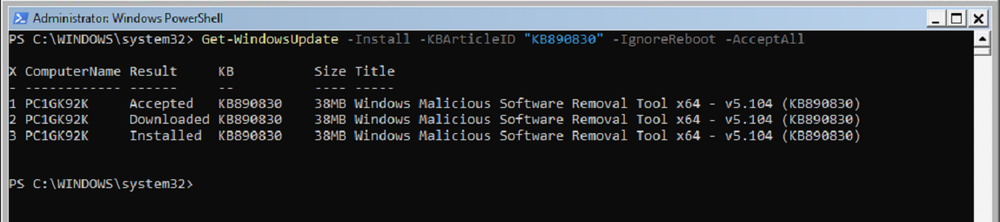
This command will install the KB that you wish without asking any questions. You will see a fancy update process bar during this time.
One-Liner Commands to Install Windows Updates With PowerShell
The following are single-line commands. These commands will install all the updates according to their purpose. The following commands have the ability to break your system. One example of this is the BitLocker update that bricked machines recently. The following command will install all the KB updates.
This command will install all updates on the machine. This includes the KB Microsoft and vendor updates. Please be aware of any dangerous updates that are in the wild. The following command will install those as well.
We use cookies to ensure that we give you the best experience on our website. If you continue to use this site we will assume that you are happy with it.