
by David | Oct 27, 2021 | Exchange, Information Technology, PowerShell
Reading Time: 2 minutes
This past week I have had multiple terminals up with different clients on different terminals connected to different Microsoft services. I quickly realized that I needed to know if I was already connected or not to each Microsoft service. I knew that Get-PPSession was a key to this, but what surprised me was azure and msols didn't have a PPSession to review. I use 4 different connections on a daily basis. The Msol, Exchange Online, Compliance, and Azure AD. Here is how you can quickly test each service to see if it's connected.
Msol Service
With Msol we want to test a command to see if it works. We output that command to null. The command I found to be the quickest for this is Get-MsolDomain. Once we run the command we check to see how successful that command was with $?. I like to put things into arrays for future use. So, I dropped it into a $Results and then present those display those results.
Get-MsolDomain -Erroraction SilentlyContinue | out-null
$Results = $?
$Results
Exchange Online
With Exchange online, we can use the Get-PSSession. We search the connection uri for outlook.office365. We also look at the state to be opened. We then ask if how many sessions there are. if it's greater than 0, then we are good to go. Believe it or not, this is a one-liner.
(Get-PSSession | Where-object { ($_.ConnectionURI -like "*outlook.office365.com*") -and ($_.State -like "Opened")}).count -gt 0
Compliance
With Compliance, it's similar to the exchange online. We are using the Get-PSSession again. This time we are looking for the word compliance and the state open as well. Once again, this can be a one-liner.
(Get-PSSession | where-object { ($_.ConnectionUri -like "*compliance*") -and ($_.State -like "Opened") } ).count -gt 0
Azure AD
Finally, we come to the Azure AD, Just like the Msol, we have to check it using a command. I have seen people use the Get-AzureADTenantDetail commandlet. So we will use that commandlet and pipe it into out-null. Then we confirm if it worked with the $? command.
Get-AzureADTenantDetail -ErrorAction SilentlyContinue | out-null
$Results = $?
$Results
The Function
Let's combine it together into a function.
function Test-SHDo365ServiceConnection {
    <#
    .SYNOPSIS
        Tests to see if you are connected to verious of services.
    .DESCRIPTION
        Tests to see if you are connected to Microsoft Online Services, Exhcange Online, Complience Center, and Azure AD.
    .PARAMETER MsolService
        [switch] - Connects to Microsoft Online Services
    .PARAMETER ExchangeOnline
        [switch] - Connects to Exchange Online
    .PARAMETER Complience
        [switch] - Connects to complience services
    .PARAMETER AzureAD
        [switch] - Connects to azure AD
    .EXAMPLE
        PS> Test-SHDo365ServiceConnection -MsolService
        Gives a trur or False statement on weither connected or not.
    .OUTPUTS
        [pscustomobject]
    .NOTES
        Author: David Bolding

    .LINK
        https://github.com/rndadhdman/PS_Super_Helpdesk
    #>
    [cmdletbinding()]
    param (
        [switch]$MsolService,
        [switch]$ExchangeOnline,
        [Switch]$Complience,
        [switch]$AzureAD
    )
    if ($MsolService) {
        Get-MsolDomain -Erroraction SilentlyContinue | out-null; $Results = $?
        [pscustomobject]@{
            Service   = "MsolService"
            Connected = $Results
        }
    }
    if ($ExchangeOnline) {
        $Results = (Get-PSSession | Where-object { ($_.ConnectionUri -like "*outlook.office365.com*") -and ($_.State -like "Opened")}).count -gt 0
        [pscustomobject]@{
            Service   = "ExchangeOnline"
            Connected = $Results
        }
    }
    if ($Complience) {
        $Results = (Get-PSSession | where-object { ($_.ConnectionUri -like "*compliance*") -and ($_.State -like "Opened") } ).count -gt 0
        [pscustomobject]@{
            Service   = "Complience"
            Connected = $Results
        }
    }
    if ($AzureAD) {
        Get-AzureADTenantDetail -ErrorAction SilentlyContinue | out-null; $Results = $?
        [pscustomobject]@{
            Service   = "AzureAD"
            Connected = $Results
        }
    }
} #Review

by David | Aug 18, 2021 | Exchange, Information Technology, PowerShell
Reading Time: 2 minutes
As part of the exchange online hardening process, one must disable the sign-in ability of shared mailboxes. This process is simple. You will need to exchange Online and the MS Online modules. First, we will grab all the shared mailboxes using the exchange online. Then using the user principal name, we grab the user info from MS Online module. From there we search for each MS user who isn't blocked and set them to be blocked. Finally, we report back on the shared mailboxes that are blocked. Now we have the concept, let us break it down a little more. FYI, this can be done in a single line, but that would make it confusing. So, we will make it into a more functional script. Let us start up our VS code and get started.
First, connect to our need services with connect-exchangeonline and connect-msolservice. We live in the world of MFA, so I will assume you will complete the MFA process for these two commands.
Next, we will grab all the shared mailboxes by filtering the get-mailbox command. We are looking for the Recipient Type Details to be equal to the shared mailbox.
$SharedMailboxes = Get-Mailbox -Filter { recipienttypedetails -eq "SharedMailbox" }
Then we will grab the MS user information from each Shared Mailbox. Once we get the MS user information we only want the user principal name and the block credential.
$Accounts = $SharedMailbox | Get-MsolUser | Select-Object userprincipalname, blockcredential
Now loop through the accounts checking each account to see if the credentials are blocked. If it isn't, aka false, then we set the block credentials to true with set-MsolUser.
if ($Account.blockcredential -eq $False) {
     Set-MsolUser -UserPrincipalName $Account.Userprincipalname -BlockCredential $true
 }
Next, we confirm every shared mailbox is set to true for blocking credentials. We are basically repeating the above command again as a single line. We use Get-Mailbox with the filter for the recipient type details to be equal shared mailbox. Pipe that into Get-MsolUser and then select the user principal name and block credentials.
Get-Mailbox -Filter { recipienttypedetails -eq "SharedMailbox" } | Get-MsolUser | Select-Object userprincipalname, blockcredential
Finally, we use our disconnects to disconnect from exchange and MS online. Let's combine it all together and see how the script unfolds.
The Script
Connect-ExchangeOnline
Connect-MsolService
$SharedMailboxes = Get-Mailbox -Filter { recipienttypedetails -eq "SharedMailbox" }
Foreach ($SharedMailbox in $SharedMailboxes) {
     $Accounts = $SharedMailbox | Get-MsolUser | Select-Object userprincipalname, blockcredential
     foreach ($Account in $Accounts) {
          if ($Account.blockcredential -eq $False) {
                    Write-Host "Blocking $($Account.Userprincipalname)"
                    Set-MsolUser -UserPrincipalName $Account.Userprincipalname -BlockCredential $true
          }
     }
}
Get-Mailbox -Filter { recipienttypedetails -eq "SharedMailbox" } | Get-MsolUser | Select-Object userprincipalname, blockcredential

Disconnect-ExchangeOnline
Get-PSSession | Remove-PSSession -Confirm:$false

by David | Jun 21, 2021 | Exchange, Information Technology, PowerShell, Resources
Reading Time: 4 minutes
Here is a little powerhouse script I wrote to audit the mailbox sizes. The focus recently is to see who's mailbox sizes are about to be over and if it's the deleted folder. I can't show you all of the scripts, but I can show you part of it. This part will pull the data down in such a way that you can view the mailbox sizes, who has the largest mailboxes, what folder is the largest in those mailboxes, and what their deleted folder is sitting at. Let us take a look at the script itself.
The Script
function Get-SHDEXOMailboxSizeAudit {
    [cmdletbinding()]
    param (
        [pscredential]$Credential
    )
    Begin {

        #Installs required modules
        Write-Verbose "Installing required modules"
        if (!(Get-InstallEdModule ExchangeOnlineManagement)) { Install-Module ExchangeOnlineManagement }

        Write-Verbose "Checking and importing required modules"
        # Starts importanting required modules
        if (!(Get-Command Connect-ExchangeOnline)) { Import-Module ExchangeOnlineManagement }

    }
    process {

        #Connecting to exchange. Grabing credentials.
        if (!($PSBoundParameters.ContainsKey('Credential'))) {
            $Credential = (Get-Credential)
        }
        Connect-ExchangeOnline -credential $Credential

        #Grabs all the mailboxes at once. As this report will look at all the mailboxes.
        $Mailboxes = Get-Mailbox

        #Starts looping through each mailbox
        For ($M = 0; $M -le $Mailboxes.count; $M++) {

            Write-Verbose "Gathering Info on: $($Mailboxes[$M].UserPrincipalName)"

            #Grabs the mailbox stats.
            $Stats = Get-EXOMailboxStatistics $mailboxes[$M].UserPrincipalName
            $FolderStats = Get-EXOMailboxFolderStatistics $mailboxes[$M].UserPrincipalName

            #Starts looping through those folders to get their sizes.
            $MainFolderStats = foreach ($Folder in $FolderStats) {
                $FolderSize = [math]::Round((($Folder.FolderSize.split('(')[1].split(' ')[0] -replace ',', '') / 1gb), 2)
                [pscustomobject]@{
                    Name = $Folder.name
                    Size = $FolderSize
                }
            }

            #Adds this information to the mailbox object
            $Mailboxes[$M] | add-member -Name "Statistics" -MemberType NoteProperty -Value $Stats
            $Mailboxes[$M] | add-member -Name "FolderStats" -MemberType NoteProperty -Value $MainFolderStats
        }

        #Creates a return value.
        $Return = foreach ($Mail in $Mailboxes) {

            #Starts looking at mailboxes that are not the discovery mailbox.
            if (!($mail.UserPrincipalName -like "DiscoverySearchMailbox*")) {

                #Grabs the deleted folder as that is a folder we want to see in this report.
                $Deleted = $Mail.FolderStats | where-object { $_.name -like "Deleted Items" }

                #Grabs the largest folder. If  it's not the deleted folder, then we might want to increase their mailbox sizes.
                $LargestFolder = $Mail.FolderStats | Sort-Object Size -Descending | select-object -first 1

                #Doing some math on a string. The string format (# bytes). Thus, we work the string to get the bytes. Divide and round.
                $Size = [math]::Round(($Mail.Statistics.TotalItemSize.value.tostring().split('(')[1].split(' ')[0].replace(',', '') / 1gb), 2)

                #Grabs the mailboxes percentage.
                $DeletedToMailboxPercent = [math]::Round((($Deleted.Size / $size) * 100), 0)

                #Outputs the data to the return value.
                [pscustomobject]@{
                    DisplayName             = $Mail.Displayname
                    UserPrincipalName       = $Mail.UserPrincipalName
                    MailboxSize             = $Size
                    LargetsFolder           = $LargestFolder.Name
                    LargetsFolderSize       = $LargestFolder.Size
                    DeletedItemSize         = $Deleted.Size
                    DeletedToMailboxPercent = $DeletedToMailboxPercent
                }
            }
        }

        #Disconnects exchange
        Disconnect-ExchangeOnline -confirm:$false > $null
    }
    End {
        $Return | sort-object MailboxSize -Descending
    }
}
The breakdown
First this script is designed to work on powershell 7. It will not work on powershell 5.
The first part we come to is the [pscredential] object. Notice it's not mandatory. Notice no pipelining either. I have found PS credentials pipped intend to do very poorly. So, it's simple, bam wam done.
Begin
Inside our begin tab, we have the module setup. We check installed modules for exchangeonlinemanagement. if it's there, we ignore it and import the module, if it's not we install it. Same way with importing. If it's imported, then we do nothing, if it's not, we import it.
Process
Next, we grab credentials if need be and connect to exchange. We use the get-credential command to grab the credentials. Then we use the connect-exchangeonline command to connect to the exchange online.
Once we are connected, the magic can start. This is the sweetness of this script. The first step is to grab all of the mailboxes at once with Get-Mailbox. Then we start a loop, not any loop, a for a loop. Wait! David, WHY A FOR LOOP! It's simple, we want to add information to the index. So, we need to be able to call the index. We use the Get-EXOMailboxStatistics and choose the userprincipalname of the index we are looking for. We do the same thing with Get-EXOMailboxFolderStatistics. These gives us some clear stats we can use later on in the script. Now we loop through the folder stats that we just collected and math ourselves some bytes to gb. See the output of the get-exomailboxfolderstatistics looks like "24mb (#### bytes). So we need to filter that out and get the ####. I use a split to do this. I split out the string at the '('. This way, the bytes are on object 1. Then we split it again by the space. Now the bytes are on the 0 object. Then we replace the ',' with nothing. Now we divide all that by 1gb to convert it to gbs. Then we drop that all into the mainfolderstats. Next, we add all of that information into the mailbox variable we created before this looping madness using add-member. We are adding it as a noteproperty.
Now we have prepped our data, it's time to sort it. We start the loop once more, but this time it's simple for each loop as we don't need the array index value. We first grab all the deleted items folder. Then we grab the largest folder using the sort-object command on the size object of the folderstats note property that we made in the last step. Then we do some math. Like before to get the mailbox overall size. Finally, we grab the deleted mailbox percentage with a little more math. This time its percentage math. Now we have all of this useful information we use our pscustomobject and put it all together.
Then we disconnect using the disconnect-exchangeonline command.
End
Finally we display the return information inside our end tab. We sort the object by the mailbox size in a descending order.

by David | Apr 9, 2021 | Exchange, Information Technology
Reading Time: 4 minutes
As I have been in IT, i have seen more than one way to handle emails after a user has left, both on-prem and off prem. This setup is for office 365/exchange online.
Shared Mailboxes And Forwarder
Overview
This method is based on a variation of how Microsoft suggests doing it with Office 365. But it doesn't limit the amount of time required. The Basic Idea is to convert a mailbox from a standard user to a shared mailbox. Then Grant the user who needs access to the mailbox access. This way they can go into the OWA and access past emails.
Details
There are hundreds of documents out there showing you how to do this, It's not a hard process at all. Why not another!
- Log into the O365 client using either your user/exchange admin or global admin account.
- Click the Admin Center button.
-

- Next, Click the Exchange Admin Button at the bottom left-hand side of the screen.
-
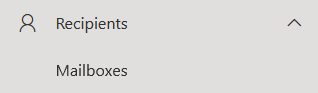
- Now you are in the Exchange Admin Center. If you are familiar to exchange on-prem, it doesn't look anything like that but has similar flows. Click the recipient button on the left.
- Click the Mailbox button.
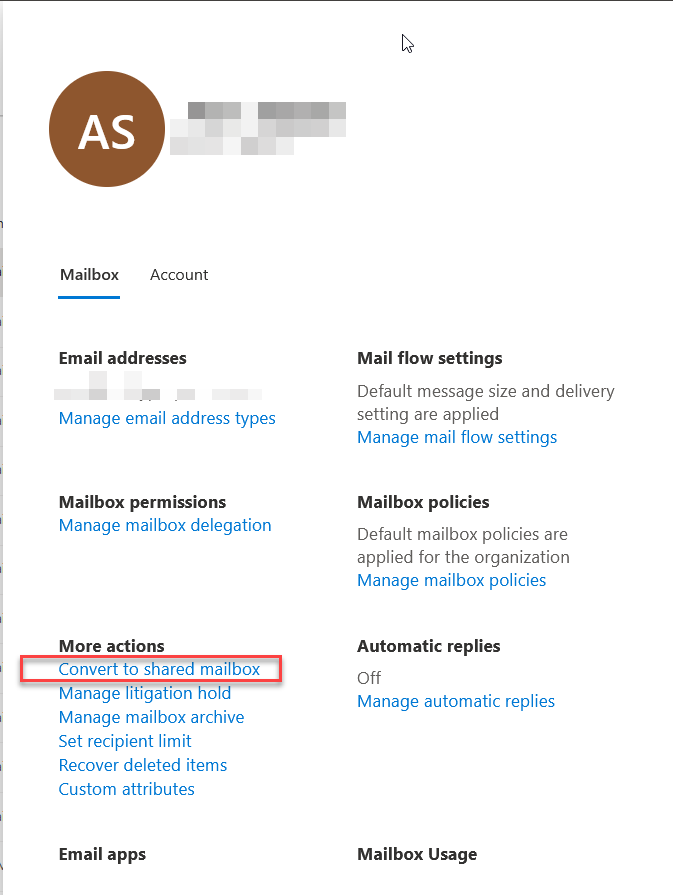
- Search for the user you wish to edit and click on the user. The user menu will appear on the right.
- Click the Convert to shared mailbox option.
- The next screen will want you to confirm this action. Do so by clicking confirm.
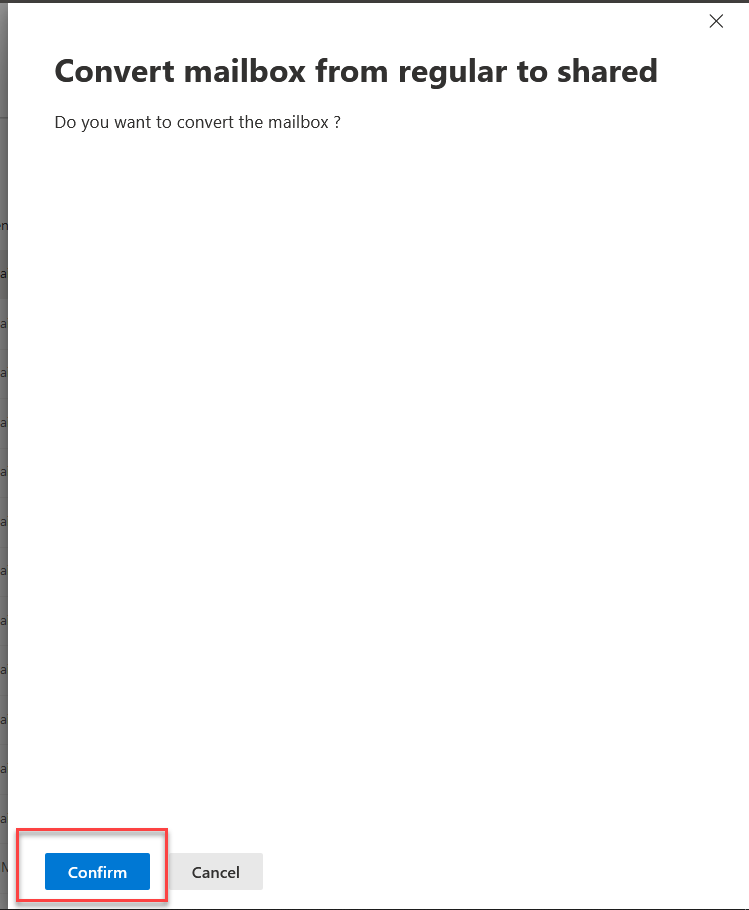
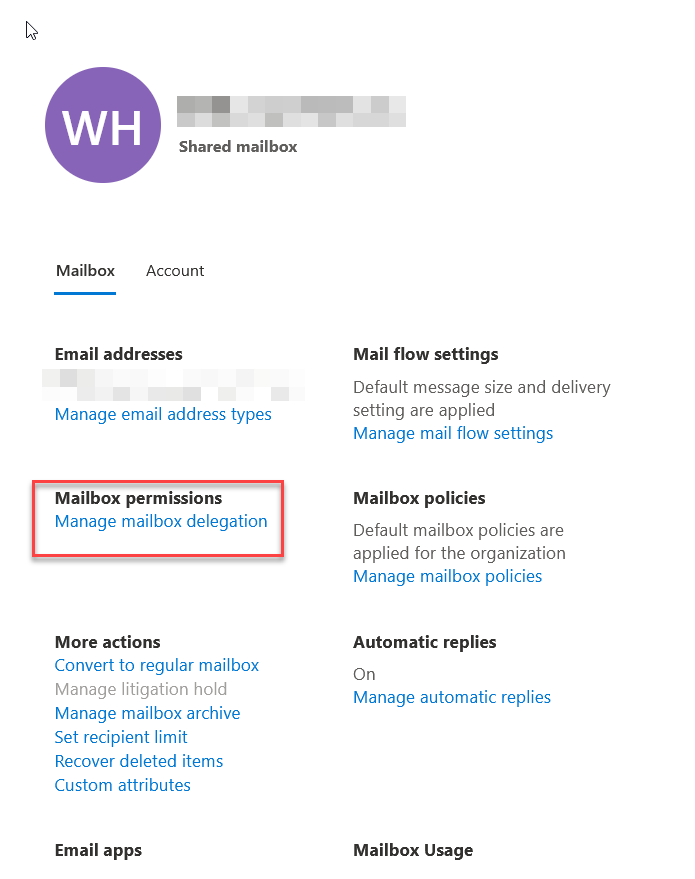
- Exchange Online will convert this mailbox into a shared mailbox. It can take up to 30 minutes from my experience for this to happen. Once the mailbox is converted, the user plane will change and say shared mailbox.
- Once the mailbox is a shared mailbox, indicated by saying shared mailbox under the display name. We need to grant permissions. To do that we click the Manage Mailbox delegation.
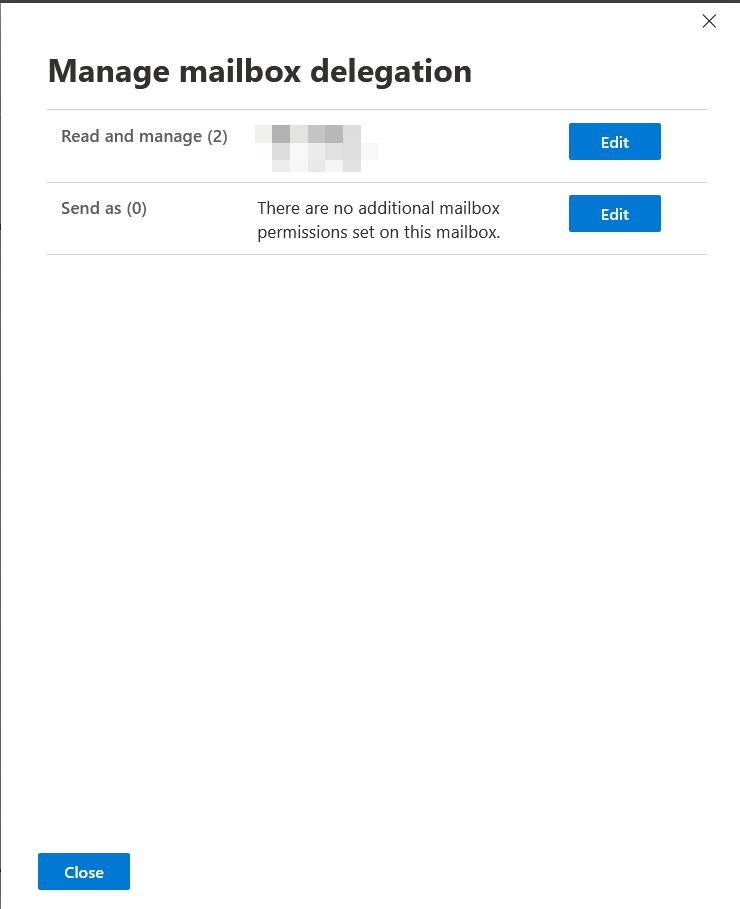
- Once in here, click the edit button for the read and manage option. I have never seen someone use the send as an option for former employees, but I have seen it for something like the marketing mailbox at a larger company.
- Here you have two options, You can either type out the name, or click the add permissions button and search that way. The add permissions button list all of the users in the company, while the search box just searches by display name or email address.
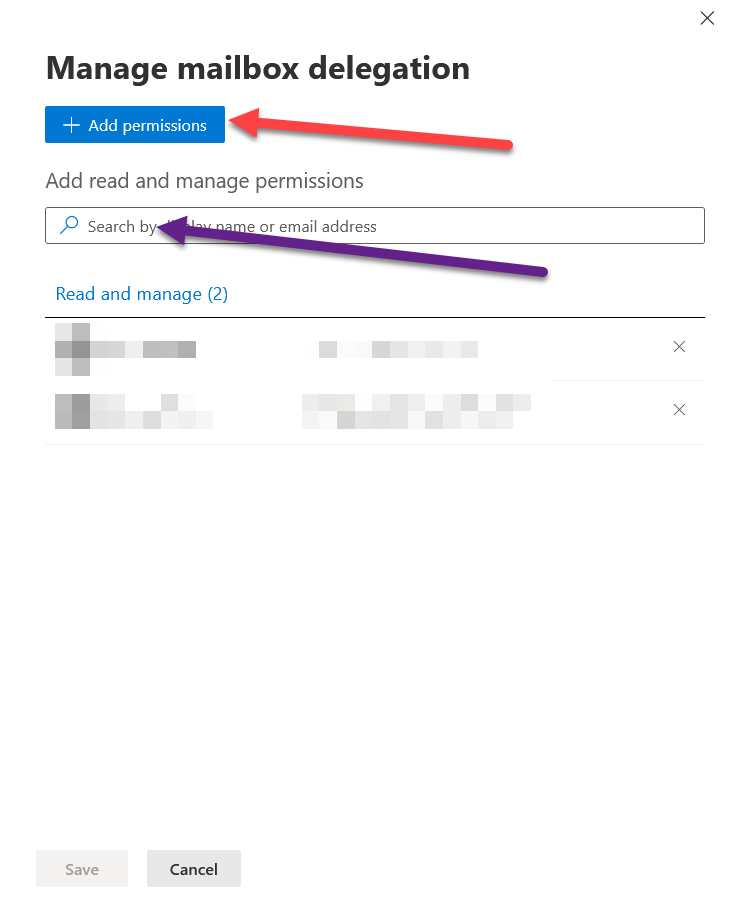
- Make sure you are clicking save with each change or it will not be changed.
- Add the permissions accordingly and click save.
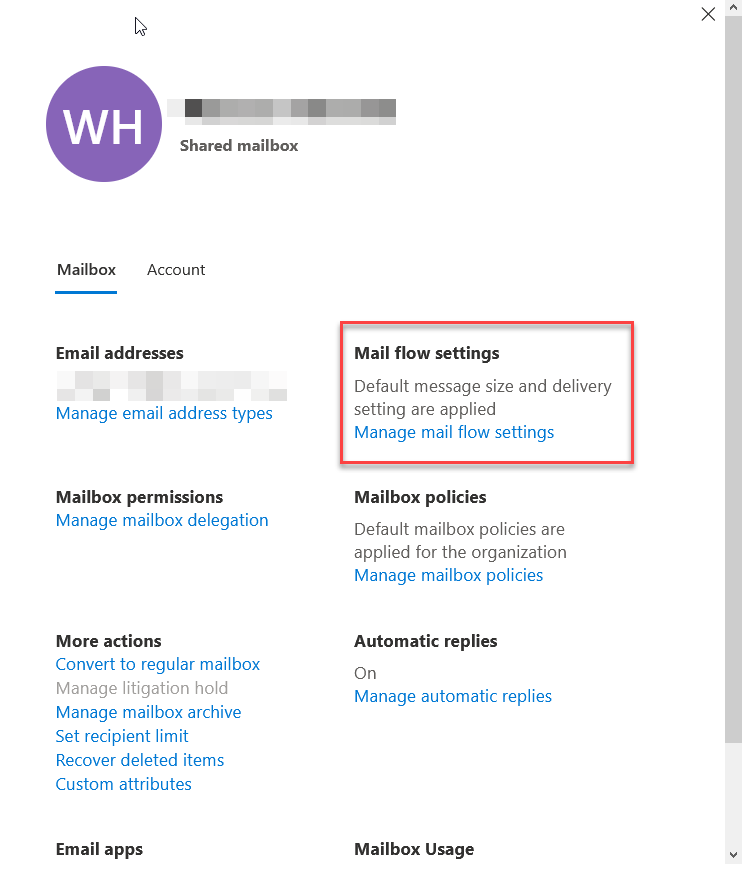
- Now we must set the forwarder. Click Manage Mailflow settings.
- Click the edit button for Email forwarding.

- Next, toggle button the Forward all emails sent to this mailbox
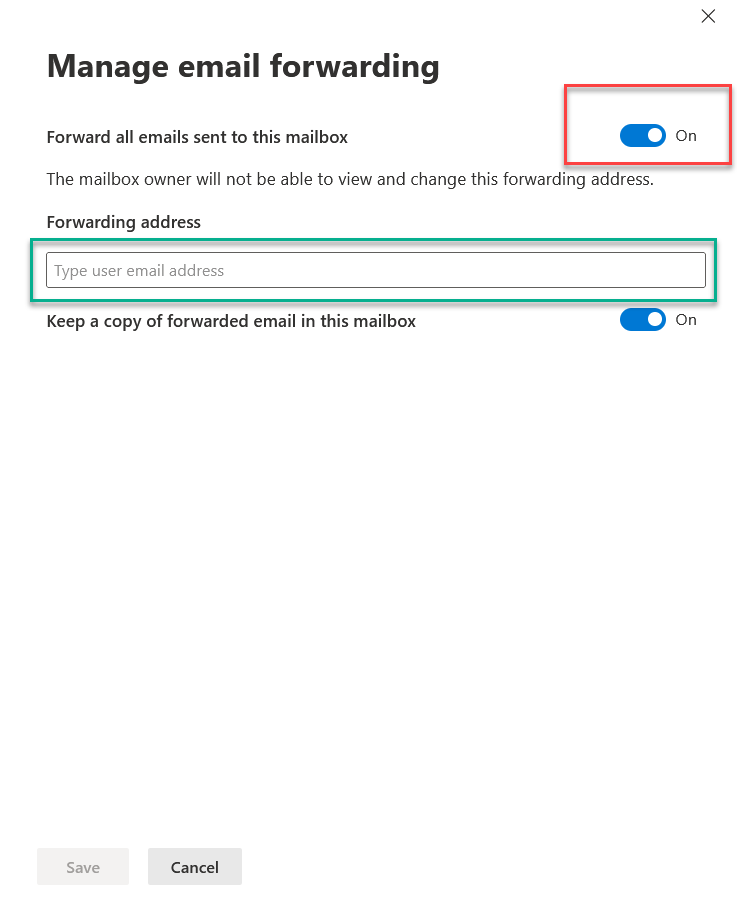
- The search box will appear. Search for the user and click add.
- Click Save.
Pros
- Previous emails are saved.
- Can have multiple people accessing the box together through delegations.
- Can set send as to mimic the previous employee's presence.
- Can set strict permissions to who and what can see what.
- Saves a license.
- Simple and industry standard.
- Forwarder set.
Cons
- Forwards to the single user, not multiple users.
- Set and forget. Often times you will end up with a large number of these boxes and will need to routinely clear them out.
- Mobile apps tend to have issues with shared mailboxes.
Use Case
As this is industry standard, it's very userful. A user leaves, convert the mailbox to a shared. It no longer has a password to worry about. Your users can gain direct access to the mailbox with outlook, or OWA.
Scripted Way
That's right every way can be scripted. Here is the script for this method.
$Username = Read-Host "Please enter the username of the employee"
$Delegets = Read-Host "Please Enter the name of the delegate"
set-mailbox $Username -Type Shared
Add-MailboxPermission -Identity "$Username" -User $Delegets -AccessRights FullAccess -InheritanceType All
