

Microsoft Graph API
Reading Time: 6 minutesBack in November Microsoft released v1.0 of graph API. Along with it is a large library of documentation. I have been hesitant about making a blog post about Graph for a while because the community seemed to be split on how PowerShell should interact with it. Now the dust is settling, I want to show you how I have worked with Graph API. This method allows for use without any modules. This means it translates to other apps as power automate. My approach is designed for security and separation of duty. However, it's a long-winded process. In the next few blog posts, I will go over the Employee Directory Graph API I created for another company. The first step is to create a registered app. This post will go through the process of creating the App both manually and PowerShell.
Create an Azure App - Manual
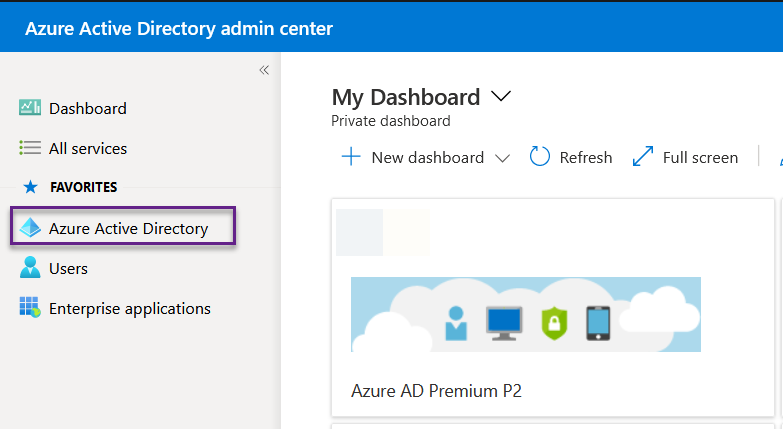
The first step is to log into your Azure tenant. Then click on the Azure Active Directory on the left-hand side.
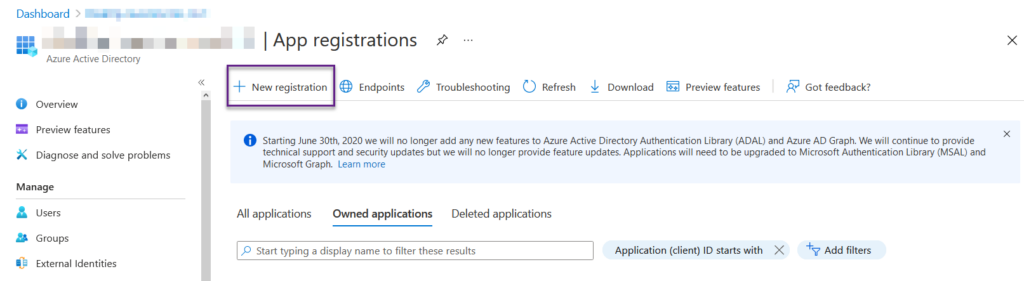
Then on the left-hand side, Click the App Registrations. You will be greeted by the owned applications. All manually added. If you add an app via PowerShell it will show up under all applications. Now click the New registration button.
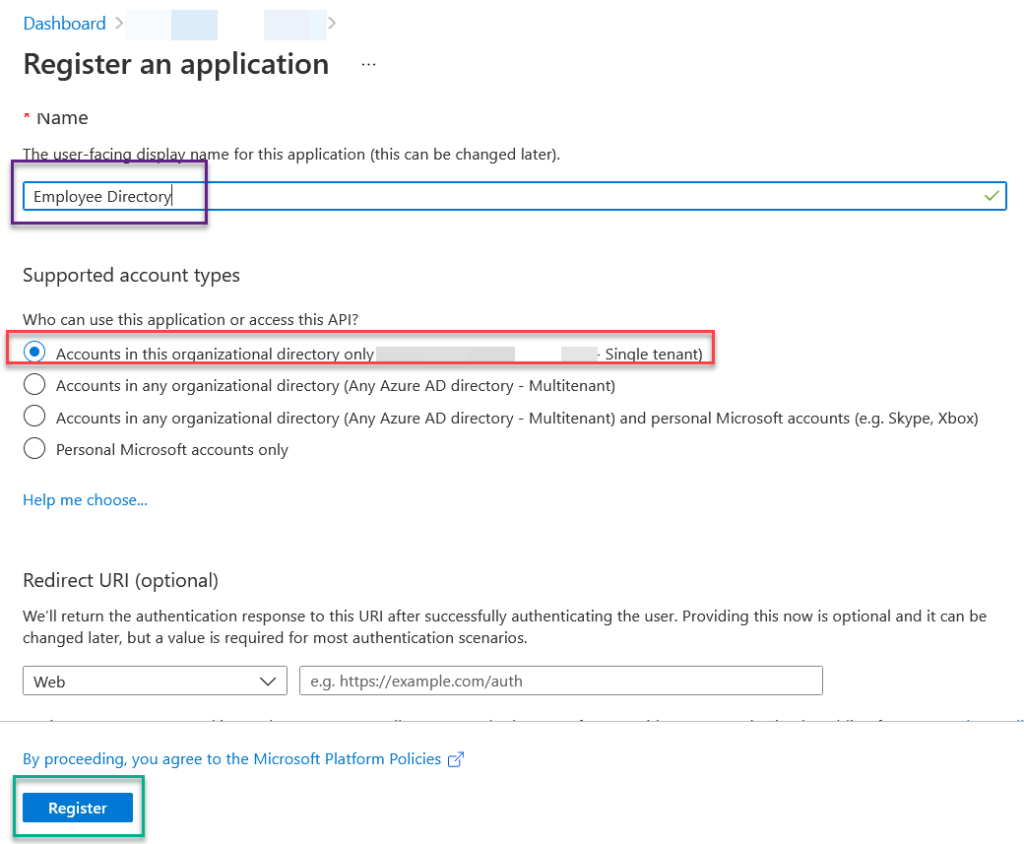
Inside the Register An Application window, we will fill in the Name of the application. This is where you will select the supported account type. The way I do it is client by client. This the client owns the application. I don't want the application to pull data from a different client. So, I radio check the "Account in this organizational directory only **** - single tenant. Then I click register.
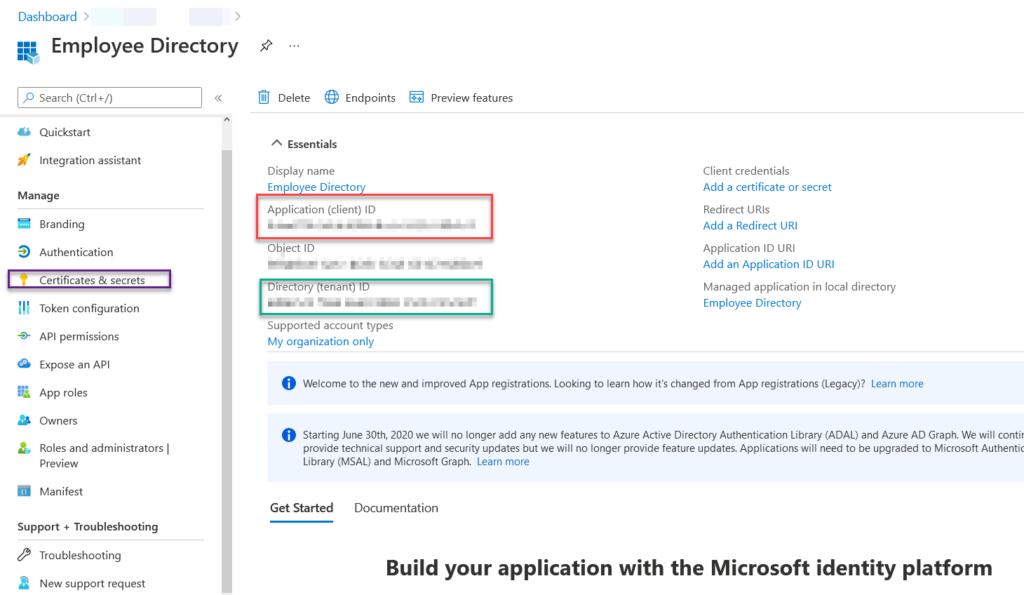
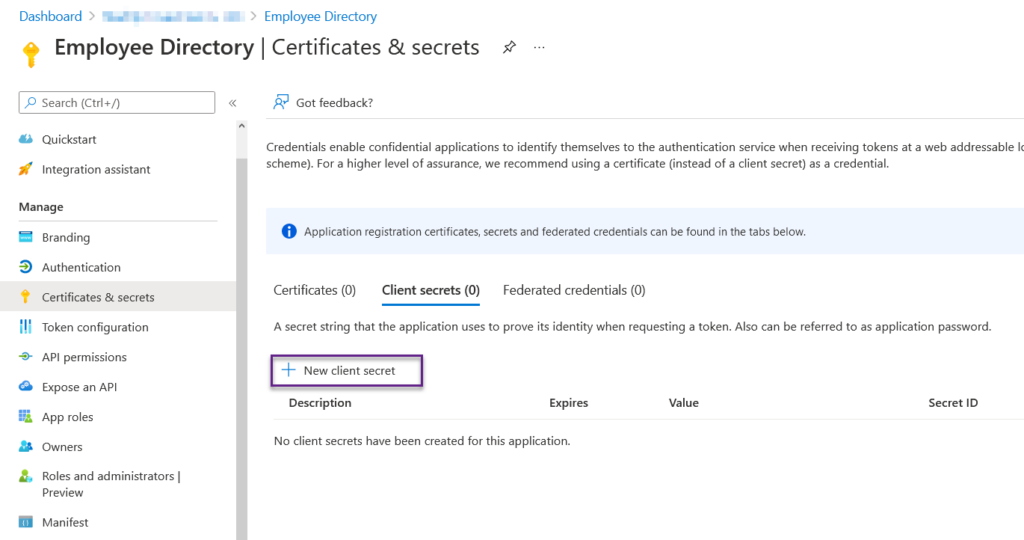
After you click register, you will be brought to the application page. Here you want to gather some pieces of information and document them. You will want the Application ID and the Directory ID. Next, we will click the Certificate and Secrets on the left-hand side.
In the certificates and secrets screen, we want to click the New Client Secret. The reason we are doing this is that we want security. This will create that security. Without the key this generates others will not be able to access this application remotely.
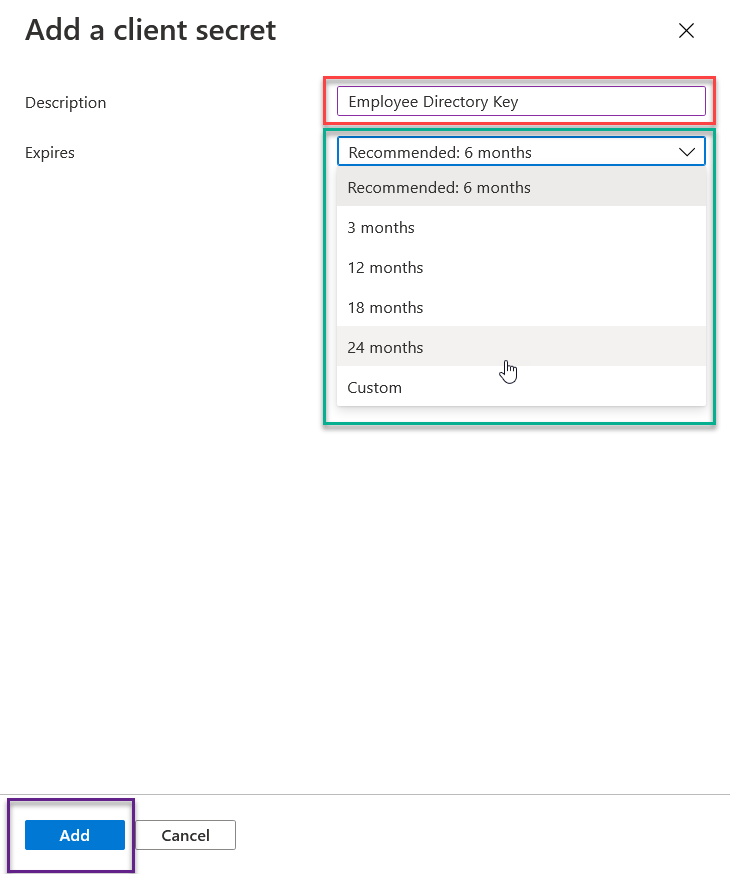
What I like to do at this point is create the key with the Application name and the word Key. In this example, we are using Employee Directory Key. The maximum time span you can select is 24 months, aka 2 years. This means in 2 years, you will have to regenerate a key and update your applications accordingly. Once you select the time span you want this key to live, click add.
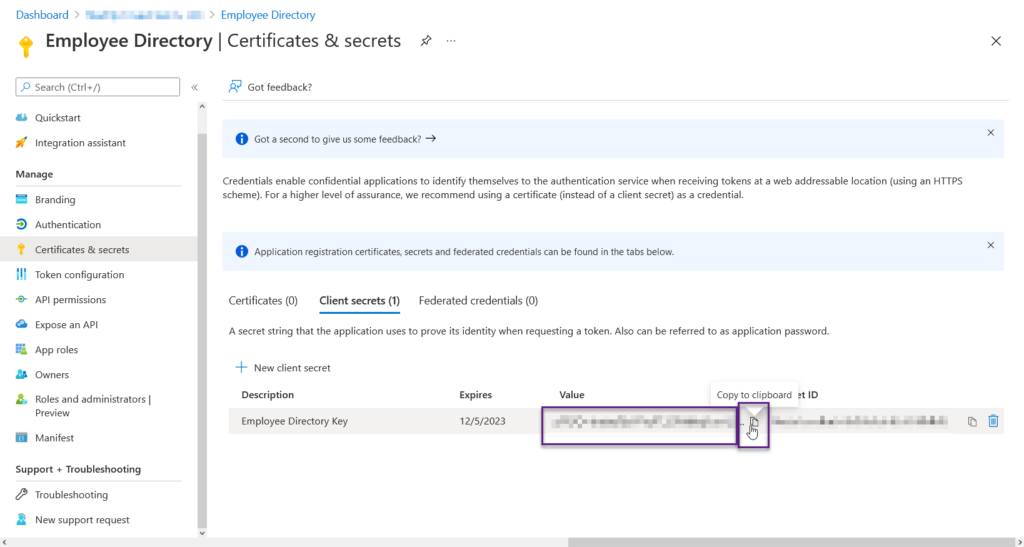
Now you have the Key created, this is the ONE AND ONLY CHANCE to grab the key value. After this there is no way that I am aware of that you can grab that key. So make sure you click the copy to clipboard button and store it somewhere safe. Best to be in the same location as the application ID and the Tenant ID.
Now you have created an Azure Registered Application manually, let us look at how to do it with PowerShell.
Create an Azure App - PowerShell
The Powershell process for this is much faster and less prone to human errors.
Connect-AzureAD
$AppName = (Read-Host -Prompt "Applicaiton Name")
$azureADAppReg = New-AzureADApplication -DisplayName $AppName -AvailableToOtherTenants $false
$start = (Get-Date)
$end = (Get-Date).AddYears(2)
$Info = New-AzureADApplicationPasswordCredential -CustomKeyIdentifier "($AppName) Key" -ObjectId $azureADAppReg.ObjectId -EndDate $end -StartDate $start
[pscustomobject]@{
    AppName  = $appname
    AppID    = $azureADAppReg.AppID
    Keyname  = "$Appname Key"
    KeyValue = $Info.Value
}
Disconnect-AzureAD
First we connect to Azure AD using the Connect-AzureAD commandlet. Then we grab the name of the application from the user with the read-host commandlet. Then we create the application using the New-azureadapplication command. We give it the name of the application we want. And we say it's not available to other tenants. Make sure you place the return info into a variable to be used later. This will produce your app ID and object ID.
Next we setup the date and times for a year by creating a start and end time with get-date commands. We will use those two dates to create the secret key. The commandlet is new-azureadapplicationpasswordcredential. The Custom Key Identifier will be the application name plus the word key. We reference the Object ID from the previous azure command for the object ID. We tell it the end date and the start dates. This will produce the secret key. So make sure once again to put that invariable.
Next, we create a custom ps object to display our information. For the App name its the app name. For the AppID we want the first commands appid. For the key name, we use the app name and the word key. Finally, for the key-value, we use the second azure command value output.
Finally, we disconnect from azure AD with the command Disconnect-AzureAd.
Assign Graph API Permissions
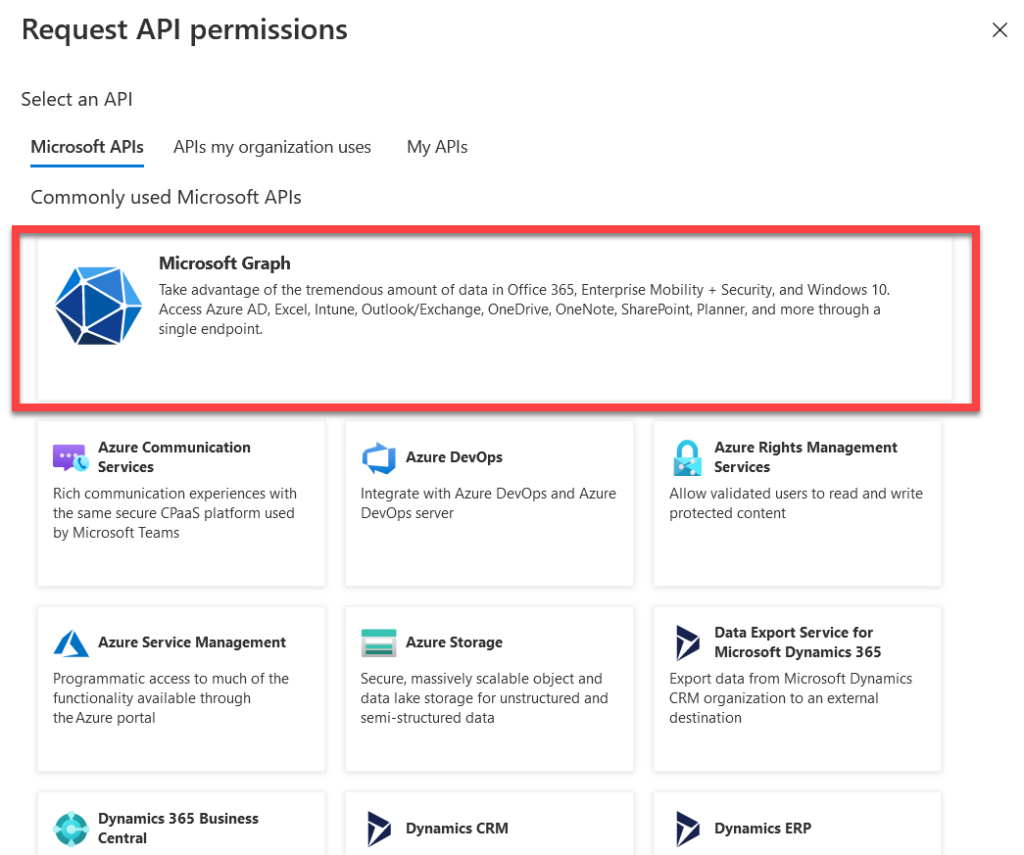
Sadly, I have not found a PowerShell method to add graph API permissions. The reason I believe this is the case is because of the nature of these permissions. They must have consent. Basically, you have to click the button manually. So let us add the user.read.all permissions to our employee directory application. Go to the application in your tenant. On the left-hand side, click the API permissions button. Then click Add Permissions
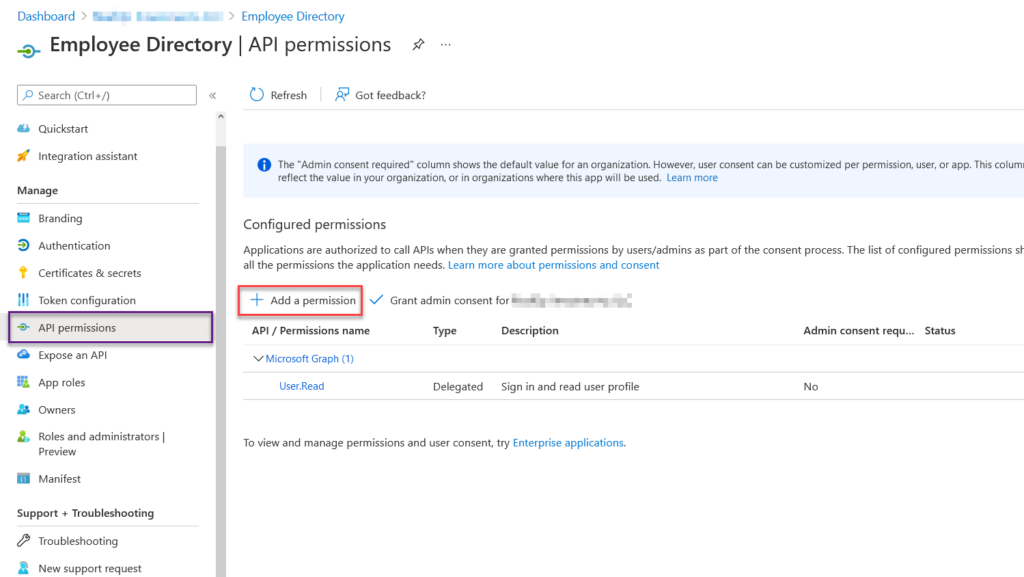
The type of application permissions will appear. You will want to search out Graph API and click on it. Luckily it's the first item on the list.
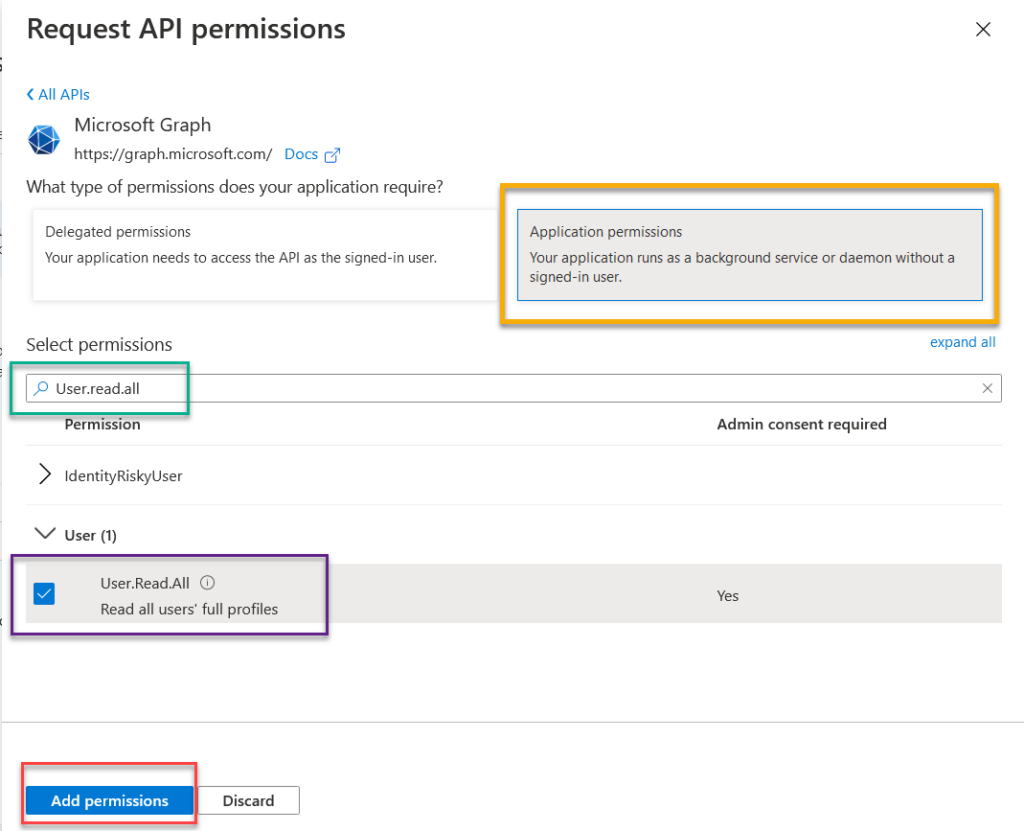
Once you click the Microsoft Graph permissions button. You will be greeted with a choice of Delegated Permissions or Application Permissions. Delegated permissions require a user to sign in to the account for the application to run. The Application permissions do not. If you want this to be an automated process, select application. Under select permissions search out the User.Read.All. This will allow the application to read user information like phone numbers, addresses, usernames, etc. It doesn't give permissions to read emails or anything else like that. Check the box for the permissions you want and click Add permissions.
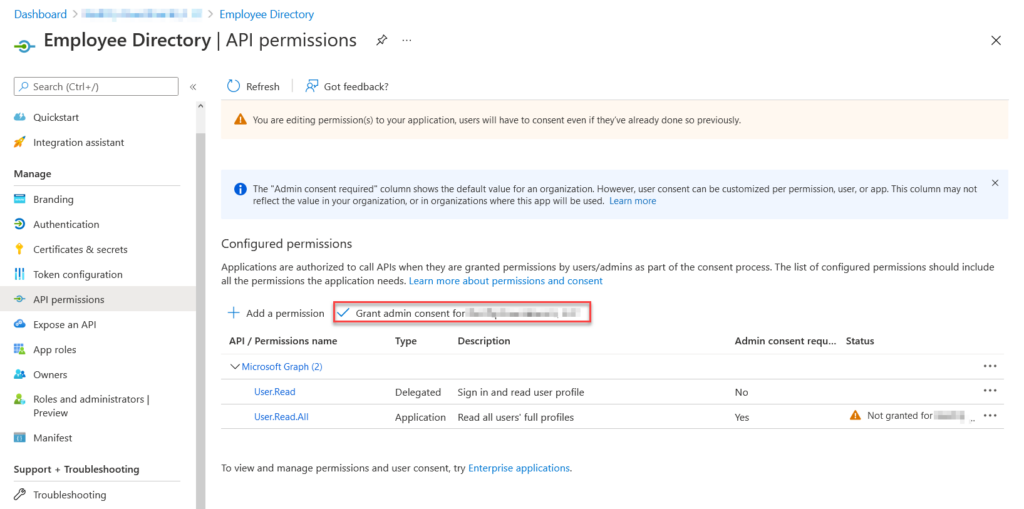
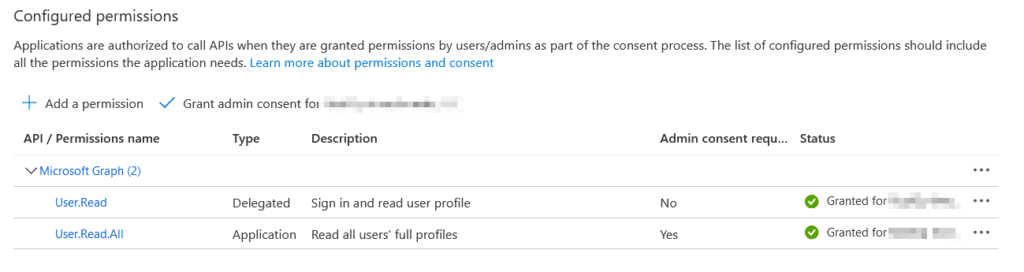
Once you add the permissions you will notice under the status, "Not Granted for". This means the application can't use those permissions yet. You will need to click Grant admin consent for... to add the permissions. Once you click that button, you will be prompted with a confirm, just click the confirm to allow access. Once you allow access, the status will turn green and you will be ready to go.
Now we have granted access, we are free to create with the application. Stay tuned for next week.