

Next Cloud – Download Files
Reading Time: 4 minutesIn the last blog, I talked about how to upload to your next cloud’s file drop, aka upload only, password-protected folder. This time we will go over how to download from a password-protected folder. Let’s go over how to share out a file with a secure password.
Password-Locked Single File
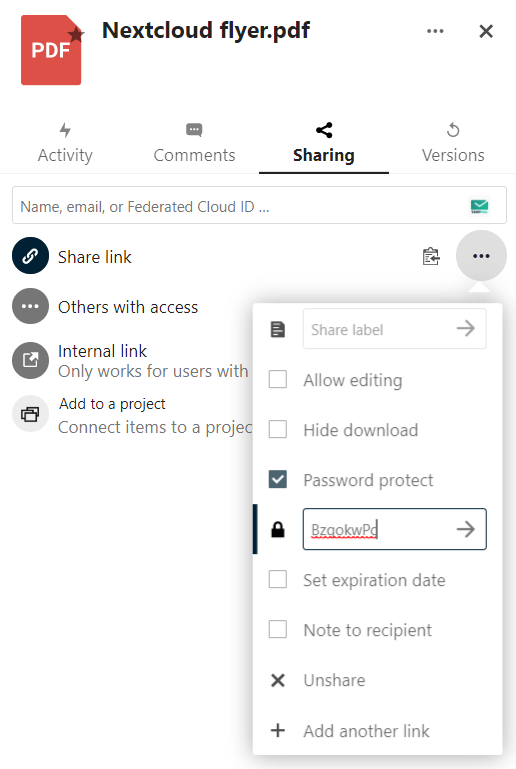
- Navigate to the file you wish to share out.
- Click on the file in question.
- Click the share link + symbol.
- Checkbox the “Password Protect”
- Enter a new secure password.
- Document the password!
- Click the Arrow to set the password
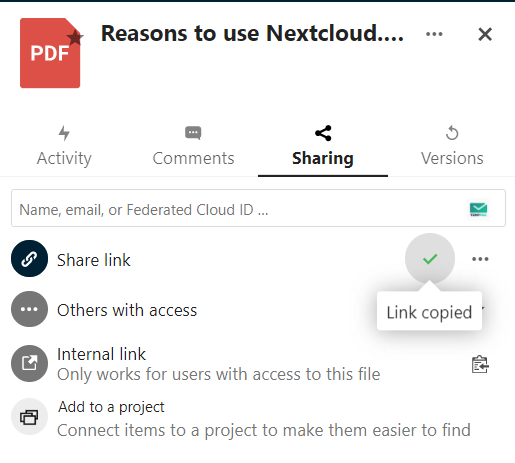
- click the Clipboard to copy the link.
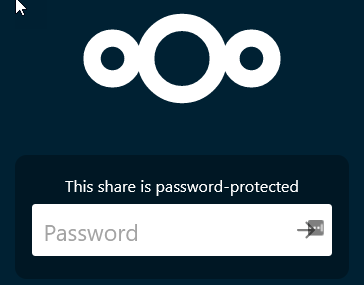
- In another browser, navigate to the link to make sure it works.

Now we have the File shared, it’s time to download it.
- The share ID
- The Share Password
- The URL of the nextcloud site.
- The file name/location of where you will save the file.
Now you have those pieces of information, you can start the process of creating the header. Let’s look at the Variables first.
$NextCloudURL = "https://cloud.bolding.us/"
$ShareID = "XXXxxxxXXxxXXxXX"
$SharePassword = "hotCXxxxx47"
$Filename = "jre-8u301-windows-i586.exe"
Now we have the variables, it’s time to build the headers for our invoke-restmethod.
$Header = @{
    "Authorization" = "Basic "+[System.Convert]::ToBase64String([System.Text.Encoding]::UTF8.GetBytes("$($ShareID):$($SharePassword)"));
    "X-Requested-With"="XMLHttpRequest";
}
Just like in the last bl
The Authorization type is going to be basic. We are going to convert the shareid and the sharepassword into the UTF8 so our nextcloud can understand it. We want all that as a base 64. So we create the string with “$($ShareID):$($SharePassword)” and push that into our System.Text.Encoding UTF8. Using the method GetByes. All that is then put into the System.Convert base of 64 string, aka password.
Next, we tell the site what we are requesting, we are requesting the XML HTTP request. Next, we will create the URL that will be used by the rest method.
$URL = "$($NextCloudURL)public.php/webdav"
Now we create the invoke-restmethod to download the file in question.
Invoke-RestMethod -Uri $URL -Headers $Header -OutFile c:\temp\$Filename
The Script
$NextCloudURL = "https://cloud.bolding.us/"
$ShareID = "XXXxxxxXXxxXXxXX"
$SharePassword = "hotCXxxxx47"
$Filename = "jre-8u301-windows-i586.exe"
$Header = @{
    "Authorization" = "Basic "+[System.Convert]::ToBase64String([System.Text.Encoding]::UTF8.GetBytes("$($ShareID):$($SharePassword)"));
    "X-Requested-With"="XMLHttpRequest";
}
$URL = "$($NextCloudURL)public.php/webdav"
Invoke-RestMethod -Uri $URL -Headers $Header -OutFile c:\temp\$Filename
Non-Password Locked Single File
Now that we covered password locked, it’s time to look at the non-password locked. This is a single line item. Like above, just don’t create a password. Copy the URL.
- Navigate to the file that you wish to share
- clickt he share icon
- Click the share link +
- Copy the Link
This is a single-line command. The copied item will be the URL/shareID. If you place a /download at the end, it will download accordingly. Nice right. Its even nicer with PowerShell.
The Script
Invoke-WebRequest -Uri "https://cloud.bolding.us/index.php/s/XxXXXXxxxxXXXxX/download" -OutFile c:\temp\somefile.pdf
That’s it! A simple invoke-webrequest. Now, let’s take it to a different level.
Download a single file from a shared Folder
If you share out a single folder, you can download the files directly from that folder if you know those file names, even if the file isn’t shared itself. Standard information is required. First, let’s make the shared folder.
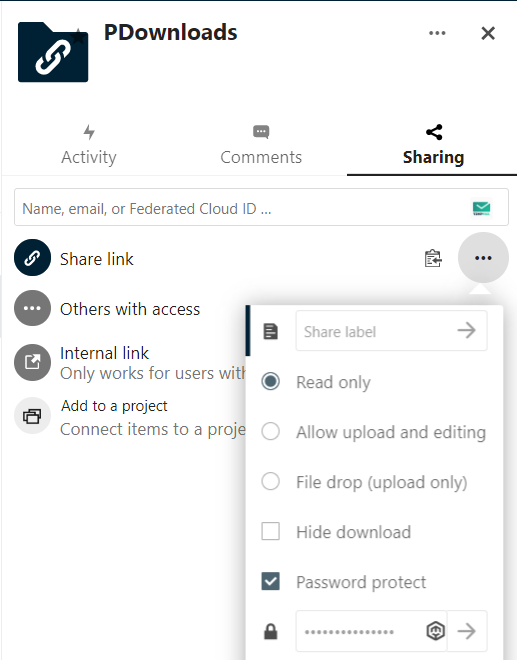
- Navigate to the folder you wish to share out.
- Click the share icon.
- Click the Share Link +
- Click the 3 Dots.
- Click the Password Protect
- Enter a new password
- Document the new password
- Click the Arrow beside the password
- Click the clip board to copy the link
Here are the items you are going to need to setup this command.
- The URL of the next cloud
- The Share ID
- The Share Password
- The File name you are going to download.
- The filename/location where you will be downloading too.
Let’s setup the variables now.
$NextCloudURL = "https://cloud.bolding.us/"
$ShareID = "XxxXxXXXxXXxXXX"
$SharePassword = "xXxXxxxX"
$FileName = Java.exe
$Outfilepath = c:\temp\java.exe
Next, we build the header like we did above. I’ll skip the explaining this time.
$Header = @{
        "Authorization" = "Basic "+[System.Convert]::ToBase64String([System.Text.Encoding]::UTF8.GetBytes("$($ShareID):$($SharePassword)"));
        "X-Requested-With"="XMLHttpRequest";
    }
The share this time is the folder. So we are authing to that folder. This is great because if you forget the password later, it’s in the script. Next, we grab the file using the invoke-restmethod.
Invoke-RestMethod -Method GET -Header $Header -uri "$($NextCloudURL)public.php/webdav/$($Filename)" -OutFile $Outfilepath
Notice at the end of the URL, the $($filename). This is the filename inside the share. So we are looking for that file to download. That’s all, take a look at the script.
The Script
$NextCloudURL = "https://cloud.bolding.us/"
$ShareID = "XxxXxXXXxXXxXXX"
$SharePassword = "xXxXxxxX"
$FileName = Java.exe
$Outfilepath = c:\temp\java.exe
$Header = @{
        "Authorization" = "Basic "+[System.Convert]::ToBase64String([System.Text.Encoding]::UTF8.GetBytes("$($ShareID):$($SharePassword)"));
        "X-Requested-With"="XMLHttpRequest";
}
Invoke-RestMethod -Method GET -Header $Header -uri "$($NextCloudURL)public.php/webdav/$($Filename)" -OutFile $Outfilepath
There we go, that’s it yall. If you have any questions feel free to reach out.