Comments in Group Policy
Reading Time: 2 minutesDocumentation is a big deal in the world of IT. There are different levels of documentation. I want to go over in-place documentation for group policy. Comments in Group Policy are in-place documentation.
How to comment on a Group Policy
This process is not straightforward by any stretch of the imagination. The first and foremost way to add comments to a Group Policy is to use the GUI.
- Open Group Policy Management Console
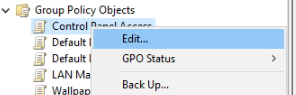
- Select the policy you wish to comment
- Right-click the policy in question and click edit
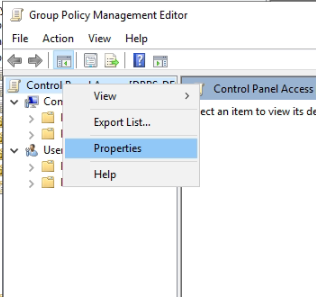
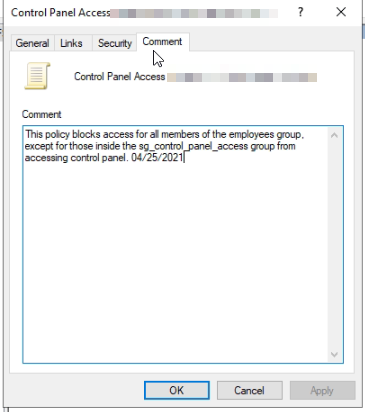
- Inside the group policy management editor, right-click the policy name and click properties
- Click the comment tab
- Now enter your comment.
- click Apply and Ok
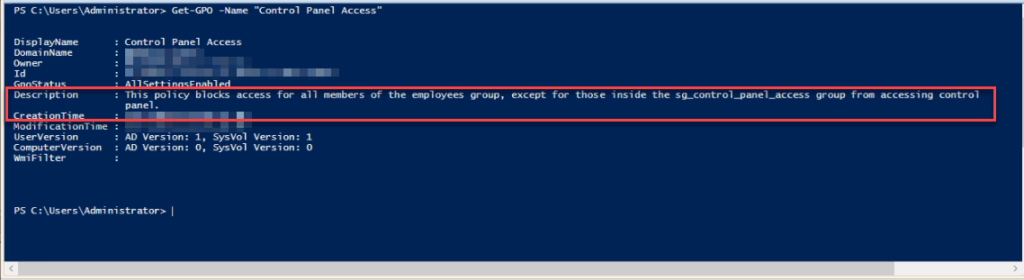
The second way to add a comment in group policy is by using PowerShell. The Description of a policy is where the comment lives. Thus using the command Get-GPO will produce the comment. We will dig more into that later.
Get-GPO -name "Control Panel Access"
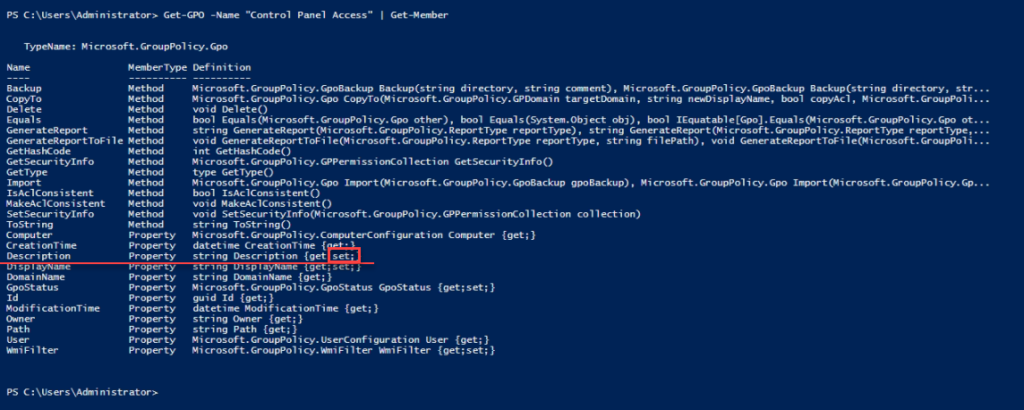
Using the Get-Member command we can pipe our Get-GPO command and see what is doable. You will be treated to a list of member types and what they are capable of. The description has a get and a set method to it. This means, you can set the description, aka comment.
(Get-GPO -name "Control Panel Access").Description = "This is my comment"
Suggestions
Here are a few suggestions for documenting the policy like this.
- Use the(Get-date).ToString(“yyyy-MM-dd_hh_mm_ss”) at the beginning to setup your date time.
- Then, I would add the author of the policy/comment
- A quick description of the policy
- Whether it’s a user or computer policy.
- Any WMI filters.
More information here helps the next person or even yourself months down the road. Don’t go overboard as it can cause issues later. Using the ‘`n’ will create a new line which can be helpful as well.
Pulling Comments with PowerShell
Now that we have all the policies documented, we can pull the information from the in-place documentation. We do this by using the GPO-Get -All command. One way to do this is by using the select-object command and passing everything into a csv. I personally don’t like that, but it works.
Get-GPO -All | select-object DisplayName,Description | export-csv c:\temp\GPO.csv
I personally like going through the GPO’s and creating a txt file with the comment and the file name being the display name.
Get-GPO -All | foreach-object {$_.Description > "c:\temp\$($_.Displayname).txt"}
Conclusion
I would like to go deeper into In-Place Documentation as it is very useful down the road. Powershell uses the #, other programs use different methods as well. If you get a chance to place in place documentation, life becomes easier when you are building out the primary documentation as you have a point of reference to look back at.