It’s time to build on our Docker knowledge. WordPress is a powerful web platform that a large part of the internet is built on. This site is built on WordPress. Whenever I am working on a site for a friend, I will build myself WordPress and then create their site there in my test environment. When I get it the way I want it, I move it and destroy the original. The best way to destroy the original is to wipe it from existence. This is where Docker and WordPress are friends.
Docker and WordPress
This method will allow you to have multiple WordPress sites with your docker image. The reason we want to be able to do this is because this allows us to test between site actions and more. It’s one of those amazing little tools that saves so much time. Before that, we want to do some basic things to get everything setup. The first thing is the networking. We want to build a network in docker for our WordPress sites. We do this outside of the compose because making if/then statements in a compose is a mess. This also allows you to have multiple networks and so on and so forth. We do this with the command “Docker Network Create”. Of course, you want to be using the docker user or sudo user.
docker network create dockerwp
Docker Compose File
Now we have our docker network built, we need to build our compose file. Inside the folder you keep all of your dockers, I Suggest making a new folder called wordpress and moving into that folder. Then create a docker-compose file using the nano command.
mkdir wordpress
cd wordpress
nano docker-compose.yml
Next you will want to copy and past the docker compose below into it.
version: "3.8"

services:
  sitename-db:
    image: mysql:latest
    volumes:
      - ./sitename_db/data:/var/lib/mysql
    restart: always
    environment:
      MYSQL_ROOT_PASSWORD: AmazingPasswordOfAwesomeness
      MYSQL_DATABASE: sitename_wp_db
      MYSQL_USER: sitename_wp_user
      MYSQL_PASSWORD: AnotherAmazingPassword

  sitename-wp:
    image: wordpress:latest
    depends_on:
      - site1-db
    volumes:
      - ./sitename_wp/wp-content:/var/www/html/wp-content
      - ./sitename_wp/uploads.ini:/user/local/etc/php/conf.d/uploads.ini
      # Add other files or folders that you want to override here e.g. stylesheets
    ports:
      - "8880:80"
    restart: always
    environment:
      WORDPRESS_DB_HOST: sitename-db:3306
      WORDPRESS_DB_NAME: sitename_wp_db
      WORDPRESS_DB_USER: sitename_wp_user
      WORDPRESS_DB_PASSWORD: AnotherAmazingPassword

networks:
	dockerwp:
	  name: dockerwp
	  external: true
From there, you can run the command “docker compose up -d” to create the wordpress page with the default settings. I don’t suggest it, but you can. How can you use this docker compose? Firstly, replace wherever you see “sitename” with the sites name you want. If you want more than one, you can copy the db and wordpress sections over and over again. Each time replacing the site name with something different. Make sure to change those amazing passwords.
How does this compose work?
This docker compose works by creating individual worlds for each site. The word sitename allows you to rename everything the way you want. So if you wanted therandomadmin_com-db, that can happen. if you want therandomadmin_org-db that can happen to. Each one can have it’s own name. This is what splits them apart. The network they share allows them to talk with each other and back out again. Uploads.ini allows the sites to have their own custom upload counts. I will go over that in just a minute. Just imagine them as little cups with two unique coins. As long as they are named the same they can talk to each other. If you wanted to, you can take it a step farther and make a new network for each compose. However, that can get messy quick trying to herd all of those networks into one place.
Next steps
The volumes part of the compose services creates folders. Each folder is important because it holds the content for that container. Notice in the wordpress volumes. You will see a ./sitename_wp/uploads.ini. This is very important as it controls how much data can be uploaded. Each site has it’s own. Thus, you can use the command below to create a simple file in each container. To activate those files, restart the container.
This command will create the ini file that tells the system how much you can upload. I have it set to 64 megabtyes, but you can set it to whatever you want. By default, the size limitation is 2mb. Which is extremely small for now day images.
Finally, you can use the nginx reverse proxy system to assign the ssl to each site as you see fit. I personally don’t do this as I don’t expose the site to the outside world, but you can do so. The instructions were covered in the previous blog about ladder. Believe it or not, that’s it. The next few steps would be to go to the site’s ip or hostname whichever you choose and set up your wordpress like normal.
What can we learn as a person today?
Recently I went to a Tech networking event where I met multiple new and unique people. I enjoyed every minute of talking about tech with each of them. While talking to them, I learned of new ways to use my dormant skills. Things like body language, mental health knowledge, and even down to my cooking was improved. We talked about things like IT, AI, and the color of the sky in some cases. It was a pleasure. Later I was the one helping others on a local discord server. We talked about the day and things we needed.
What spoke to me while working on this blog post was each WordPress has it’s own container and it’s own world, but the network is the same. This allows the WordPress installs to talk with each other and share items easliy. That’s the same way we are as humans. We are all unique in our own ways. I can be someone who enjoys reading a good white paper about mind bind while someone else can enjoy reading a good book at how pepsi cola is made. We are all different. What we have in common is our networks.
Without our networks, we can’t go far. Imagine the WordPress hosted on it’s own network, but that network can’t leave your lab. Would it be useful to the outside world? How about this site? What if I locked it down so only 1 other IP address could read it. This blog wouldn’t be helpful to you. This is how our networking is. If we lock down ourselves to only one group of people, we can’t grow and they can’t grow. This is often times how cults are made. They lock themselves down to only themselves and whoever they can recruit.
Think about it
As you go throughout your week this week, think about your networks. If you go to church, that’s a network, if you go to school, that’s a network. How about your discord friends? That’s a network as well. Each place has it’s own network, even if that place is temporary like a store. What can you bring to those networks, and what can you learn from those networks?
The other day I was searching for a piece of code for work. One of the links I clicked was geo locked to the EU only. Which threw me off. I didn’t have a VPN on the computer. So what do you do? We use a web proxy. Last week we talked about a reverse proxy. A web proxy is a website that you can use to look like you are from that site’s hosts. Most of the bigger sites will block you from using a web proxy, but simple sites have no idea. Everywall built a simple web proxy that we can use in docker. This is where we get to use Ladder with Docker.
What is Ladder
Ladder is a web proxy. So, when you install this inside your homelab, or wherever you can with docker, you can enter a url into the link and it will take you there from that machine. The example above, my ladder install had to be on a machine in the EU for me to access the site. Fun part is, I had a box in the EU to work with. A web proxy works by being in the middle. When you enter your url you wish to go to, the web proxy acts like the browser and sends the request from itself. Then it brings that information back to you and displays it. Ladder appends the link to the back of it’s url. This way you can edit the url if need be. So, if you go to “Therandomadmin.com” while using your ladder, it will think you are coming from the ladder instead of your browser. You could be at work, using your ladder to view the rest of the world. Thus, you can see things from your home. Yes, this can get around filters.
How Do you install Ladder
I have Ladder with Docker. First thing first, always check out the official documentation, you can do that here. We will be using our reverse proxy from our previous blog post, here. Docker is going to be our go to here. First, we need to log into our server using ssh. Once you get into your server, navigate to where you are holding all your docker folders. Next, you will need to use the mkdir command and make a folder called ladder. Then CD into it.
mkdir ladder
cd ladder
Now, inside the “ladder” folder, we want to create a compose file. Now we are in the folder. It’s time to build the compose file by using the nano command. We want to build a “docker-compose.yml” file.
nano docker-compose.yml
You will be brought into the editor where you can write the docker file. You can simply copy the information below and past it into the text file.
To save, all you have to do is press ctrl and x and follow the prompts.
Breakdown of the Yml
Like before, we are starting off with version 3 of docker. Our service is called ladder, and the image is from ghcr.io. Everywall is the company and ladder is the image name. We are grabbing the latest. The container’s name will be ladder. We will set the restart to always restart unless we stop it. This will allow it to survive a reboot. Next, we will be using the environmental flags. We want to use our port 8080 and have our ruleset accordingly. Later we can build a unique rule set. Then we want to select our ports. The system port will be 8080, we can change this to whatever we want. The image port is 8080. Finally, we build our volume. We need a /app/ruleset.yaml and a /app/form.html. Ladder has additional options, and you can find that information from the official documentation. Of course, you will need to start the Image. Do so by using the docker compose commands with the d flag.
docker-compose up -d

# If using docker-compose-plugin
docker compose up -d
Now navigate to your http:<ip address>:8080 and confirm the site is up and running.
Pointing your Reverse Proxy to your Ladder with Docker
Now, we want to point our reverse proxy we made in the last post to our ladder. Lets follow these steps:
Navigate to your reverse proxy and log in
Click On the dashboard button if you not already brought to it.
Click “Proxy Hosts”
Click “Add Proxy Host”
Enter your name for the ladder. Remember to have the DNS already setup for this.
Enter the IP address you wish to forward to.
Enter your port, in this case it will be 8080
Select “Websocket support”
If you want to have a custom SSL for this site, Complete by doing the next.
Click SSL
Under SSL Certificate, select request a new SSL Certificate.
Enter your email address and check the agree to the let’s encrypt terms and service.
Click Save
If your DNS is pointing, and your Ladder is working, your system will be assigned a SSL. Now, your ladder is ready to go. I hope you enjoy.
What can we learn as a person today?
As you see in this post, it builds on the last post. Most of our lives have been built on something from our past. I know powershell really well. Now imagine, if I suddenly couldn’t read. All those skills would be gone. Our minds are built on stages of knowledge and skill sets. Inside the brain, there is a network that is more complex then the world’s road systems. If you are studying something that that really has no usefulness right this minute, it may a few years down the road because Knowledge builds upon itself. I didn’t know why I was studying virtual hosts for redhat servers back in the day. Now you are reading my blog. Sometimes the knowledge is wasted space or damaging. Those are still there, but they are like the awkward emails, they go to trash at some point. As a person, you can choose to build on your skills and grow any way you choose.
Over the past year, I have started rebuliding my home lab. One thing about a home lab is you want very little entries into your network. I split off my home lab from my main network using a pfsense firewall. The home network only has 2 ports open on it. That’s 80 and 443. Everything runs through those ports. The whole lab is based on docker. This way I can run mulitple objects on different ports. For example, I have 3 wordpress living on one server. These are for development tests and so on and so forth. The question that needs to be answered is how do I get to those services outside the network? This is where a Reverse Proxy on Docker comes into play.
What is a Reverse Proxy?
Imagine walking into a massive building with hundreds of offices. There are no maps on the wall. The doors have no names and there is no glass to look through each door. All that lives on each door is a number. So, how would you find anything in that building? Well, there is a receiptionist at the front with a security guard. If you ask the receiptionist to see Dr Ross Geller, they will look at their charts. If Dr Ross Geller doesn’t work there. They will look up at you and say nothing. You get no feed back and you can go past that point without the security gaurd’s keys. Even if you got the keys, the lights are off and you need the recipionists keys for the lights.
Now, if Dr Ross Geller is there, She will grab the security guard and whisper the room number into their ear. Then, the guard will hand cuff you to himself and walk you to the office in the dark. Once at the door, he will pat you down for common weapons then open the door for you and you can walk into the meeting with Dr Ross Geller. Remember to PIVOT!
This is how a reverse proxy works. They are the gate keepers of the network. When something comes in on port 80 or 443, the reverse proxy will that the DNS name and check it’s register. If it has the DNS name, it then forwards you to the local port. It doesn’t tell the user about any other active ports. Many proxies will block common exploits and even work with your SSLs.
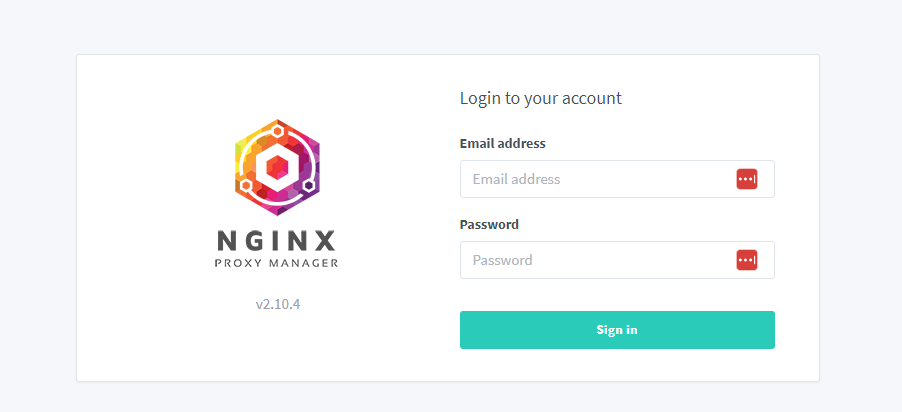
Ngnix Reverse Proxy Manager
We are going to be working with Ngnix Reverse Proxy Manager. Ngnix Reverse Proxy Manager is a docker friendly reverse proxy that gives you a beautiful ui to work with. Along with connecting to Let’s Encrypt to give you free ssls, it also allows multiple users, redirects, custom 404 pages, streaming services, and more. The Graphical interface helps keep management sustainable.
Install on Docker
We are going to assume you have docker installed on your system. If you do not, you can read on how to do it here and you can learn how to install docker compose here. Nginx proxy Manager has their quick guide that you can read here. This next steps below will match up to this documentation with a few small changes.
The First step is to setup your docker folders. I am in the camp of using a folder for each service. After logging in with SSH we want to make a directory using the mkdir command.
mkdir ReverseProxyManager
cd ReverseProxyManager
Now inside the “ReverseProxyManager” folder we want to create a compose file. On Ubuntu, my server of choice for this, we will use the built in editor, nano. I am a nano fan, some like vi, some like vim. That is a debate for other people. I suggest using what you have access to. So run the nano command and build a “docker-compose.yml” file.
nano docker-compose.yml
This will drop you into a text file. Copy the blow information and past it into the text file.
To save, all you have to do is press ctrl and x and follow the prompts.
Breakdown of the Yml
Here we ahve the service manager making a service called proxy-manager. We are using the offical Reverse proxy for Docker through jc21. We tell it to continue running until someone stops it. Then we tell it the ports we want. Here we want 80, 81, and 443. 81 will be your management port and should only be accessiable internally. The other two will be for the data coming in. Next we have the volumes. We need a data folder. Using ./ to indicate the folder this yml file lives in. We also want a place for the lets encrypt. Finally we are using enviromental tags. Having a sqlite server allows you to do more than without it. Finally, I disable IPv6 because I don’t use IPv6, yet. I will one day.
Starting The Docker
The next step is to start the docker. There is a way to test by using docker-compose up, but it freezes your terminal. adding the -d will make what the docker-compose up perment and give you back your terminal.
docker-compose up -d

# If using docker-compose-plugin
docker compose up -d
now the stack is up and running. The next step is to navigate to the ip address of the server. you can use the ip a to grab the ip address from the server. When you access the Url, you will see the below. Enter the below information.
URL: http://<serverIPAdddress>:81
Email: admin@example.com
Password: changeme
It will prompt you to change your password. Make sure you do that.
What can we learn as a person from Reverse Proxies?
In our lives, we have many different parts of ourselves. What’s interesting about these parts is we don’t know all of them. Imagine the reciptionist from our example above being your sub countinous mind. It knows all the parts of you and can direct you to those parts. But to get to the sub countinous mind, you have to go through the body. Imagine trying to walk into a building and the door handle says push, but every time you push it, it doesn’t open. Many people get mad and give up. The truth behind the door is a pull. Our brains don’t like being pushed, instead they like us to sit and pull them to us. Calm brings the sub countinous to the surface as it changes the state of our minds to allow the sub countinous to communicate back. Once that is achived, you will have access to some of the darkest parts of your mind.
Almost every religion has some reference to being still. In our busy world, being still is like dealing with an alien language. Being still allows you to communicate with your body. It allows you to know who you are and be able to sit with that knowledge. Without that stillness, we end up burning ourselves on our internal fire. This is why vacation times are so important in companies. Companies who give poor vaction time sees a higher turn over because their people don’t have a chance to commucate with themselves and enjoy thierselves.
Over the next week, take moments where you can be still with your thoughts and become aware of yourself. You may see that your internal proxy is hiding some dark secreats that are leaking out in verious of way.
We use cookies to ensure that we give you the best experience on our website. If you continue to use this site we will assume that you are happy with it.