The goal of this blog is to show you a way to speed up a computer using basic software commands/programs. I use these daily and I have seen them work. Sometimes they don't sometimes they do.
Disk Cleanup
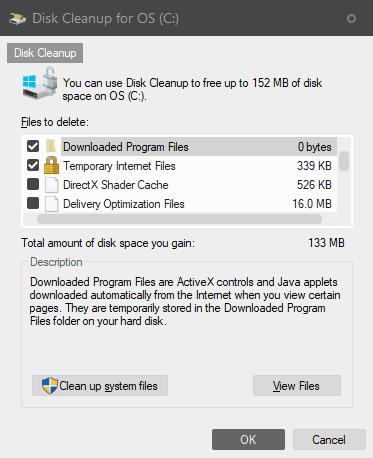
Disk cleanup is a powerful built-in tool that allows you to clean up temporary files and whatnots. It's a very surface-level tool. I tend to prefer tools like wise disk cleaner over this tool. In this tool you can clean up a full range of items:
Disk Cleanup has two modes. A mode for standard users and a mode for Admins. Of course, you have to have admin rights to run the admin side of the app. Disk cleanup starts in standard mode. You know it's in standard mode by the lack of options and the button with the admin shield on it called "Clean Up System Files".
Standard user Mode
Download Program Files
Temporary Interent Files (Edge and IE Only)
DirectX Shader Cache
Delivery Optimization Files
Recycle Bin
Temporary Files
Thumbnails
Clean Up System Files - Admin Mode
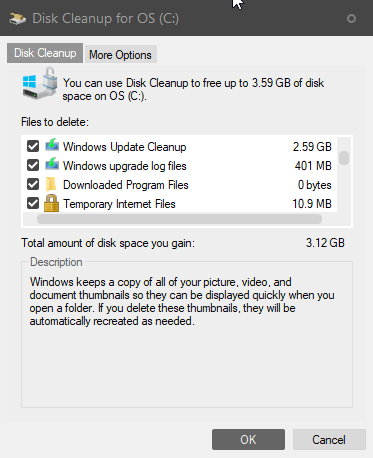
When you click the "Clean Up system files", disk cleanup restarts with more options. These options down blow. They include things like windows update items.
Windows update Cleanup
Windows update log files
Downloaded program files
temporary internet files (only edge and IE)
DirectX Shader Cache
Delivery Optimization Files
Device Driver packages
Language resource files
The Recycling Bin
Temporary files
Temporary windows installation files
Thumbnails
Wise Disk Cleaner
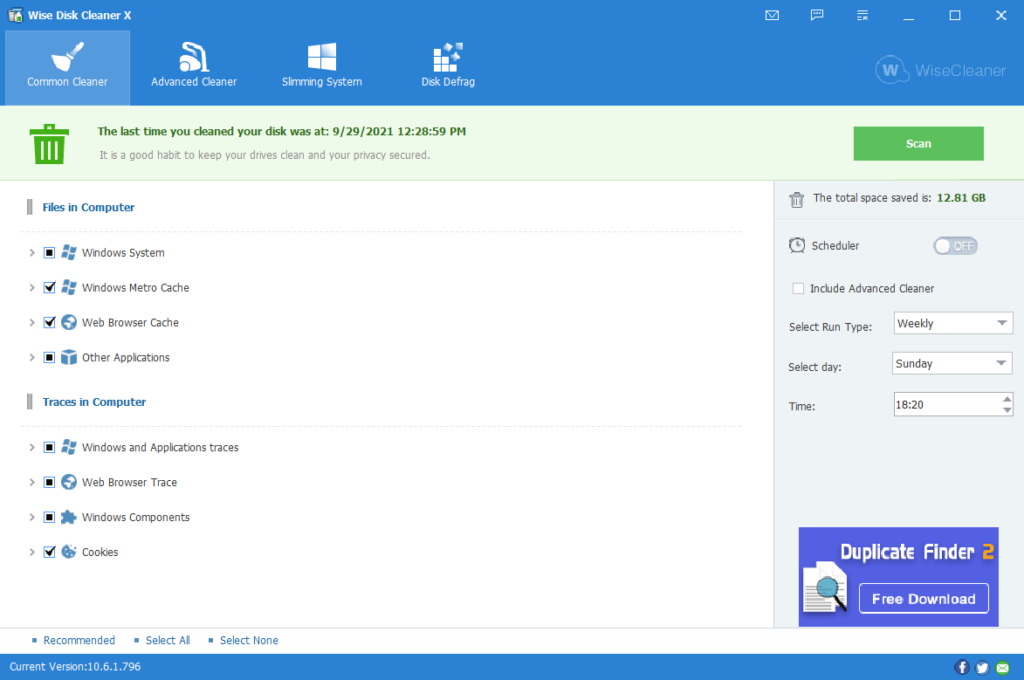
The next tool is a disk cleaner as well, but it goes much further than the basic standard disk cleanup. This tool is called wise disk cleaner by the company called wise. They also make wise registry cleaner and more. This software will clean out the temporary files of all of your browsers, your windows, cookies, and much more. It's repo of what it looks for is fairly large. What I like about wise is it is smart as well. It knows what can be dangerous and what is not. You can tell it to be dangerous as well.
Wise disk cleaner on startup.
All you have to do is click the scan and then clean up. It does everything for you. Along with the scan and clean-up, it also offers disk defragging for HHDs. The system slimming and advanced cleaner are tools for the more advanced user and I wouldn't recommend using them if you are new to computers.
I personally like that wise has a portable version in the portable apps platform and all versions have command-line switches as well. Here is more useful information:
After I run the disk cleaner, I run the wise registry cleaner on computers. Whenever a program installs, updates add to and so on with the OS, the registry gets junky. This junk often times has pointers to dead ends and other items that slow down the system. It is important to clean up those bad pointers, especially after a windows update.
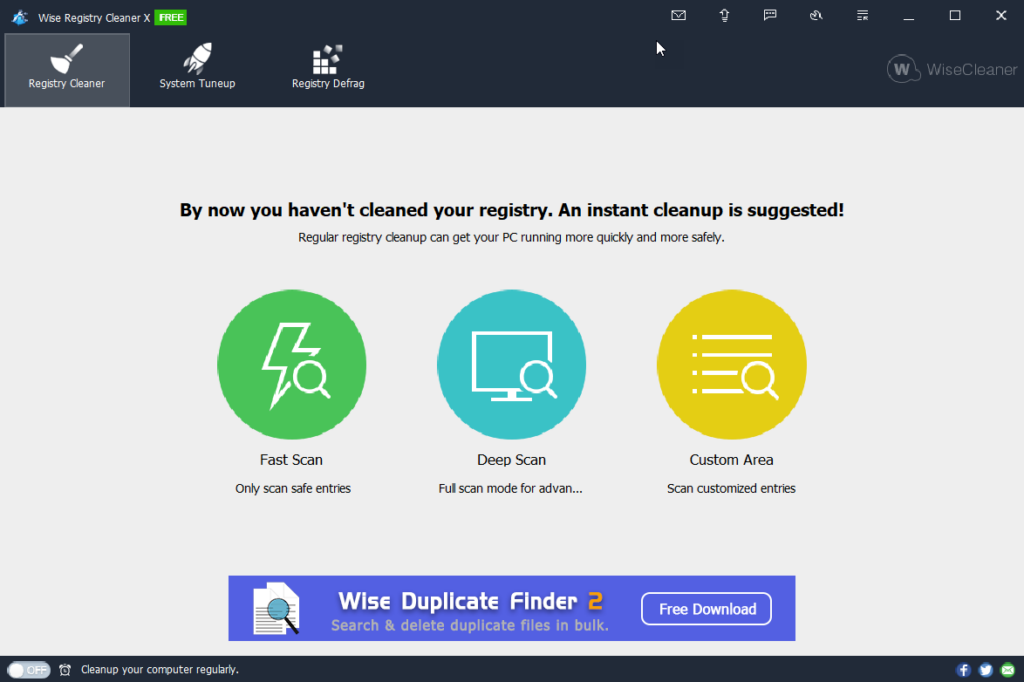
What I like about Wise Registry Cleaner is it offers backing up your system with a restore point and a registry back before it does anything. They know that something bad could happen. The app also offers different scan types. Fast, Deep, and Custom.
Wise Registry Cleaner Start Page
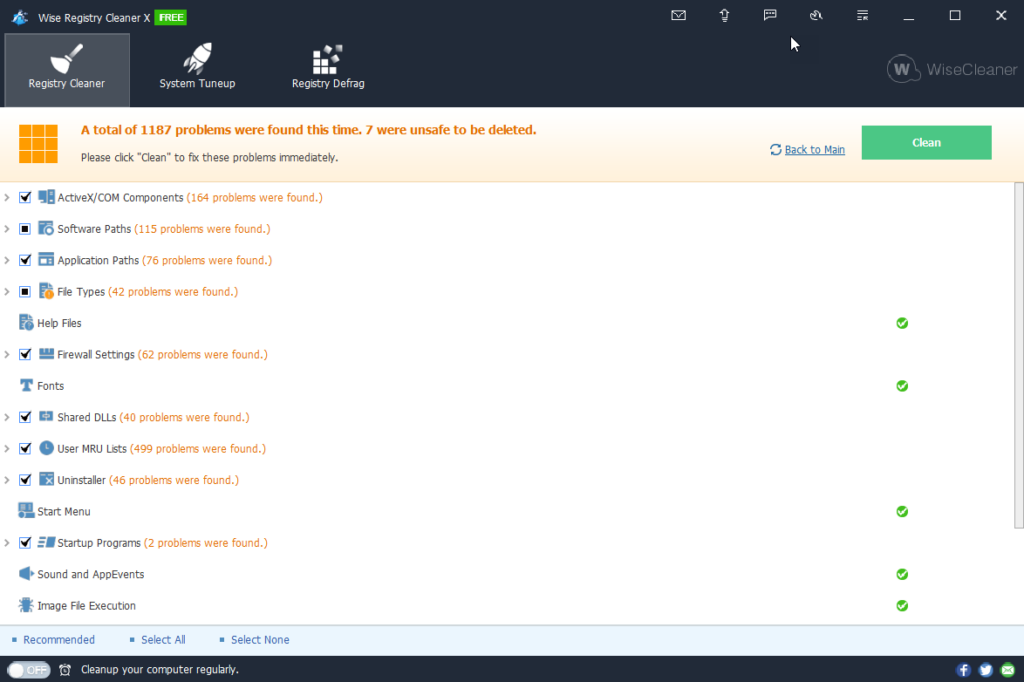
The next example is a deep scan of a system I was working on.
Wise Registry Cleaner Scan
Wise Registry cleaner also has command lines like the disk cleaner. Here is some useful links.
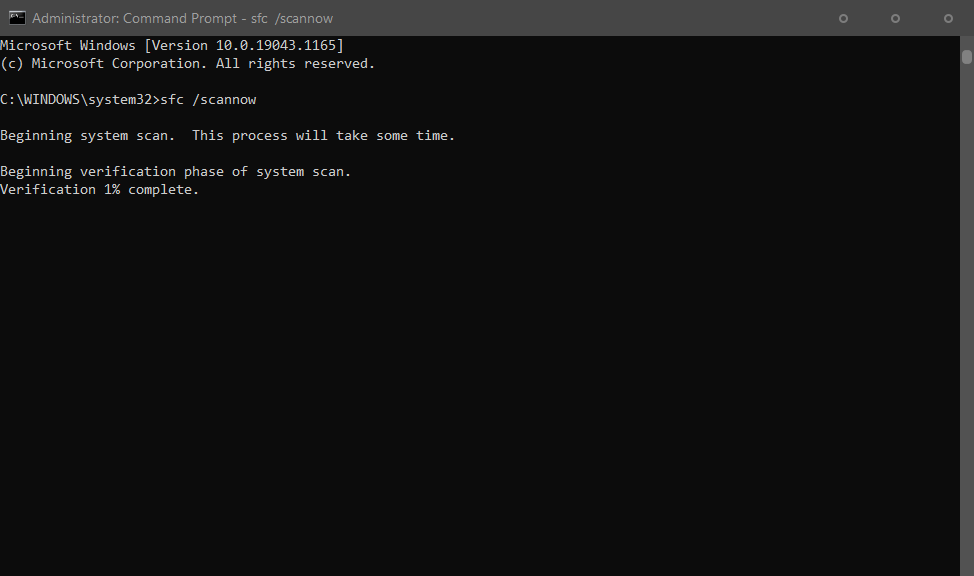
This tool allows you to quickly find issues with your OS. Missing files, missing registry keys, and more. It validates your internal OS settings. The command has to be run as an administrator.
SFC /Scannow
SFC has much more flags that you can run, but I will not cover them in this blog. That's worthy of its own blog post. For more information, you can check out the Microsoft documentation here.
DISM Cleanup
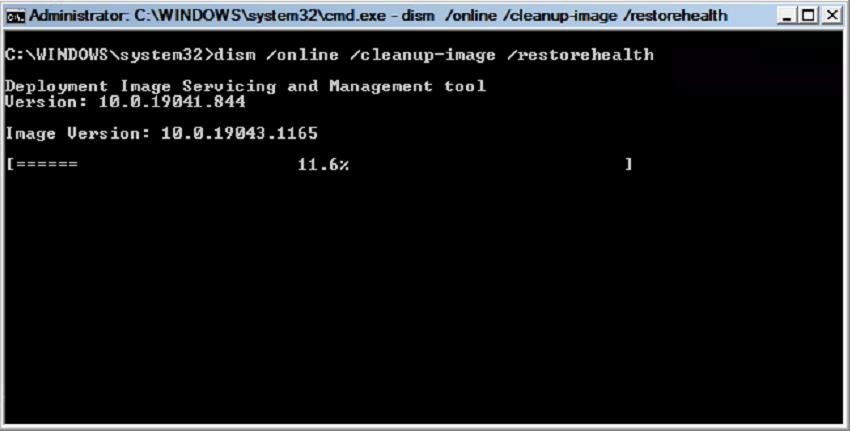
Finally, you can use the DISM command to reach out to Microsoft itself and compare/repair your system. the /online flag tells dism to go online. The /cleanup-image opens up the cleaning process and the various commands after that repair different items.
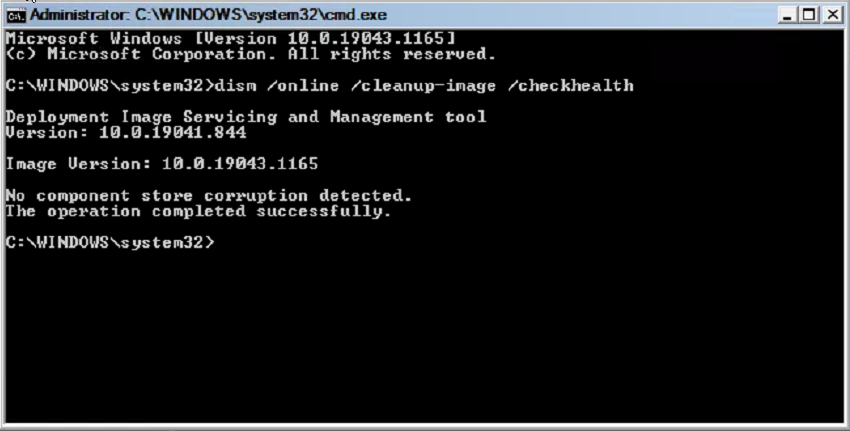
dism /online /cleanup-image /checkhealth
This command checks the system for anything that might be corrupt or damaged. This one is a high level and it also checks itself. Basically lets make sure the tool works.
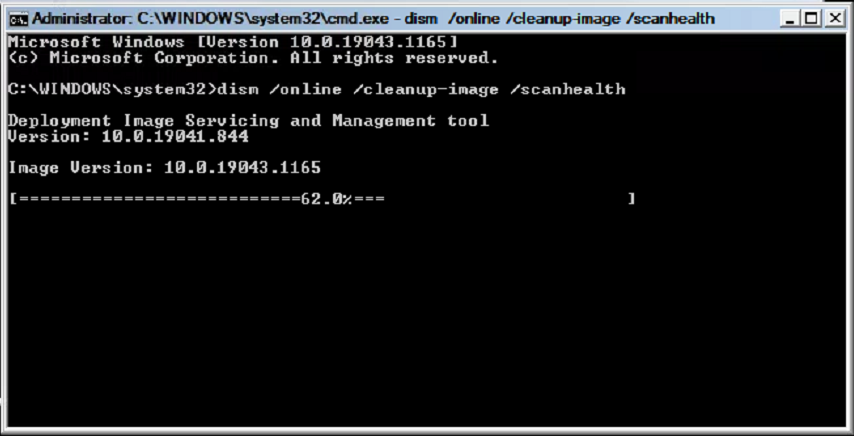
dism /online /cleanup-image /scanhealth
This command scans the system for missing files, damaged files, and much more based on the image from Microsoft. This one is much more in-depth than the checkhealth. This part takes some time and once complete, the system is ready for the next command.
dism /online /cleanup-image /restorehealth
This command takes the list from scanhealth and the online repository and repairs the OS image. Without this command, nothing is getting fixed. It's also best to run this command last. If this process appears stuck at any point, that's normal. Let it do what it gots to do.
Final thoughts
I have come across lots of computers recently where office updates have damaged the OS and left thousands of useless files lying around. Completing these tasks has brought new life into those computers. It doesn't work all the time, but when it does, it's awesome. Out of all of the systems I have worked with the number one issue I see the most is age. Most slow computers are due to the fact that the computer is 10 years old trying to run the latest and greatest. My suggestion for those machines is linux.
I hope these little tricks will help you in your day-to-day IT endeavors.
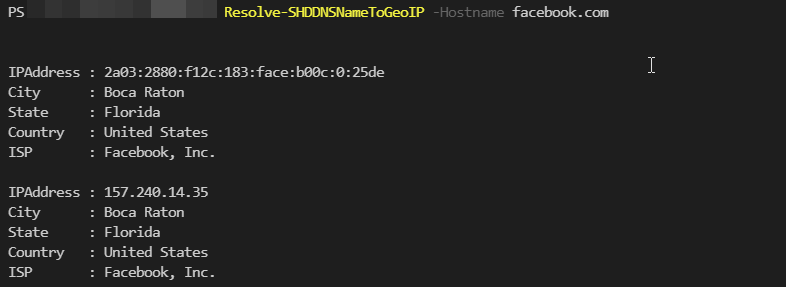
With everything that happened with Facebook yesterday, I began to wonder where does my query goes when I type in facebook.com. So, I did a few things and found out. The first thing I did was resolve the name facebook.com to an IP address, or group of IP addresses in this case with the command resolve-dnsname.
Resolve-DnsName -Name facebook.com
Then from there, I used the site, ip-api.com to pull the location information of the IP address. This awesome little site gives you city, state, country, zip codes, and even the ISP information of an IP address.
$Info = Invoke-RestMethod -Method Get -URI "http://ip-api.com/json/$IP"
That's the base of the code that we will explore. It's very straightforward, but I want to clean it up some. I want to make a Get GEO IP information and a Resolve DNSname to Geo IP. I want it to all work together even if there is multiple IP addresses and hosts names. So, lets start off with the scripts and break them down. This will contain two functions for what we are wanting.
Get-SHDGeoIP
function Get-SHDGeoIP {
    [cmdletbinding()]
    param (
        [parameter(Mandatory = $true)][ipaddress[]]$IPAddress,
        [switch]$Complete
    )
    foreach ($IP in $IPAddress) {

        $Info = Invoke-RestMethod -Method Get -URI "http://ip-api.com/json/$IP"
        if ($Complete) {
            $Info
        }
        else {
            [pscustomobject]@{
                IPAddress = $info.Query
                City      = $Info.city
                State     = $Info.regionName
                Country   = $Info.country
                ISP       = $Info.isp
            }
        }
    }
}
This script is going to pull the geo information for us. We start off with the parameters. We are testing the parameters to see if the IP address is an valid IP address. We do that with [ipaddress]. This tests for both IPv4 and IPv6. We tell it to be a array of IPaddresses with the [] inside of it. [ipaddress[]]. Just for cleaner fun, I have a switch for a complete information dump. This way
Since this is an array of IP addresses, we will start a foreach loop for each IP address in the array. We start the foreach loop by grabbing the IP information. If the user selected complete, we just dump the information we gathered to the user. if they didn't select complete, we create a custom object with the IP address, city, state, country and ISP information.
The next function uses the previous function and combines it with Resolve-DnsName. We start off with a list of strings for our hostname parameter and our complete parameter. We start our loop like before of the host names. Then we use the Get-SHDGeoIP -IPAddress command with the Resolve-DnsName -Name and the link name. We then select the IP addresses which is an array. We place that array inside the Get-SHDGeoIP and bam, we have our information. Converting a hostname like Facebook.com to IP information.
With these two little scripts, you will be able to find quick information about a website and where it is being hosted. For example, this site is hosted in new jersey. I personally didn't know that.
WSD is an awesome service for printers. It goes out and finds a printer on the network and adds it accordingly. It does all the IP address stuff for you. Which is awesome. It even tells you that it was set up as a wsd by naming the port wsd and some code. Super friendly. However... What happens when DHCP changes that IP address because someone forgot to do a reservation? How do you get that IP address? Believe it or not, that IP address is stored in the registry for the most part. Its located under the Hardware Local Machine > System > Current Control Set > Enum > SWD > DAFWSDProvider. Each entry has a friendly name and location information. The location information has the IP address like a web page. Powershell can give you this information pretty quickly with a single line as well. Let's take a look.
Get-childitem is normally used in directories. The registry is a type of directory with files inside of it. So we use the get-childitem and treat the registry as a file path. We navigate to the DAFWSDProvider. Then we look at each file or in this case item property with Get-ItemProperty. We are looking for that FriendlyName and the LocationInformation. The location information will look like https://192.168.2.62/something because it is treating the IP address as a webpage. Still unsure why. The above command will list all of the printers like this. If it has an IP address, it will appear there.
Now we can wrap this up in a nice little function for remote computers.
Passwords can be hard to make for people, especially kids and older users. That's where Dino Passwords come into play. You can make simple and yet complex passwords using this service. This service also has a simple API to work with. I personally like using the API with new user creation scripts. The API is a single line with the invoke-webrequest command let.
This past week I needed to find all of the quickbook files on a computer without accessing quickbooks itself. The core of the script is a simple Get-Childitem command looped for each logical disk on the machine. Looking for one of the four main extensions for quickbooks. The four extensions are as follows
Since I want this to be a little easier to use, I broke it down between the file types with a validate set parameter. This way you can choose which extension you want. Then I go through each extension and make an if statement for each one matching up the extension.
Next we get the disks using the Get-CimInstance -classname win32_logicaldisk. This grabs all the mapped drives, local drives, and anything else that has a drive letter.
Now we loop through those disks and search the root of each drive for any files with the extension we choose. We select the fullname as this gives us the full path. I also like having file size and last write time to determine if the file is valid still. Once we go through this loop we display the information.
Improvements
I can add remote computers to this setup.
That's it, if you have any questions feel free too reach out.
I have a love hate relationship with dell. When it comes to windows 10 upgrades, I really don't like them. How do you mass push windows 10 upgrade to clients without breaking them. As many of you know, recently the 20H2 update has broken many different dells. So, a quick way to fix this is by comparing the model to the online list. This script isn't that big, and is designed to be deployed from the end user's machine as a system service or admin account.
The Script
$DellSite = Invoke-WebRequest -Uri "https://www.dell.com/support/kbdoc/en-us/000180684/dell-computers-tested-for-windows-10-october-2020-update-and-previous-versions-of-windows-10" -DisableKeepAlive
$Dellraw = $DellSite.Rawcontent.split('`r')
$CPInfo = Get-ComputerInfo
if ($Dellraw | select-string $CPInfo.csmodel) {
    if (!(Test-Path "$($env:SystemDrive)\Temp\Win10Upgrade")) {New-Item c:\temp\win10upgrade -Type directory}
    $DateTime = (Get-date).ToString("yyyy-MM-dd_hh-mm-ss")
    $webClient = New-Object System.Net.WebClient
    $url = 'https://go.microsoft.com/fwlink/?LinkID=799445'
    $file = "$($env:SystemDrive)\Temp\win10upgrade\Win10Update_$DateTime.exe"
    $webClient.DownloadFile($url, $file)
    Start-Process -FilePath $file -ArgumentList '/auto Upgrade /quiet /noreboot'
} else {
    Write-Error "$($env:COMPUTERNAME) is a $($CPInfo.CsModel) and is not on the approved list found at: https://www.dell.com/support/kbdoc/en-us/000180684/dell-computers-tested-for-windows-10-october-2020-update-and-previous-versions-of-windows-10"
}
The Breakdown
I'm glad you decided to stay for the breakdown. This breakdown isn't going to take long. The first element of this break down is the invoke-webrequest. We capture the website with the required information. (Link). Then we split the raw content by the return carriage.
Now our web data is ready to pull from. Now we need to get information from the computer itself. Most systems these days have the Get-ComputerInfo command on them. It pulls the system info on a computer. Next, we ask a simple if-then statement. If the $DellRaw has the model number, then download and install the upgrade, if not let us know. Basically, we need a bouncer at this point. We use the $CPInfo.CSmodel as this is the model number.
$CPInfo = Get-ComputerInfo
if ($Dellraw | select-string $CPInfo.csmodel) {
    #Install the upgrade
} else {
    #Warning the installer program that it's not on the list.
}
The Download and Install
We first ask if the file folder is there. If it isn't then we create it using the new-item command. Then we want to create a datetime stamp. Like in previous blogs, we use the .tostring() method to format the output. Then we declare the url and file path. Next, we invoke-webrequest command and download the file using the -outfile flag. Finally, we start the install with the correct flags. In this case, we want the install to be an upgrade that is silent and doesn't force a restart because it could be in the middle of the day when this thing is finishing up. To start the installer we use the start-process
If your computer model is not on the list we will need to do a write-error. It's best to say the computer name, model name, and the website it is pulling the data from. The write-error is collected by the standard deployment software.
Write-Error "$($env:COMPUTERNAME) is a $($CPInfo.CsModel) and is not on the approved list found at: https://www.dell.com/support/kbdoc/en-us/000180684/dell-computers-tested-for-windows-10-october-2020-update-and-previous-versions-of-windows-10"
I hope this helps. Y'all have a great day now you hear.
We use cookies to ensure that we give you the best experience on our website. If you continue to use this site we will assume that you are happy with it.